Operating Instructions
32 Pages
Preview
Page 1
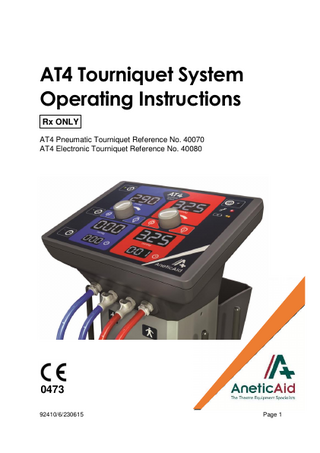
AT4 Tourniquet System Operating Instructions Rx ONLY AT4 Pneumatic Tourniquet Reference No. 40070 AT4 Electronic Tourniquet Reference No. 40080
0473 92410/6/230615
Page 1
92410/6/230615
Page 2
Contents 1. Introduction ... 4 1.1.
Warnings & Cautions ... 4
1.2.
Scope of Use ... 4
1.3.
Intended user ... 4
1.4.
Equipment Classification ... 4
1.5.
Associated Devices... 5
1.6.
Serial Number Label ... 5
2.
Summary of Warnings, Cautions and Side-Effects... 6
3.
Symbols... 8
4.
Getting Started ... 10
5.
Controls and Operation ... 12 5.1.
Preparation... 12
5.2.
General operation ... 14
5.3.
IVRA Operation ... 15
5.4.
Alarms and Warning Indicators... 17
6.
Handling ... 19
7.
Performance and Technical Specification... 20
8.
Cleaning and Disinfecting ... 24
9.
Installation of Battery ... 25
10. Expected battery life: ... 26 11. Maintenance ... 27 11.1. Daily... 27 11.2. Recurrent (Periodic) Testing... 27 12. Product Warranty ... 29 13. Disposal of Waste Electrical & Electronic Equipment ... 29
© Anetic Aid Ltd. All rights reserved; this document is not to be reproduced in whole or in part without the permission of the copyright owners. The company reserves the right to modify or improve the equipment referred to.
92410/6/230615
Page 3
1. Introduction These instructions are intended to assist you with the operation of the AT4 Electrically powered and Pneumatically powered Tourniquets and it is important that the instructions are read thoroughly and understood before using the equipment. It is also important to check the tourniquet before use to ensure there is no loss or change in performance; ensure that all functions operate correctly and to their full range. We recommend that the tourniquet is visually inspected for any damaged parts, or contamination before use. In this manual items in green text relate exclusively to the pneumatic powered version of the AT4 while items in blue relate exclusively to the electrically powered version. Items in black apply to both versions
1.1. Warnings & Cautions The European Medical Device Directive requires all manufacturers to include appropriate warnings and cautions and many of the warnings and cautions will apply to other similar devices. To ensure that all users are well informed various warnings and cautions are made throughout these operating instructions. A WARNING: is given when the personal safety of the patient or user may be affected and when disregarding this information could result in injury.
A CAUTION: is given when special instructions must be followed. Disregarding this information could result in permanent damage being caused to the tourniquet.
1.2. Scope of Use This product is intended for the control of pneumatic tourniquet cuffs in operating theatres or similar environments.
1.3. Intended user Tourniquets should only be operated by trained and competent clinical staff and used in accordance with your establishments approved clinical practice. WARNING: Intra Venous Regional Anaesthesia (IVRA) should only be administered by staff that have been trained and approved to carry out this procedure.
1.4. Equipment Classification This tourniquet has been classified as a ‘Class IIa’ medical device in accordance with the European Medical Device Directive 93/42EEC as amended by 2007/47.
92410/6/230615
Page 4
1.5. Associated Devices The cuffs and gas cylinder (pneumatically powered version only) which may be used with this device are considered to be associated devices and will have their own instructions for use which should be read and understood. Any conflicts between the instructions should be resolved before use.
To ensure compatibility it is recommended that accessories and associated devices are supplied by Anetic Aid. Inappropriate bore size of the hose and compliance of the cuff can affect the stability of the pressure control.
Ensure that O rings on cuffs and associated hoses are in good condition before use.
1.6. Serial Number Label The Serial and Reference Numbers are located on a label on the rear of the device. When requesting service ensure that both the Ref No and the Serial No are quoted.
92410/6/230615
Page 5
2. Summary of Warnings, Cautions and Side-Effects In common with all medical devices of this nature there are inherent risks and side-effects that the user should be made aware of. Whilst every effort has been taken to eliminate these risks, care should be taken when using the tourniquet. It is important that the user familiarises themselves with all of the warnings and cautions contained within this document. WARNING: The pressure and duration of application of a tourniquet cuff is a matter for clinical judgement. Application of a tourniquet cuff for excessive duration or at excessive pressures can result in tissue narcosis. The correct size and shape of cuff will allow cessation of blood flow at lower pressures and reduce the risk of tissue narcosis. Intra Venous Regional Anaesthesia (IVRA) should only be administered by staff that have been trained and approved to carry out this procedure. The castors are intended for positioning the tourniquet within the operating room they are not to be used for transportation over thresholds or steps. The AT4 should always be moved by pulling the handle it should not be moved by pushing. When the electrically powered AT4 is not in use it should be connected to the mains electrical supply to recharge the battery. See section 10.1 relating to charging Only Gas Cylinder Mounting kits and regulators supplied by the manufacturer may be used. Other equipment may make the unit unstable. When handling gas cylinders take appropriate precautions with respect to lifting and high pressure gas. If a gas supply from a cylinder is being used check the contents before every procedure. The cylinder should be removed if the AT4 is to be moved further than being repositioned within the operating room. Disconnect the tourniquet from the cylinder or turn cylinder valve off when tourniquet is not in use as high precision regulators by the nature of their design vent a small amount of gas even when the pressure is set to zero and the cuff is deflated. Only use the cells (Battery) specified and always replace all ten cells do not mix batteries or replace only some of them. Rechargeable Cells should not be used It is recommended that only CE marked cleaning products are used in the cleaning of the AT4. See section 8 Dilute all disinfectants in accordance with the manufacturer’s guidelines. See section 8
92410/6/230615
Page 6
CAUTION: Before use, ensure all device functions operate correctly. Also visually inspect the device for any loose or damaged parts. If the devices performance changes from that specified or required the device should be taken out of service immediately. Maintenance work should only be conducted by suitably trained personnel following manufacturer’s guidelines. Do not use concentrated solutions of bleach or disinfectant, organic solvents, abrasive powders or expose any part of the tourniquet to excessive heat. For cleaning and disinfection methods see section 8 The AT4 pneumatically powered tourniquet should only be powered by compressed air. Oxygen or other medical gasses must NOT be used. Disinfectant products are corrosive in nature; failure to properly wash and dry the surfaces could leave a corrosive residue which may cause damage. Do not steam clean or jet wash any areas of the device or its detachable hoses or cables. Do not use concentrated bleaching disinfectant solutions, organic solvents, abrasive powders or expose any part of the device to excessive heat.
SIDE-EFFECTS: Application of a tourniquet cuff for excessive duration or at excessive pressures can result in tissue narcosis. The correct size and shape of cuff will allow cessation of blood flow at lower pressures and reduce the risk of tissue narcosis. Intra Venous Regional Anaesthesia (IVRA) if incorrectly performed can have catastrophic and even fatal side effects. The inclusion of a system to reduce the risk of errors should not be seen as mitigating or reducing the level of training and caution required when using IVRA. IVRA should only be administered by staff that have been trained and approved to carry out this procedure.
92410/6/230615
Page 7
3. Symbols The following Symbols have been used on the AT4 tourniquet control panel: Symbol
Title
Description
ON / OFF
Press to turn ON, Green indicator.
AUDIBLE ALARM PAUSE AUDIBLE ALARM OFF
INFLATE PRESSURE CONTROL
To turn OFF press and hold until pressure displays are blank. Press once to pause audible alarms for 3 minutes; Amber Indicator. (Except Low Battery) Press second time to cancel audible alarms (Except Low Battery) Red Flashing Indicator Turn to set inflation pressure blue channel Turn to set inflation pressure red channel
PRESSURE SET OR APPLIED INFLATE
Indicates the set and applied pressures
DEFLATE
Deflates blue and red channels respectively.
IVRA
Selects IVRA control mode interlocking the controls of both channels. Amber indicates ready but not operational, green indicates operational, Red indicates incorrect action. Prior to inflation of cuff this button sets the reminder start time and repeater frequency. This function is cancelled after the cuff has been inflated. Audible Reminder is supported by amber visual indicator and flashing of the timer LCD and is cancelled by pressing the timer button
TIMER REMINDER
Inflates blue and red channels respectively
TIME
Indicates the timer display for blue and red channels respectively.
BATTERY LEVEL
Green: represents acceptable battery level Amber: connect to mains as soon as soon as practical Green/Amber: Charging Red: connect to mains immediately Amber: Replace batteries as soon as practical Red: Replace batteries
MAINTENANCE INDICATOR
Amber: Service required Red: stop using and request immediate service
92410/6/230615
Page 8
The following symbols are used on the AT4 tourniquets: Symbol
Title
Description
CE MARK
Indicates compliance with the European Medical Device Directive 93/42 and amendments thereto. Symbol is associated with a number indicating the Notified Body. Read Instructions For Use
READ INSTRUCTIONS CAUTION
Indicates the need for the user to consult the instructions for use for important cautionary information
FUSE
Location and value of fuses
CELL
Location and type of cells
BATTERY
Location and type of battery used
WEEE
Do NOT dispose of in domestic waste see section 13
AIR CONNECTION
Location of compressed air supply connector
SUPPLY VOLTAGE
Supply voltage of mains inlet
~ Hz
SUPPLY FREQUENCY
Frequency of AC mains supply
W Max
MAX POWER CONSUMPTION
Maximum power consumption in watts
SN
SERIAL NUMBER
Unique serial number used for traceability
REF
REFERENCE NUMBER
Reference or model number indicating the type of unit
DATE OF MANUFACTURE
Date of manufacture as YYYY:MM
MANUFACTURER
Name and address of manufacturer is adjacent
Do not push
The AT4 should not be pushed as it is more stable when pulled by the handle.
V
92410/6/230615
Page 9
4. Getting Started Packaging can be fully recycled or reused. During manufacture the base moulding and front panel are protected by a thin plastic film. The film, indicated with the symbol illustrated, shall be removed during commissioning. On receipt or after periods of storage the AT4, must be cleaned and disinfected before being put into clinical use. For safety the AT4s are shipped without the batteries being operational. The fuse requires to be fitted connecting the battery of the electrically powered version and the D size cells require to be fitted to the pneumatically powered version as detailed in section 9. The D size cells should be removed if the AT4 is going to be stored for more than 8 weeks. The AT4 electrically powered version will have been supplied with a T3.15A fuse which requires to be fitted during commissioning. Lay the AT4 on its back and fit the fuse in the fuse holder indicated by the fuse symbol on the underside of the AT4 On receipt the electrically powered AT4, or after periods of storage, it must be connected to the mains electricity supply with the cable provided for 24 hours to allow the battery to be charged. When fully charged the AT4 may be disconnected from the mains and operated from the battery avoiding the requirements for mains cable in the surgical area. The AT4 may also be operated while connected to the mains if the battery is low. When not in use it is recommended that the AT4 be left connected to the mains to ensure that the battery is fully charged and ready for Use. On receipt of the pneumatically powered AT4, must be connected to the piped medical air supply before use with the hose provided. The hose should be attached by hand to the DISS connector on the rear of the AT4 indicated by the air symbol illustrated. The use of tools should not be required to achieve a gas tight seal and over-tightening may result in damage. The pneumatically powered AT4 has optional cylinder mount and regulator which requires to be fitted before delivery from the manufacturer, as part of the commissioning or by a competent service engineer. Warning: Only Gas Cylinder Mounting kits and regulators supplied by the manufacturer may be used. Other equipment may make the unit unstable. When handling gas cylinders take appropriate precautions with respect to lifting and high pressure gas.
92410/6/230615
Page 10
The D-Cells will have been supplied separately for safety. Lay the unit on its back and fit the D-Cells as indicated in the installation of battery section 9 and indicated by the labels on the underside ensuring correct orientation as indicated by the + symbol on the lid of the battery holder. The AT4 will have been supplied with Red and Blue cuff hoses. These should be connected to the connections in the front of the AT4 and below the appropriate red or blue segment of the front panel. There are two connections to pressurise the cuff and two which are for stowage of the cuff end of the hose when not in use.
1
2
4
3 7
5
8
6
9
10
1. 2. 3. 4. 5. 6. 7. 8. 9. 10.
Control Panel Pulling Handle Main Air Supply DISS connection (AT4 Pneumatic Only) Cuff Supply Hose Connectors Cuff Supply Hose Storage Connectors Cuff Supply Hose Storage Facility Cuff Hooks Additional Storage Facility Locating Pins IEC Socket (AT4 Electronic Only)
92410/6/230615
Page 11
5. Controls and Operation Both versions of the AT4 have identical control panels and operate in similar manner.
On/Off Set pressure display IVRA* Applied pressure display
Reminder control
Audible alarm, pause and indicator Maintenance indicator Battery level indicator Pressure Controller Deflate Inflate
Elapsed time H:MM *IVRA stands for Intravenous Regional Anaesthesia.
5.1. Preparation If a gas cylinder is being used to power the device ensure that the contents gauge indicates there is sufficient gas to complete the procedure, that the cylinder valve is turned on and that the supply hose is connected to the regulator outlet socket. If pipeline gas is being used to power the device ensure that the supply hose is connected to the wall or pendant outlet socket. If theAT4 is electrically powered ensure that the battery has been charged and the battery indicator is green, if not it must be used connected to the mains supply. The red and blue cuff hoses should be connected to the connectors in the front of the AT4 ready for use below the appropriate red or blue segment of the front panel. There are two connections to pressurise the cuff and two which are for stowage of the cuff end of the hose when not in use. Select the appropriate size and type of cuff(s) and apply to the patient’s limb(s). The correct size and shape of cuff will allow cessation of blood flow at lower pressures and reduce the risk of tissue narcosis.
92410/6/230615
Page 12
Caution: Before use, ensure all device functions operate correctly. Also visually inspect the device for any loose or damaged parts. If the devices performance changes from that specified or required, the device should be taken out of service immediately. Ensure that O rings on cuffs and associated hoses are in good condition before use.
92410/6/230615
Page 13
5.2. General operation
The AT4 requires to be turned by depressing the ON button. The green light will be displayed. By default the Timer Reminder is set to commence at 90 minutes (1.30) and repeat at 15 minute intervals. Before a cuff is inflated the Timer Reminder option may be set by repeatedly depressing the button until the required option is obtained. The option is momentarily displayed in the lower displays the left display being the time to the first reminder and the right display setting the frequency that the reminder repeats. Set the required pressure on the desired channel by rotating the control clockwise to increase and anticlockwise to decrease. The selected pressure in mmHg is displayed in the window above the rotary control. Application of a tourniquet cuff at excessive pressures can result in tissue narcosis.
To inflate the cuff depress the inflate button associated with the pressure set in the previous step.
The Timer Reminder will sound at pre-set intervals and can be cancelled until the next scheduled reminder by depressing the Timer button To deflate the cuff depress the deflate button associated with the cuff a single push initiates a slow deflate a second depression initiates a fast deflate. During deflation the screen will flash
If bilateral operation is required the second cuff can be inflated at any time without affecting the first channel.
When the procedure is finished press the off button to turn the AT4 off as this will conserve battery life. If the AT4 is not turned off it will automatically shut down if the cuffs have not been inflated for 15 minutes
When not in use it is recommended that the electrically powered AT4 be left connected to the mains to ensure that the battery is fully charged and ready for Use. Caution: When not in use it is essential that the tourniquet is disconnect from the cylinder or that the cylinder valve is turned off. High precision regulators by the nature of their d esign vent a small amount of gas even when not in use and this can deplete the cylinder contents even when the tourniquet is not in use.
92410/6/230615
Page 14
5.3. IVRA Operation Warning: Intra Venous Regional Anaesthesia (IVRA) should only be administered by staff that have been trained and approved to carry out this procedure.
The AT4 requires to be turned by depressing the ON button. The green indicator will be illuminated. By default the Timer Reminder is set to commence at 90 minutes (1.30) and repeat at 15 minute intervals. Before a cuff is inflated the Timer Reminder option may be set by repeatedly depressing the button until the required option is obtained. The option is momentarily displayed in the lower displays the left display being the first reminder and the right display setting the frequency that the reminder repeats. With default of 1:30 for first reminder and 15 for repeat To implement the IVRA mode depress the IVRA button. The green indicator will be illuminated.
Set the required pressure on the first channel (Upper cuff) by rotating the control clockwise to increase and anticlockwise to decrease. The selected pressure in mmHg is displayed in the window above the rotary control. Application of a tourniquet cuff at excessive pressures can result in tissue narcosis. To inflate the cuff depress the inflate button associated with the pressure set in the previous step. If this button is depressed prior to setting the pressure levels above, the device will lock out. To reset turn the IVRA button off and then back on to start the process again. Set the required pressure on the second channel (Lower cuff) by rotating the control clockwise to increase and anticlockwise to decrease. The selected pressure in mmHg is displayed in the window above the rotary control. Application of a tourniquet cuff at excessive pressures can result in tissue narcosis. To inflate the cuff depress the inflate button associated with the pressure set in the previous step.
The first cuff can be deflated when the second cuff has been inflated The Timer Reminder will sound at pre-set intervals and can be cancelled until the next scheduled reminder by depressing the Timer button
92410/6/230615
Page 15
To deflate the cuff depress the deflate button associated with the cuff a single push initiates a slow deflate. Continued…..
When the procedure is finished, to turn the AT4 off, press the off button and hold down until the pressure displays turn blank then release the button. Turning off after use will conserve battery life. If the AT4 is not turned off it will automatically shut down after both cuffs have been deflated for 15 minutes
When not in use it is recommended that the electrically powered AT4 be left connected to the mains to ensure that the battery is fully charged and ready for Use. Caution: When not in use it is essential that the tourniquet is disconnected from the cylinder or that the cylinder valve is turned off. High precision regulators by the nature of their design vent a small amount of gas even when not in use and this can deplete the cylinder contents even when the tourniquet is not in use.
92410/6/230615
Page 16
5.4. Alarms and Warning Indicators Caution: A number of Alarm and Indicator functions have been included and due note and actions should be taken.
Maintenance: The spanner symbol with a red indicator requires investigation. If the indicator is not cleared by replacing leaking cuffs hoses and O rings and then restarting the AT4 a service should be requested. The AT4 has integral calibration and leak detection monitoring and an alarm which is not cleared by the above procedure may indicate failure of a pressure sensor or a leak in the internal pneumatic circuit. Battery Level: The battery level alarm indicates: When the Electrically powered unit is being used while NOT connected to the mains supply the following indications apply: Amber: Red: Green:
Low battery connect to mains as soon as soon as practical Extremely low battery, connect to mains immediately Normal operation condition
When the electronic unit is connected to the mains supply but NOT in use: Amber: Indicates connection to the mains. This is NOT an indication of battery level (See Battery Charging Section 9) When the electronic unit is being used while connected to the mains supply: Green/Amber: use
Alternating Green/Amber indicating connection to the mains while in
Note: the amber indicator will take approximately 30 seconds to extinguish after disconnection from the mains The Pneumatically powered unit has the following indications: Amber: Red: Green:
Low Battery, replace batteries as soon as practical Extremely low battery, Replace batteries before further use Normal operating condition
Timer Indicator: The timer indicator can be set as preferred see section 5.2 and 5.3 but will as a default commence at 90 (1.30) minutes and repeat at 15 minute intervals. Application of a tourniquet cuff for excessive duration can result in tissue narcosis. 92410/6/230615
Page 17
Excessive Pressure Indicator: When pressures above those normally applied are selected an audible indicator will sound. Application of a tourniquet cuff at excessive pressures can result in tissue narcosis. Low Pressure When the cuff pressure is reduced below those normally applied an audible indicator will sound. In the event that there is a catastrophic loss of pressure such as the disconnection of a cuff hose the alarm will sound and will be cancelled when the pressure is re-established or the deflate button is pressed. IVRA If the IVRA option has been activated pressing an incorrect inflate or deflate button will generate an audible indication that the function is not appropriate and has not been implemented.
92410/6/230615
Page 18
6. Handling Warning: The AT4 should not be pushed as equipment is more stable and controllable when pulled by the handle. The castors are intended for repositioning the AT4 within the operating room environment or on other smooth level surfaces and slopes up to 10 o. They are not intended for negotiating steps, thresholds or other obstacles such as cables or hoses. If a cylinder is fitted it shall be removed before transporting the AT4 pneumatic version further than repositioning it within the operating room. If required to be lifted up a step or over a threshold the AT4 should be lifted by the cuff hooks on the side of the unit. Do not lift the AT4 by the control panel as this may result in damage.
92410/6/230615
Page 19
7. Performance and Technical Specification Accuracy and resolution: Pressure is measured to an accuracy of +/- 2.5 mmHg and displayed with a resolution of 5 mmHg Maximum cuff pressure: The maximum cuff pressure is set to 600mmHg The maximum cuff pressure is set between 550-600mmHg Input Electrical: Mains Electricity supply factory set to either: o 230V 50-60 Hz o 110-120V 50-60HZ See label beside mains inlet for voltage your unit has been set to. Input Pneumatic: 4-7 bar Air DISS Connection Battery: Ten Energiser Industrial D Size Alkaline Cells EN95-LR20-AM1-1.5V Sonnenschein A512/6.5 S NGA51206D5HS0SA Fuse:
Battery T3.15A 250V 20mm 230V supply 2 X Mains fuse T630mA 250V 20mm 110-120 V Supply 2 X Mains fuse T1A 120-250V 20mm Battery Fuse T1A 250V 20mm
Safety:
Earth connection as per EN IEC 60601-1 class 1
Weight: Excluding accessories but with batteries fitted: o 17.3 Kg Electrical powered o 15.5 Kg Pneumatic Powered Standards Applied: EN IEC 60601-1 EN IEC 60601-1-2
92410/6/230615
Page 20