ARJO Huntleigh Healthcare
ARJOHUNTLEIGH Tenor Instructions for Use Rev 8 May 2015
Instructions for Use
34 Pages
Preview
Page 1
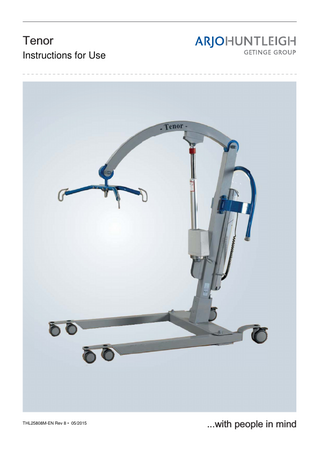
Tenor Instructions for Use
THL25808M-EN Rev 8 • 05/2015
...with people in mind
WARNING To avoid injury, always read this Instructions for Use and accompanied documents before using the product. Mandatory to read the Instructions for Use
Design Policy and Copyright ® and ™ are trademarks belonging to the ArjoHuntleigh group of companies. © ArjoHuntleigh AB 2015. As our policy is one of continuous improvement, we reserve the right to modify designs without prior notice.The content of this publication may not be copied either whole or in part without the consent of ArjoHuntleigh AB.
Contents Safety instructions... 3 Read Before Use... 3 Intended Use... 3 Operational Life... 3 Bariatric Slings Guidance... 4 Product description... 5 Parts referred to in this manual... 5 Controls and functions... 6 Control Handset:... 6 Dual control switch... 6 Emergency Stop Button (red)... 6 Power on / Reset button (green)... 6 Power off button (red)... 6 Automatic cut out... 6 System failure lower override... 6 Automatic stop function... 7 OverHeat Protection... 7 Battery discharge indicator... 7 Chassis castor brakes... 7 Powered adjustable width chassis legs... 7 Hour/Cycle meter... 7 Using your Tenor... 8 Checklist before use... 8 Preparation... 8 Before approaching the resident... 8 To lift a resident from a chair... 8 To return resident back to the chair... 9 To lift a resident from a bed... 10 To return resident to a bed... 11 To lift a resident from the floor... 12 ArjoHuntleigh Scale (if fitted)... 12 Battery charging... 13 Care of your Tenor... 17 Servicing Advice... 17 Slings... 18 Environmental Advice... 18 Labels... 19 Key to labels:... 19 Technical specification...20 Component Weights... 20 Maximum Lifting Capacities (Safe Working Load - SWL)... 20 Electrical... 20 Environment... 21 Maximum sound power level... 21 Scale... 21 Hoist Dimensions... 22 Troubleshooting / Problem Solving... 24 Preventive Maintenance Schedule... 26 ArjoHuntleigh Slings... 26 ArjoHuntleigh Battery Charger... 26 ArjoHuntleigh Tenor... 26 Checks to be performed by qualified ArjoHuntleigh personnel... 27 Electromagnetic Compatibility (EMC)...26 1
Intentionally left blank
2
Safety instructions OPERATIONAL LIFE Unless stated otherwise, the operational life of the Tenor is ten (10) years, as long as the required preventive maintenance is carried out in accordance with the care and maintenance instructions in this user manual. The Tenor will not be suitable for use if it is damaged.
READ BEFORE USE Before using your Tenor, familiarise yourself with the various parts and controls as illustrated in this document. Read this whole manual thoroughly before operating your Tenor in order to prevent injury or damage to the product.
The operational life of the sling and of the consumable parts e.g. batteries, depends on the actual use conditions. Therefore, before use, always make sure that the sling, loops, cords and straps do not show any sign of fraying, tearing or other damage and that there is no damage (e.g. cracking, bending, breaking) to the attachment clips. If any such damage is observed, do no use the sling.
Symbols and definitions used in this manual: CAUTION Failure to follow these instructions may cause damage to the product.
WARNING
WARNING
Failure to follow these instructions may result in injury to yourself or to others.
When using the Tenor, only use the slings as described in the list on the next page.
INTENDED USE Tenor is a mobile passive lift, intended to be used on horizontal surfaces for lifting and transfer in hospitals, nursing homes or other health care facilities.
The scale (if fitted) has been designed to weigh residents. WARNING Do not overload the Tenor beyond the approved maximum lifting capacity (Safe Working Load) of 320 kg (705 lbs).
To describe which residents may be lifted using an ArjoHuntleigh hoist, a resident gallery has been created by ArjoHuntleigh. The residents that can be transferred with a Tenor have been named Doris (D) and Emma (E).
CAUTION Although manufactured to a high standard, the Tenor and accessories should not be left for extended periods in humid or wet areas.
Tenor has been designed to lift Doris, who: • Sits in wheelchair • Has no capacity to support herself at all • Cannot stand unsupported and is not able to bear weight, not even partially • Is dependent on carer in most situations
Do not, under any circumstances, spray the Tenor or accessories (excluding sling) with water e.g. under the shower.
Tenor has been designed to lift Emma, who: • Is a passive resident • Might be almost completely bed ridden • Is often stiff and has contracted joints • Is totally dependent 3
Safety instructions WARNING
WARNING
Before attempting to raise a resident, a full clinical assessment of the resident’s condition & suitability must be carried out by a qualified person on the individual resident to determine if it is advisable that he/she will be lifted and/or transferred using a Tenor.
If FLITES (disposable sling) are to be used with the Tenor, then always refer to the separate operating instructions for FLITES as well as these instructions before using.
BARIATRIC SLINGS GUIDANCE Part number
Sling Size
Edge binding colour
Safe Working Load
MAA8000-M
M
Yellow
454 kg / 1000 lbs
MAA8000-L
L
Green
454 kg / 1000 lbs
MAA8000-XL
XL
Blue
454 kg / 1000 lbs
MAA8000-XXL
XXL
Terracotta
454 kg / 1000 lbs
MAA8010-M
M
Yellow
454 kg / 1000 lbs
MAA8010-L
L
Green
454 kg / 1000 lbs
MAA8010-XL
XL
Blue
454 kg / 1000 lbs
MAA8010-XXL
XXL
Terracotta
454 kg / 1000 lbs
MAA8020-M
M
Yellow
454 kg / 1000 lbs
MAA8020-L
L
Green
454 kg / 1000 lbs
MAA8020-XL
XL
Blue
454 kg / 1000 lbs
MAA8020-XXL
XXL
Terracotta
454 kg / 1000 lbs
MAA8030-M
M
Yellow
454 kg / 1000 lbs
MAA8030-L
L
Green
454 kg / 1000 lbs
MAA8030-XL
XL
Blue
454 kg / 1000 lbs
MAA8030-XXL
XXL
Terracotta
454 kg / 1000 lbs
If the resident’s weight falls into two sizes or if there is any doubt on choosing the right size slings, always go for the smaller size sling first. This resident sling guide is only an approximation, other factors which must be considered when selecting the appropriate sling are: resident’s distribution of body weight (i.e. hips, thighs, upper body); resident’s height, torso length; resident’s physical condition (i.e. amputee, contractions, etc.). WARNING The Tenor resident must only be lifted using a bariatric sling.
4
Product description Parts referred to in this manual 6
15
18
13 14
1
10
7
12
19 16
11 17B 17A 5
8
17 4 2
9 3 20 21
Fig. 1
22
1. Mast
13.Scale unit and display (if fitted)
2. Chassis
14.System failure lower override
3. Adjustable width chassis legs
15.Power off button
4. Rear castors (braked)
16.Power on / Reset button
5. Lift actuator 6. Jib
17.LCD 17A: Battery discharge indicator 17B. Hour/Cycle meter
7. Manoeuvring handle
18.Dual control switch for raising UP
8. Battery pack
19.Dual control switch for lowering DOWN
9. Hand control (for raising and lowering)
20.Front castor
10.Electric / Battery compartment
21.Battery release button
11.Spreader bar
22.Emergency stop button
12.Sling attachment hooks
5
Product description Power on / Reset button (green) : Located on the top control panel (Fig. 1). Press this button to turn on power to the Tenor. Also used to reset if the automatic overload fuse has operated (indicated by the button projecting outwards slightly). If the fuse has operated and, once reset, operates again, withdraw the lifter from use and contact ArjoHuntleigh or their appointed distributor.
CONTROLS AND FUNCTIONS Control Handset: Press the appropriate button on the control handset to raise / lower the jib and to move the spreader bar. A small direction arrow is printed next to each button for function identification (See Fig. 2). ‘Raise’ button
‘Lower’ button Power off button (red) : Located on the top
Chassis legs ‘Open’ button
control panel (Fig. 1). Press this button to turn off power to the Tenor.
Chassis legs ‘Close’ button
Automatic cut out: If the lift is accidentally
overloaded, trying to lift a resident heavier than permitted, an automatic ‘cut out’ operates to prevent the lift lifting a load in excess of one and a half a times the maximum allowed load. The lift motion will stop automatically.
Fig. 2
If pressure is released during any function, powered motion will stop immediately. Do not drop the handset into water, e.g. bath.
System failure lower override: In
case of control handset / dual switch malfunctioning, with a resident still supported by the sling, the lowering process can be continued using the system failure lower override, situated on the lift actuator tube (See Figs. 1 & 3).
When not in use, the handset can be kept ready for use by hooking it over the loop at the rear of the mast. Dual control switch: The raising / lowering of
the jib can also be controlled from this switch, situated on the top of the electronics / battery compartment on the mast. Arrows on the switch are for function identification (See inset to Fig. 1). This switch will function, even if the handset cable has been unplugged.
To use this function, turn the red ring on top of the motor / actuator of the Tenor clockwise, using the resident’s own weight to enable the mast to slowly lower. To stop lowering, simply stop turning the ring. Only use this function in the event of normal control failure. Do not use it for normal function lowering.
Emergency Stop Button (red): If, in an emer-
gency, you have to immediately stop any powered movement (other than by releasing pressure on the button on the handset) press the emergency stop button situated on the right hand side of the electronics / battery compartment on the mast (Fig. 1). Once the Emergency Stop button has been operated, it must be reset by turning the red cap until it pops out. Now the Tenor can be operated again.
6
Product description Chassis castor brakes: The chassis rear castors have brakes which can be foot operated (See Fig. 4).
Fig. 4
Lowering
Powered adjustable width chassis legs:
The mobile chassis legs can be opened to avoid obstructions e.g. chair legs. This can be done by operating the hand control, using only one hand and having the other free to hold onto the lift or care for the resident. Use the lower button to close the chassis legs and the upper one to open them (See Fig. 2).
Fig. 3
WARNING Before operating the “System failure lower override” to lower a resident, always ensure that a chair or suitable support is underneath ready to accept the resident.
Numerous positions can be obtained between fully opened and fully closed.
Automatic stop function: Great care should
Transportation should be done with the chassis legs closed, it will be easier to push the lifter through doorways, etc.
be taken not to lower the jib and / or spreader bar onto the resident or any obstruction, particularly when the resident is standing up and weight bearing. If this should happen, the motor will continue to run but downward movement will be blocked by the obstruction. If this occurs, release pressure from the “lower” button until immediately and operate the “raise” button until the equipment is clear. Then remove the obstruction.
When opening the chassis legs, the rear castors will close inwards. WARNING When opening or closing the legs on a powered chassis, care must be taken not to allow anyone to stand in the way of the moving chassis legs.
OverHeat Protection: The buzzer will beep twice every 15s and “OverHeat” will display on the LCD. This happens when the caregiver exceeds the duty cycle for the lift actuator (2min /18 min) When it starts beeping, lifting and lowering is still possible. This function protects actuator against damage.
Hour/Cycle Meter: On the top of the LCD display it shows the total duration of the lift and lowering operation (in hours -see item 17B, Fig. 1). The LCD can also shows the number of cycles by simultaneously pressing the “raise” and “lowering” button. This is primarily intended to help the caregiver calculate maintenance intervals.
Battery discharge indicator: There is a small battery symbol on the bottom of the LCD. The battery symbol shows the level of battery charge.(See Fig. 1 and also the ‘Battery Charging’ section for complete description).
7
Using your Tenor CHECKLIST BEFORE USE
Before using a sling, first read the ‘Guidelines on the use of your sling’ and the sling label, which are delivered with the sling.
For a list of what to check before use, please read the “Preventive Maintenance Schedule” section of this document. PREPARATION Unpack the battery supplied with the lift. CAUTION
Fig. 5
A battery that is charged for the first time, or after a long storage period, must be charged until the charger indicates full charge (See “Battery charger IFU 001-24257).
Place the sling around the resident so that the bottom of the back support area reaches the bottom of the resident’s spine (it is not necessary to pull the sling under the resident). Ensure the head support area is behind the head (See Fig. 5).
When the battery pack is fully charged, disconnect the mains power, then remove the pack from the charger and insert if fully into the Tenor battery position, located at the rear of the mast (See Fig. 1). Electrical connection is made automatically.
Pull each leg section under each thigh so that they appear on the inside of the thighs (See Fig. 6).
Before approaching the resident
WARNING Never leave the resident unattended.
The caregiver should always tell the resident what he / she is going to do and have the correct sling size ready. Where possible, always approach the resident from the front.
Fig. 6
Ensure the sling is not folded or twisted under the resident (See Fig. 6).
To ensure maximum resident comfort, do not allow the resident to hold onto the spreader bar.
Move the Tenor towards the resident, ensure the widest side of the spreader bar is facing towards the resident and is at, or just below, shoulder level (See Fig. 7).
If required, the chassis legs may be opened to go around a chair, wheelchair or to avoid bed legs or any other obstruction. To lift a resident from a chair
Hold the sling up with the leg sections pointing downwards (See Fig. 5), to identify the orientation of the sling.
Fig. 7
8
Using your Tenor Ensure that the Tenor is close enough to be able to attach the shoulder loops of the sling to the spreader bar. To accomplish this, you may have to put the resident’s feet on or over the chassis.
WARNING Always check that all sling attachment loops are completely underneath and away from the safety latch on the hanger bar, before and during the commencement of the lifting cycle, in tension as the resident’s weight is gradually taken up (See Figs. 8 & 9)
If the slings supplied have more than one loop attachment position, attach whichever loop seems appropriate to the size of the resident. Once the Tenor is in position, attach the shoulder strap loops to the hooks on the spreader bar nearest to the resident (See Figs. 8 & 9).
Raise the resident with the control handset, just high enough to move the resident clear of the seat, ensure their feet are clear of the floor.
The wider hook up points are for the shoulder sling loops and the narrower hook up points are for the leg sling loops (See Fig. 9). If necessary, carefully lower the spreader bar a little bit using the control handset to enable the connection of the sling leg section loops, being careful not to lower it onto the resident.
Fig. 9
The leg section loops should not be crossed over or twisted. Instead, the left leg section loop should be connected to the exact side hook above the leg being lifted (See Figs. 6 & 8).
Before transportation, turn the resident to face the caregiver and lower the individual to approximately normal chair height. This gives confidence and dignity and also improves the Tenor mobility. To return resident back to a chair When returning to a chair, make sure the lift legs are positioned around the legs/wheels of the chair. To position the resident over the chair, use the lift handles, do NOT pull the sling. The resident suspended in sling should always remain in the centre of gravity. Use the hand control to lower the resident. (see Fig. 10)
WARNING When lifting or lowering the resident, ensure that no part of the resident’s body can be caught between the lift’s moving parts.
Fig. 8 Fig. 10
9
Using your Tenor To lift a resident from a bed WARNING When lowering the resident back into a chair or when transferring from bed to chair, position the resident in such a way that he / she is fully supported by the chair when he / she is lowered.
Before lifting a person from a bed, ensure there is sufficient clearance underneath the bed to accommodate the Tenor chassis legs. Adjust width of chassis legs if necessary.
Fig. 13
When rolling the resident back onto the sling, roll them slightly in the opposite direction so that the folded part of the sling can be brought out.
Position the resident onto the sling by rolling the resident towards you, then folding the sling in half and placing it behind the resident’s back, so that the bottom edge of sling is aligned with bottom of the resident’s spine (See Figs. 11, 12 & 13). Position the sling carefully so that when rolled back, the resident will lie centrally on the sling. Check that the head support area of the sling is in position.
Alternatively, the resident can be brought into a sitting posture. Then position the sling as detailed in the section “To lift a resident from a chair”. Using the adjustable width chassis, it is possible to make adjustments to chassis leg widths to assist manoeuvrability around obstructions, for example, bed legs. Make sure the lift is positioned perpendicular to the bed. (see Fig. 14)
Fig. 14
Approach the bed with the open side of the Tenor spreader bar towards the resident’s head.
Fig. 11
Position the Tenor so that the spreader bar is just above and centrally situated over the resident. Carefully lower the spreader bar until the shoulder attachment loops can be connected to the hooks nearest to the resident’s head. Fig. 12
10
Using your Tenor To return resident to a bed If returning the resident to a bed, move into the desired position above the bed and then lower using the control handset.When returning to a bed, make sure the lift is positioned perpendicular to the bed (see Fig. 15). To position the resident over the bed, use the lift handles, do NOT pull the sling. The resident suspended in sling should always remain in the centre of gravity. Use the hand control to lower the resident.
Slide the leg sections of the sling under the resident’s thighs and connect each loop on the side hook above each leg. To make the lift more comfortable for the resident, it is recommended to lift the head end of the bed to semi-reclined position before commencing the lifting of the resident. When correctly connected, operate the control handset to raise the resident from the bed. At all times when lifting and lowering, it is advisable to stay at the side of the resident to ensure they are in a comfortable position. This is also reassuring to the resident. The resident suspended in sling should always remain in the centre of gravity.
Fig. 15
Only when the resident’s body weight is fully supported by the bed, may the sling connection loops be detached and while still in sitting position, detach the sling from the hooks before reclining the resident to the bed.
WARNING Always check that the sling attachment loops are fully in position before and during the commencement of the lifting cycle, and in tension as the resident’s weight is gradually taken up.
Move the Tenor away before removing the sling from under the resident.
After lifting the resident, adjust to a comfortable height for transfer. The specially designed sling, together with its integral head support, enables one person to carry out a complete lifting function without additional help.
If transferring the resident to a chair, refer to the section “To return resident back to the chair”.
11
Using your Tenor To lift a resident from the floor Put the sling around the resident as before, by using the rolling or seated position method. Depending on circumstances, space and / or position of the resident etc., open the chassis legs if necessary and carefully approach the resident with the front of the lift. Now lift the resident’s legs over the chassis as shown in Figure 13, should the situation require it. The resident’s head and shoulders should be raised on pillows for comfort. This will also make it easier to attach the shoulder position attachment loops (See Fig. 16).
Always move the Tenor in the direction shown in Fig. 17. Raise the resident to a suitable height for transport in a semi-recumbent position. WARNING Before and during the commencement of the lifting cycle, always check that all the sling attachment loops are fully in position and in tension as the resident’s weight is gradually taken up and that the sling loops are underneath and away from the safety latch on the hanger bar. If the leg sections of the sling tend to be fairly high in the crotch area, make adjustments for added comfort. The resident should be positioned in a chair or placed onto a bed in order to do this.
Fig. 16
Attach the shoulder strap attachment loops. It will probably be easier to attach the longest loops. Some caregivers prefer to use a larger sling when lifting a resident from the floor.
If the resident is prone to extensor spasm, he / she may be lifted with the Tenor, but special attention should be paid to supporting the legs during lifting.
Bring each leg section of the sling under the resident’s thighs and attach each leg strap loop to the side hook above each leg (See Fig. 17).
Staff assessment should be made to determine if a spastic or combative resident requires an additional caregiver to assist.
Once securely connected, raise the resident carefully, staying in close proximity of the resident’s legs at this stage of the lift to guide his / her legs safely over the lift until clear. Once raised from the floor, ensure the resident’s legs are clear of the chassis before continuing to lift.
Transportation of a resident is possible with the chassis legs open or closed, but manoeuvrability will be easier, especially through doorways, with the chassis legs closed. The resident should be positioned facing the caregiver and at a dignified height. Apply the brakes on an incline.
Fig. 17 12
ArjoHuntleigh Scale (if fitted) If your Tenor has been supplied, fitted with the ArjoHuntleigh Scale unit (See Fig. 18), it is possible to weigh a resident during the lifting procedure.
Technical details: Capacity: Display type: Display units: Resolution: Accuracy:
The scale can be used as follows: 1. Push the button marked with ‘Zero’, to calculate the weight unit to zero; 2. Place the resident in the sling; 3. Lift the resident in sling with Tenor; 4. Stabilize the resident’s movements, push the button marked ‘Operate’; 5. Read the resident’s weight from the display; 6. You can switch between pounds and kilograms using the kg / lbs button, by keeping it pressed in for 10 seconds.
Fig. 18
Alternatively, 1. Weigh the sling by first connecting it to the hanger bar; 2. Read the display; 3. Calibrate the scale to zero; 4. Lift the resident with the sling; 5. Read the display to know the weight; 6. Deduct the sling weight to learn the resident’s net weight.
13
320 kg / 705 lbs LCD lbs / Kg 1 / 10 0.2 kg / 0.44 lbs
Battery charging The Tenor incorporates a battery discharge indicator, situated on the rear of the battery / electronics compartment (See Battery discharge indicator in chapter Labels, item 5).
WARNING Only use the ArjoHuntleigh battery that is supplied with the Tenor. Only use ArjoHuntleigh components that have been specifically designed for the purpose when charging batteries.
WARNING No smoking or naked flames in battery vicinity. Do not place batteries near, or dispose of, in a fire. Do not short circuit a battery. Do not store batteries at temperatures in excess of 60°C (140°F). Do not crush, puncture, open, dismantle, or otherwise mechanically interfere with batteries
WARNING Should the battery casing become cracked and electrolyte come into contact with skin or clothing, wash immediately with water. If the electrolyte contacts the eye, wash immediately with copious amounts of water and seek medical attention. When disposing of batteries, contact the appropriate local authorities for advice. The abbreviation “Pb” shown next to the recycling and trash bin symbols on the battery pack label is the element symbol for lead and indicates that the battery contains lead and therefore should not be disposed of in the normal manner but must be recycled.
14
Battery charging It is recommended that the battery is removed from the lifter and recharged when the battery discharge indicator displays 3 filled segments of battery charge and the buzzer beeps once every 10s. However, at this point lifting is still possible until the display shows one filled segment and the buzzer beeps continuously.
the battery to the battery charger unit, ensure the battery is positioned securely (See “Battery charger IFU 001-24257).
Best practice is to charge batteries at each shift to maximize battery life. Avoid totally discharging the battery, this will prolong battery life. CAUTION Fig. 19
A battery that is charged for the first time or after a long storage period must be charged until the charger indicates full charge.
WARNING Hold the pack firmly to ensure it does not drop and become damaged or cause personal injury.
A discharged battery must be left to charge until the charger indicates full charge.
When the battery pack is fully charged, disconnect the mains power, remove the battery pack from the charger and insert it back into the Tenor battery compartment.
To ensure the Tenor is always ready for use, it is recommended that a freshly charged battery pack is always available. This is achieved by having additional battery packs available and keeping one on charge while the other is in use.
Ensure that the green Power On / Reset button (Fig. 1) is pressed in.
The battery life is variable (2-5 years) and mainly depends on proper charging practices. To extend the battery life, the batteries must be charged at regular interval until the charger indicates full charge.
The Tenor is now ready for use. CAUTION After use, turn off the Tenor by pressing the red Power off button (Fig. 1) to reduce power consumption.
It may be considered good protocol to have a freshly charged battery pack ready for the start of every work shift.
Place the battery pack on charge as follows: When the battery discharge indicator displays 3 filled segments, complete your lift cycle. Then take the lifter to a convenient location and remove the battery pack by holding the grip handle on the top and lift clear (See Fig. 19). Take 15
Intentionally left blank
16
Care of your TENOR Servicing Advice
How often the following actions are taken, depends on how often the equipment is used.
CAUTION Unless otherwise stated, before each and every use follow the cleaning, care and inspection procedures described in this section.
Do not use the product in wet areas, as this could cause problems with electrical components or internal corrosion.
WARNING
If a hot air dryer is used to dry the lifter, the temperature must not exceed 90°C (194°F)
It is recommended that resident lifters, equipment, accessories and slings supplied by ArjoHuntleigh are regularly cleaned and / or disinfected between each resident use if necessary, or daily as a minimum. If the slings, lifters and equipment need cleaning or are suspected of being contaminated, follow the cleaning and / or disinfection procedures below, before re-using the equipment. This is especially important when using the same equipment for another resident to minimize the risk of cross infection.
Do not use petroleum based solvents or similar. This may damage plastic parts.
WARNING ArjoHuntleigh recommends that the Tenor is maintained at regular intervals. See ArjoHuntleigh Preventive Maintenance Schedule.
Spare parts, if required, are available from ArjoHuntleigh or their approved distributors. Parts list and circuit diagrams are available from ArjoHuntleigh or their approved distributors upon request.
For cleaning your lifter, equipment and accessories wipe down with a damp cloth using warm water to which a mild detergent has been added.
Special tools are required for certain component replacement.
For disinfection of contaminated lifters, equipment and accessories, use the preferred method of wiping the product completely with “hard surface disinfectant wipes” that are supplied impregnated with a mild detergent.
UK LIFTERS ONLY: Important new legislation came into force on 5th December 1998, which has an impact on the schedule of service for your resident lifter(s), variable height baths and other raising and lowering equipment. The Lifting Operations and Lifting Equipment Regulations (LOLER) 1998 and the Provision and Use of Work Equipment Regulations (PUWER 98) must be satisfied by the duty holder. A scheme of six monthly through examinations has been devised to comply with the law and details can be obtained from ArjoHuntleigh Service UK.
A rubbing action will be necessary when using the wipes to promote effective disinfection of the surfaces. WARNING Cleaning and disinfection products must be used in accordance with the manufacturer’s instructions and suitable eye, hand and clothing protection must be worn at all times when handling disinfectants.
The simplest, safest and most effective way to maintain your product in good working order, is to have it methodically and professionally serviced by an ArjoHuntleigh approved engineer using ArjoHuntleigh approved spare parts. 17
Care of your TENOR For information on service and maintenance contracts, please contact your local ArjoHuntleigh distributor.
WARNING When using your sling, always read “the Guidelines on the use of your sling” that are delivered with the sling.
Slings CAUTION The sling should be checked before and after using with each resident and if necessary, washed according to the instructions on the sling. Also refer to the sling instruction sheet.
Environmental Advice When disposing of any items associated with the equipment, contact the appropriate local authority for advice.
With regard to laundering, the sling should not be classified as linen, but as an accessory to a resident transfer lifter and therefore classified as a medical device. Slings should be cleaned and disinfected only in strict accordance with the manufacturer’s instructions. WARNING Mechanical pressure should be avoided during the washing and drying procedure e.g. rolling and pressing, as these can damage parts vital to the safe and comfortable operation of the sling.
CAUTION Washing and drying procedures must not exceed 90°C (194°F). Wash using normal detergents, do not iron. Also refer to the sling instruction sheet.
It is essential that resident lifters, equipment, accessories and slings supplied by ArjoHuntleigh are regularly cleaned and/or disinfected between each resident use if necessary, or daily as a minimum. If the slings, lifters and equipment need cleaning or are suspected of being contaminated, follow the cleaning and/or disinfection procedures below, before re-using the equipment. This is especially important when using the same equipment for another resident to minimize the risk of cross infection.
18