Arthrex
Arthroscopy Systems
Continuous Wave III Arthroscopy Pump - Set Up and Operation Quick Guide Rev B
Quick Guide
2 Pages

Preview
Page 1
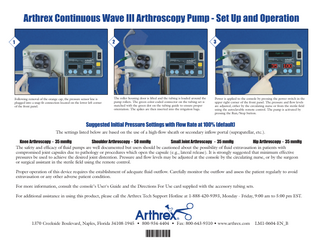
Arthrex Continuous Wave III Arthroscopy Pump - Set Up and Operation 1
2
3
Following removal of the orange cap, the pressure sensor line is plugged into a snap-fit connection located on the lower left corner of the front panel.
The roller housing door is lifted and the tubing is loaded around the pump rollers. The green color-coded connector on the tubing set is matched with the green dot on the tubing guide to ensure proper orientation. The spikes are then inserted into the irrigation bags.
Power is applied to the console by pressing the power switch in the upper right corner of the front panel. The pressure and flow levels are adjusted, either by the circulating nurse or from the sterile field using the autoclavable remote control. The pump is activated by pressing the Run/Stop button.
Suggested Initial Pressure Settings with Flow Rate at 100% (default) The settings listed below are based on the use of a high-flow sheath or secondary inflow portal (suprapatellar, etc.). Knee Arthroscopy - 35 mmHg Shoulder Arthroscopy - 5O mmHg Small Joint Arthroscopy - 35 mmHg Hip Arthroscopy - 35 mmHg The safety and efficacy of fluid pumps are well documented but users should be cautioned about the possibility of fluid extravasation in patients with compromised joint capsules due to pathology or procedures which open the capsule (e.g., lateral release). It is strongly suggested that minimum effective pressures be used to achieve the desired joint distention. Pressure and flow levels may be adjusted at the console by the circulating nurse, or by the surgeon or surgical assistant in the sterile field using the remote control. Proper operation of this device requires the establishment of adequate fluid outflow. Carefully monitor the outflow and assess the patient regularly to avoid extravasation or any other adverse patient condition. For more information, consult the console’s User's Guide and the Directions For Use card supplied with the accessory tubing sets. For additional assistance in using this product, please call the Arthrex Tech Support Hotline at 1-888-420-9393, Monday - Friday, 9:00 am to 5:00 pm EST.
1370 Creekside Boulevard, Naples, Florida 34108-1945 • 800-934-4404 • Fax: 800-643-9310 • www.arthrex.com
LM1-0604-EN_B
Troubleshooting Arthrex Technical Support should be informed immediately in the event of any damage or malfunctions in the equipment. Attempt the remedies listed below and in the User's Guide of the Operating Instruction Manual in the order in which they are presented.
PROBLEM SOLUTION
COMMON PROBLEMS AND REMEDIES:
* Check Tube *
Distention liquid bloody or cloudy
Console won’t power up
Console fails Self Diagnostic Test
1. Increase outflow. 2. Increase pressure.
1. Check AC mains power cord. 2. Try alternate power outlet. 3. Check AC mains fuses. 4. Return to Arthrex for repair.
1. Ensure no tubing is connected to the pump during power on sequence. 2. Return to Arthrex for repair.
Tubing sensor indicator not seated. Ensure that the tubing pressure plug is seated completely. Change tubing. Return to Arthrex for repair.
1. 2. 3. 4.
Doesn't pump when activated
Open all tubing clamps and shut-off valves. Ensure actual pressure is below target pressure. Check if the tubing is pinched, kinked, or blocked. Check whether the pressure sensor plug is seated completely and correctly. Return to Arthrex for repair.
1. 2. 3. 4. 5.
1. Roller Housing not secured – ensure locking lever is properly secured. 2. Return to Arthrex for repair.
Inadequate pressure
1. Increase pressure. 2. Reduce outflow. 3. Use high-flow cannulas.
* Door Not Closed *
No (or inadequate) flow
* Overpressure *
1. Increase outflow. 2. Manipulate joint to stress-free position.
Check that all tubing clamps are open. Check the settings for flow and pressure. Check if the tubing is pinched, kinked or blocked. Secure the roller housing door. Check that tubing seats correctly over the rollers. Verify use of high-flow cannulas. If failure remains, return to Arthrex for repair.
1. 2. 3. 4. 5. 6. 7.
* Pressure Fault *
Ensure adequate fluid supply. Decrease outflow. Check the tubing for damage and if it is pinched, kinked, or blocked. Check tubing for proper connections. Replace tubing. If failure remains, return to Arthrex for repair.
1. 2. 3. 4. 5. 6.