BBraun
AESCULAP Aicon sterile container system Instructions for Use
12 Pages
Preview
Page 1
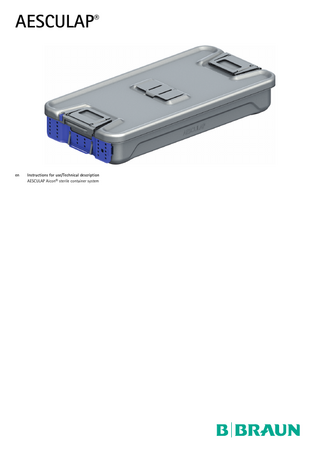
AESCULAP®
en
Instructions for use/Technical description AESCULAP Aicon® sterile container system
3
2
1 2
4 12
5 6
7
11 11
10
9
8
13 5 13
6
14
A
2
1 2 2 1 4
B
7
C
2
7
en en
AESCULAP® AESCULAP Aicon® sterile container system Legend 1 Lid 2 Lid lock 3 Perforation field cover 4 Plastic seal 5 Single-use/permanent filter 6 (Universal) filter holder 7 Bottom 8 Front panel 9 Holding clamp for front plate 10 Indicator plate holder 11 Signs for front plate 12 Condensate discharges (2 pcs) 13 Pushbutton 14 Lid seal
8.6 8.6.1 8.7 9 9.1 9.2 10 11 11.1
procedure... 9 Manual cleaning/disinfecting... 9 Manual cleaning with disinfecting cleaning by wipe disinfection... 10 Mechanical cleaning/disinfecting... 10 Mechanical neutral cleaning and thermal Disinfecting... 10 Care... 11 Maintenance and service... 11 Technical service... 11 Service addresses... 11 Disposal... 11 Extracts from relevant standards... 11 Standards cited... 11
1
About this document
Contents
These instructions for use describe important application and care instructions and provide – without claim to completeness – warning notices of possible dangers that can arise from non-observance.
1 1.1 1.2 2 3 3.1 3.2 4 5 5.1 5.2 5.3 6 7 7.1 7.1.1 7.1.2 7.2 7.3 7.3.1 7.3.2 7.3.3 7.3.4 7.3.5 7.3.6 7.3.7 7.3.8 7.4 8 8.1 8.2 8.3 8.4 8.4.1 4
About this document... Scope... Warnings... Product description... Areas of use and limitations of use... Intended use... Indications... Risks, adverse effects and interactions... Safety notes... General safety notes... Sterility... Limitations on reuse... First use... Working with the device... System set-up... Remove container lid... Changing the filters in lid and bottom... Function checks... Applications... Loading the sterile containers... Labeling and sealing the container... Loading the sterilizer... Sterilization... Unloading the sterilizer and releasing the sterile goods... Transporting the sterile container... Storing the sterile containers... Checking and commissioning the sterile materials... Troubleshooting list... Validated reprocessing procedure... General safety information... General information... Reusable products... Cleaning/Disinfection... Product-specific safety information on the processing
8.5 8.5.1
4 4 4 5 5 5 5 5 5 5 5 5 5 6 6 6 6 6 6 6 7 7 7 7 7 7 7 8 9 9 9 9 9
Note General risk factors associated with surgical procedures are not described in this documentation.
1.1
Scope
These instructions for use apply to all the components of the AESCULAP Aicon sterile container system. ► For article specific instructions for use and information on processing and material compatibility, see also Braun eIFU at eifu.bbraun.com
1.2
Warnings
Warnings make clear the dangers to patient, user and/or product that could arise during the use of the product. Warnings are labeled as follows: DANGER Indicates a potential danger. If it is not prevented, death or severe injuries may result. WARNING Indicates a potential danger. If it is not prevented, minor or moderate injuries may result. CAUTION Indicates a possible threat of material damage. If not avoided, the product may be damaged.
en
2
Product description
The Aesculap sterile container system meets the requirements of EN ISO 11607 Part 1. The Aesculap sterile container system is suitable for the following sterilization procedures: ■ Steam sterilization in a sterilizer acc. to EN 285 in fractionated vacuum process ■ Sterilization in ethylene oxide acc. to EN ISO 11135-1. ■ Sterilization with hydrogen peroxide: STERIS (VPRO 1Plus, VPRO 60, VPRO maX / maX 2), STERIZONE (VP4), STERRAD (100NX, 100S, NX) Hot air sterilization, gravitation or flow processes and formaldehyde sterilization are not applicable. Note When using hydrogen peroxide or ethylene oxide in sterilization, use the filter JJ617 that is suitable for this sterilization process! To assist drying in the sterilizer during steam sterilization, the AESCULAP AiconJJ800 sterile container system can optionally be equipped with the condensate drains (2 pce.). For this purpose, separate container bodies are required. Note In the case of container bottoms with condensate discharges, the last digit of the item number is always a "1," e.g. JJ121. Required components ■ Bottom (e.g. JJ110) ■ Lid (e.g. JJ410) ■ Filter retainer (JJ600) ■ Plastic seal (e.g. JJ700) ■ Filter (e.g. JJ612)
3
Areas of use and limitations of use
3.1
Intended use
The Aesculap sterile container system is a reusable sterilization container. It serves as a sterile goods package to hold sterile goods and/or textiles during sterilization and to maintain sterility during storage and transport under proper hospital conditions. Intended users are professionals trained in health care, especially in the fields of hospital hygiene and the processing of medical devices, or assistants working under the guidance and supervision of the former.
3.2
Indications
The Aesculap sterile container system has no clinical indication, but rather only the aforementioned intended use. No contraindications are known.
4
Risks, adverse effects and interactions
No risks, adverse effects and interactions can currently be identified.
5
Safety notes
5.1
General safety notes
► Prior to use of the product, check that the product is in good working
order, see Function checks. ► To prevent damage caused by improper setup or use and in order not to compromise the warranty and liability: – Use the product only according to these instructions for use. – Please observe the safety information and maintenance notes. – Never use damaged or faulty sterile containers. – Replace any damaged components immediately with original spare parts. ► Ensure that only persons with the requisite training, expertise or experience will handle the product and its accessories. ► Keep the instructions for use accessible for the users. ► Follow general guidelines and aseptic principles when handling contaminated items that have undergone or are to undergo sterilization. Note The user agrees to report all serious incidents occurring in connection with the product to the manufacturer and to the competent authority of the country in which the user is registered. Contamination of sterile materials The sealing of the sterile container and its germ barrier function will be compromised if the sterile container is combined with components from other manufacturers. ► Only combine AESCULAP Aicon sterile container products with each other.
5.2
Sterility
The product is delivered in an unsterile condition. ► Clean the new product after removing its transport packaging and prior to its initial sterilization.
5.3
Limitations on reuse
There are no known effects of processing resulting in damage to the product. Careful visual and functional testing prior to next use is the best way to identify a malfunctioning product, see Function checks.
6
First use
► Thoroughly clean the new sterile container prior to first use. ► After cleaning, use a suitable filter, see System set-up.
5
en
7
Working with the device
7.1
System set-up
Note Use an appropriate filter from Aesculap for the sterilization process.
7.3.1 Loading the sterile containers Maximum load height: up to about 1 cm below the edge of the container bottom Depending on the sterilization procedure, the following maximum loading of the sterile container (including the strainer basket) must be observed.
7.1.1 Remove container lid ► Pull both lid closures 2 on the top side of the lid 1 upward. ► Remove lid 1 from the bottom 7. ► Put lid 1 down and push lid closures 2 down to the stop.
Sterilization process
7.1.2 Changing the filters in lid and bottom Replace single use filter before every sterilization: ► Press the push buttons 13 on the universal filter retainer 6 simultaneously, see Fig. A. ► Remove the universal filter retainer 6. ► Insert a new filter 5 and remount the universal filter retainer 6. ► Press filter retainer 6 until locking catches can be heard to latch in place.
7.2
Manufacturer and equipment
1/1
1/2
3/4
Steam sterilization acc. to DIN EN 868-8 and DIN 58953-9
10
5
7.5
Sterilization with ethylene oxide acc. to EN ISO 11135-1
11.3
11.3
11.3
STERIS VPRO 1 Plus
Lumen
9.7
5.8
5.8
Non-Lumen
9.7
6.3
6.3
Flex
5.9
5.9
5.9
Lumen
9.7
5.8
5.8
Non-Lumen
9.7
6.3
6.3
Flex
5.9
5.9
5.9
Lumen
9.7
5.8
5.8
Non-Lumen
9.7
6.3
6.3
Flex
5.9
5.9
5.9
Lumen
9.7
5.8
5.8
Non-Lumen
9.7
6.3
6.3
6.2
6.2
6.2
DUO
6.6
6.6
6.6
Express
5.2
4.9
4.9
Flex
5.1
4.9
4.9
Standard
5.1
4.9
4.9
6.4
6.3
6.3
Advanced
4.9
4.9
4.9
Standard
4.9
4.9
4.9
STERIS VPRO 60
Function checks
► Visually inspect all components of the sterile containers for damage
and correct functioning prior to each use. ■ Metal parts are not deformedThe aluminum lid and bottom are not warped ■ Plastic parts are not damagedLid seals 14 are intact ■ The seal at filter holder 6 is undamaged (no cracks)the edges of the universal filter retainer 6 are seated in full-surface contact ■ The latch of filter holder 6 functions properly (engages) ■ The single-use filter 5 has been changed ■ The single-use filter 5 is undamaged (no kinks, holes or cracks) ■ The lid closure 2 is functional (grips under bottom edge) ■ For containers with condensate drains: – Condensate drain 12 is present, undamaged and engaged. – If necessary, fold condensate drain all the way up and remove it for visual inspection. ► Use sterile containers only if they have been visually inspected and are free from defects listed above. Replace any damaged components immediately with original spare parts, or have the damaged components repaired, see Technical service.
7.3
Applications
WARNING Risk of contamination of sterile goods by sterile containers that have not passed the function check! The sealing of the sterile container and its germ barrier function will be compromised if the sterile container is combined with components from other manufacturers. ► Only AESCULAP Aicon sterile container accessories/replacement parts with each other. CAUTION Risk of non-sterility of container contents! ► Never carry or lift the sterile container at the lid.
6
Maximum load [kg]
STERIS VPRO maX
STERIS VPRO maX 2
Program
STERIZONE VP4 STERRAD 100NX
STERRAD 100S STERRAD NX
Note Store sterile goods in wire baskets in suitable supports. When doing so, lay hollow materials, dishes, plates, etc with the opening facing downwards at a slant. Note Load the sterile container in such a way that filter retainer 6 is not obstructed. ► Pull up both cover lids 2 on the top of the cover 1 and set the cover 1
flush to the tray 7, see Fig. B. ► Push both lid closures 2 down to the stop in order to lock the lid 1 on the bottom 7, see Fig. B. ► Ensure that the cover sits correctly on the tray before the cover lock is activated. ► Ensure that both lid closures 2 audibly lock in place. If not: have the sterile container repaired, see Technical service.
en 7.3.2 Labeling and sealing the container ► After loading the sterile container: label container on the end faces. Note A front plate (e.g. JJ500) can also optionally be used to label the sterile container. ► When using a front plate 8:
– Snap in indicator sign holder 10, signs 11 and/or holding clamp 9 in front plate and/or insert labels in holder. – Snap front plate 8 in recesses on the end faces. ► After closing the sterile container, insert a plastic seal 4 (e.g. JJ700) at on the lid closure 2, see Fig. C. Note An indicator suitable for the sterilization process (Type 1 in accordance with EN ISO 11140-1) must be used! 7.3.3 Loading the sterilizer Prepare the sterile container and the sterilizer in the following way for loading the sterilizer: WARNING Risk of vacuum damage to the sterile container due to inadequate pressure equalization! ► Do not use outer packaging for the sterile containers. ► Never obstruct air flow through the perforation fields in the lid. ► Do not place foil packaging directly on the sterile container. Note The AESCULAP Aicon sterile container system can be sterilized with a perforation field cover JJ440 on it. ► Follow the sterilizer manufacturer’s recommendations. ► Always place heavy sterile containers at the bottom of the sterilizer.
Note AESCULAP Aicon sterile containers can be stacked in the sterilizer. 7.3.4
Sterilization
CAUTION Risk of sterilization failure! ► Sterilize the containers only by approved and validated sterilizing processes. ► For sterilization, use appropriate filters and seals only for the appro-
priate procedure.
7.3.5
Unloading the sterilizer and releasing the sterile goods
DANGER Risk of contamination from improperly sterilized materials! ► Prior to commissioning the sterile materials, check to ensure that the sterilization was successful. WARNING Risk of burns due to a hot sterile container after steam sterilization! ► Allow sterile containers to cool after sterilization. ► Make certain that the color of the indicator point has changed. ► Ensure that the plastic seal 4 is intact.
7.3.6
Transporting the sterile container
CAUTION Risk of non-sterility of container contents! ► Never carry or lift the sterile container at the lid. ► Transport the sterile container in such a way that mechanical damage will not occur. 7.3.7
Storing the sterile containers
Note The sterile containers may be stored in stacks. ► Store sterile containers in a dry, clean and protected place.
The loss of sterility is normally event-based and not time-based. Loss of sterility is not so much connected to the storage periods as to outside influences and the effects of storage, transport and handling. Therefore, blanket statements cannot be made regarding appropriate storage periods, see EN ISO 11607-1. 7.3.8 Checking and commissioning the sterile materials The contents of a sterile container can only be considered to be sterile if the sterile container is sterilized, stored and transported as specified, and opened under aseptic conditions (operating room). ► Verify that the indicator colour has changed. ► Ensure that all container components are intact, particularly: – Plastic seal 4 – Single-use filter 5 – Lid seal 14 ► Ensure that the condensate drain is present, undamaged and engaged. If this is not the case, the sterile materials must be processed again.
► Ensure that the maximum load capacity of the steam sterilizer, as
specified by the manufacturer, is not exceeded. ► Ensure that the sterilization medium can reach all products stored in
the sterile container. Note A product cooling time of 30 minutes outside of the sterilizer is recommended after steam sterilization.
7
en 7.4
Troubleshooting list
Malfunction
Cause
Excessive amounts of condensate inside the sterile container
Temperature of sterile materials too low prior to ster- Allow materials for sterilization to reach room temperailization ture (approx. 20 °C) Sterile container too heavy
Remedy
1/1 container: with instruments: max. load 10.0 kg 1/2 container: max. load 5.0 kg 3/4 container: max. load 7.5 kg
Materials for sterilization incorrectly packed
Position hollow materials, dishes, plates, etc with the opening facing downwards at a slant.
Sterile container incorrectly positioned in sterilizer
Always place heavy sterile containers at the bottom. Place sterile container with condensate outlet in sterilizer horizontally. Sterilization rack should not have any slope.
Sterile containers processed immediately after steril- Allow sterile containers to cool down to room temperaization ture prior to processing. Sterile containers improperly positioned during cool- Do not store sterile containers on a floor or in a drafty ing phase place. Store sterile containers in a temperature-controlled room with a constant relative humidity and temperature. Sterilizer properties do not comply with DIN EN 285
Have sterilizer serviced regularly. Check drying vacuum. Check drying time. Check steam quality and upgrade if necessary.
Condensate on the lid
Empty-cycle and vacuum test not run daily before sterilization begins
Run empty-cycle and vacuum test daily before beginning sterilization.
Unsuitable sterilizer cycle selected
Select cycle in accordance with load.
Sterilizer door left open too long, sterilizer cooled down
Load and unload sterilizer quickly.
Incorrect loading configuration
Loading configuration according to validation and loading specifications.
Sterilizer properties do not meet DIN EN 285 standards
Have sterilizer serviced regularly. Check drying vacuum. Check drying time. Check steam quality and upgrade if necessary.
No clear color change of indicator Sterilization performed incorrectly (type 1 according to EN ISO 11140-1) Sterilizer defective
Sterile containers deformed
Container lid cannot be positioned or locked on the bottom component
8
Have the sterilizer inspected by the manufacturer.
Accessory with indicator stored incorrectly
Observe storage conditions as specified on the packaging of the accessory.
Expiration date of accessory with indicator passed
Repeat sterilization with new accessory with indicator.
Sterile container stored improperly
Do not store sterile container that has been sterilized with steam in the immediate vicinity of sterile materials that have been sterilized with H2O2.
Perforations covered during sterilization
Do not cover the perforation field from either the inside or the outside.
Permissible loading height exceeded
Observe the loading heights, see Loading the sterile containers
Container lid or bottom are deformed/damaged due to improper handling
Replace container lid or bottom, or have components repaired by Aesculap Technical Service, see Technical service.
en
8 8.1
Validated reprocessing procedure
8.4
Cleaning/Disinfection
General safety information
8.4.1
Product-specific safety information on the processing procedure
Note Adhere to national statutory regulations, national and international standards and directives, and local, clinical hygiene instructions for reprocessing. Note For patients with Creutzfeldt-Jakob disease (CJD), suspected CJD, or possible variants of CJD, observe the relevant national regulations concerning the reprocessing of products. Note Mechanical reprocessing should be favored over manual cleaning as it gives better and more reliable results. Note It should be noted that successful reprocessing of this medical device can only be guaranteed following prior validation of the reprocessing method. The operator/reprocessing technician is responsible for this. The recommended cleaning chemical was used for validation. Due to process tolerances, the manufacturer's specifications can only serve as an approximate guide for assessing the processing procedures applied by the individual operator/processors.
CAUTION Damage to the product due to inappropriate cleaning/disinfecting agents and/or excessive temperatures! ► Observe specifications regarding concentration, temperature and exposure time.
8.5
Manual cleaning/disinfecting
► Prior to manual disinfecting, allow water to drip off for a sufficient
length of time to prevent dilution of the disinfecting solution. ► After manual cleaning/disinfection, check visible surfaces visually for
residues. ► Repeat the cleaning/disinfection process if necessary.
Note For up-to-date information on reprocessing and material compatibility, see also the Aesculap extranet at eIFU.bbraun.com
8.2
General information
Dried or affixed surgical residues can make cleaning more difficult or ineffective and lead to corrosion. Therefore the time interval between application and reprocessing should not exceed 6 h; also, neither fixating pre-cleaning temperatures >45 °C nor fixating disinfecting agents (active ingredient: aldehyde) should be used. Only process chemicals that have been tested and approved (e.g. VAH or FDA approval or CE mark) and which are compatible with the product’s materials according to the chemical manufacturers’ recommendations may be used for processing the product. All the chemical manufacturer's application specifications must be strictly observed. Failure to do so can result in the following problems: ■ If white residue is observed on the container, this may have been caused by a high pH (e.g. caused by alkaline cleaning solution), water quality or deviating process parameters. Check pH level of water and detergent solution throughout the process – reduce to a pH of 6.5 to 8.5. The white residue does not impact form, fit or function ■ Material damage such as corrosion, cracks, fracturing, premature aging or swelling. ► Only use cleaners that have been approved by the cleaner’s manufacturer for medical devices made out of aluminum. ► Do not use metal cleaning brushes or other abrasives that would damage the product surface and could cause corrosion ► For detailed information on hygienically safe and material-friendly/ careful processing, please refer to www.a-k-i.org Header "AKIBrochures", "Red Brochure".
8.3
Reusable products
There are no known effects of processing resulting in damage to the product. Careful visual and functional testing prior to next use is the best way to identify a malfunctioning product.
9
en 8.5.1
Manual cleaning with disinfecting cleaning by wipe disinfection
Phase
Step
D [°C/°F]
t [min]
Conc. [%]
Water quality
Chemistry
I
Cleaning
RT (cold)
-
-
D–W
-
II
Drying
RT
-
-
-
-
III
Wipe disinfection
-
>1
-
-
a Denatured alcohol 70% (B. Braun ethanol)
b Aldehyde-free surface disinfectants (e.g. Melisptol HBV cloths)
IV
Final rinse
RT (cold)
0.5
-
FD–W
not required
Rinse off cleaning chemicals; do not leave residues
V
Drying
RT
-
-
-
-
DW: Drinking water FD–W: Fully desalinated, demineralized water (low-germ, max. 10 CFU / 100 ml, as well as low endotoxin contamination, max. 0.25 endotoxin units/ml) RT: Room temperature Phase I
Phase III
► Clean the product under running tap water, using a suitable cleaning
Note For Primeline, only use the following cleaning agent: Denatured alcohol 70% (B. Braun ethanol)
brush until all visible residues have been removed from the surfaces. ► Mobilize non-rigid components, such as set screws and hinges, during cleaning. Phase II ► Dry the product in the drying phase with suitable equipment (e.g. cloth, compressed air).
8.6
► Wipe all surfaces of the product with a single-use disinfecting wipe.
Phase IV ► Rinse disinfected surfaces under running demineralized water after
Mechanical cleaning/disinfecting
8.6.1 Mechanical neutral cleaning and thermal Disinfecting Machine type: single-chamber cleaning/disinfection device without ultrasound Phase
Step
T [°C/°F]
t [min]
Water quality
Chemicals
I
Pre-rinse
<25/77
3
D–W
–
II
Cleaning
55/131
10
FD–W
Neutral cleaner (e.g. B. Braun Helimatic Cleaner neutral in 0.5% working solution): ■ pH neutral (pH 6.5 to 8.5)
III
Intermediate rinse
>10/50
1
FD–W
–
IV
Thermal disinfection
90/194
5
FD–W
Other process parameters may be feasible with agreement by the hospital hygienist.
V
Dry
120/248
10
-
D–W: Drinking water FD–W: Fully desalinated, demineralized water (low-germ, max. 10 CFU / 100 ml, as well as low endotoxin contamination, max. 0.25 endotoxin units/ml) ► Check visible surfaces for residues after mechanical cleaning/disinfecting. If white residue is observed on the container, this may have been caused by a high pH (e.g. caused by alkaline cleaning solution), water quality or deviating process parameters. Check pH level of water and detergent solution throughout the process – reduce to a pH of 6.5 to 8.5. The white residue does not impact form, fit or function. ► Repeat the cleaning/disinfection process if necessary. Note Temperatures of up to 120 °C are permitted for machine drying with hot air.
10
en 8.7
Care
► Oil
closure hinges with suitable maintenance oil (e.g. AESCULAPSTERILIT I oil spray JG600 or maintenance oil JG598).
9
Maintenance and service
9.1
Technical service
WARNING Risk of injury and/or malfunction! ► Do not modify the product. ► For service and repairs, please contact your national B. Braun/
Aesculap agency. Modifications carried out on medical technical equipment may result in loss of guarantee/warranty rights and forfeiture of applicable licenses.
9.2
Service addresses
Aesculap Technischer Service Am Aesculap-Platz 78532 Tuttlingen / Germany Phone:+49 (7461) 95 -1601 Fax: +49 (7461) 14 -939 E-Mail:ats@aesculap.de Other service addresses can be obtained from the address indicated above.
10
Disposal
Note The user institution is obliged to process the product before its disposal, see Validated reprocessing procedure ► Adhere to national regulations when disposing of or recycling the
product, its components and its packaging.
11
Extracts from relevant standards
11.1
Standards cited
The following standards are cited in connection with the sterile containers: ■ EN ISO 11135-1: Sterilization of health care products - ethylene oxide - part 1: Requirements for development, validation and routine control of a sterilization process for medical devices ■ EN ISO 11607: Packaging for terminally sterilized medical devices – Part 1 ■ EN ISO 11140-1: Sterilization of health care products - chemical indicators - part 1: general requirements ■ ANSI/AAMI/EN ISO 17665-1: Sterilization of health care products Moist heat - Part 1 ■ EN 868-8: Packaging for terminally sterilized medical devices – Part 8 ■ EN 285: Large steam sterilizers
11