14 Pages
Preview
Page 1
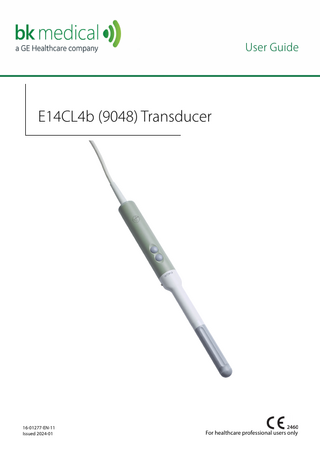
User Guide
E14CL4b (9048) Transducer
16-01277-EN-11 Issued 2024-01
For healthcare professional users only
LEGAL MANUFACTURER
BK Medical ApS
Mileparken 34 2730 Herlev Denmark Tel.:+45 44528100 / Fax:+45 44528199 www.bkmedical.com Email: info@bkmedical.com (BK Medical hereinafter referred to as BK) The connector label on a BK Medical transducer contains information about the date of manufacture. BK Medical Customer Satisfaction
Input from our customers helps us improve our products and services. Your opinions are important to us. You are always welcome to contact us via your BK Medical representative or by contacting us directly. Incident Reporting
Should any serious incident occur in relation to this device, you should report this to the manufacturer and your local competent authority.
E14CL4b = Ref. Type 9048 © 2014 BK Medical
Information in this document may be subject to change without notice.
Contents Introduction... 5 Intended use... 5 Indications for use... 5 Imaging Plane... 5 General Information... 6 Service and Repair... 6 Caring for the Transducer... 7 Reprocessing... 7 Starting Imaging... 7 Connecting the Transducer... 7 Changing Frequency... 8 Using a Transducer Cover... 8 Using the Transducer Control Button... 9 Changing Orientation... 9 Endorectal Imaging with E14CL4b... 9 Adjusting Image Area and Using Expanded Sector (Trapezoidal View)... 9 Puncture and Biopsy Facilities... 10 Reusable Needle Guide UA1232... 10 Performing Puncture and Biopsy... 11 Prostate Volume Determination... 12 Radioactive Source Implantation... 12 Cleaning after Puncture and Biopsy... 13 Disposal... 13
An electronic copy of this document in the official language of your member state can also be accessed through our website. English source version 16-01277-EN-11
3
Introduction This is the user guide for the E14CL4b (9048) transducer (hereinafter referred to as E14CL4b), and it must be used together with the Care and Cleaning user guide which contains important safety information. Caution Rx-c1 Physicians only
United States Federal law restricts this device to sale by or on the order of a physician.
Intended use The transducer is intended for diagnostic ultrasound imaging or fluid flow analysis of the human body.
Indications for use E14CL4b is suitable for transrectal imaging, transvaginal imaging, guidance of all transperineal interventional procedures including brachytherapy and cryotherapy treatments. It is also suitable for strain elastography1 and contrast imaging. E14CL4b contains two arrays - a curved array for transverse (T) imaging, and a linear array for sagittal (S) imaging. Both arrays can be used separately or they can be used simultaneously. When using the simultaneous biplane feature, you are able to view two planes at once with a single transducer, and this helps determine the true position of the needle and its tip during puncture and biopsy.
Patient Population The patient population is adults.
Imaging Plane Sagittal Button Transverse Button
Tip
Figure 1. E14CL4b.
1. Imaging mode not available in Japan.
E14CL4b User Guide (16-01277-EN-11)
Introduction
5
Sagittal Plane
Transverse Plane
Figure 2. Imaging planes for E14CL4b.
General Information Product specifications, acoustic output data and data about EMC (electromagnetic compatibility) for this transducer can be found in the Product Data Sheet and the Technical Data (BZ2100) that accompany this user guide. WARNING GS-w2 If at any time the system malfunctions, or the image is severely distorted or degraded, or you suspect in any way that the system is not functioning correctly: 1 Remove all transducers from contact with the patient. 2 Turn off the system. Unplug the system from the wall and make sure it cannot be used until it has been checked. 3 Contact your BK service representative or hospital technician. Do not try to repair the system yourself.
WARNING GS-w5 Do not run over transducer cables with system wheels or other heavy equipment. This can damage the cable, leading to degradation and/or corruption of the ultrasound image.
WARNING AO-w1 To avoid tissue damage, always keep the exposure level (the acoustic output level and the exposure time) as low as possible.
Service and Repair WARNING SR-w1 Service and repair of BK electromedical equipment must be carried out only by the manufacturer or BK authorized service representatives. BK Medical reserves the right to disclaim all responsibility, including but not limited to responsibility for the operating safety, reliability and performance of equipment serviced or repaired by other parties. After service or repairs have been carried out, a qualified electrician or hospital technician should verify the safety of all equipment.
6
Issued 2024-01
E14CL4b User Guide (16-01277-EN-11)
Caring for the Transducer The transducer may be damaged during use or reprocessing, so it must be checked before use for cracks or irregularities in the surface, following the procedure in Care and Cleaning. It should also be checked thoroughly once a month following the same procedure.
Reprocessing To ensure the best results when using BK Medical equipment, it is important to maintain a strict cleaning routine. Complete details and procedures can be found in Care and Cleaning that accompanies this user guide. A list of reprocessing methods that the transducer can withstand are listed in the Product Data Sheet. Sterile covers are available. See the Product Data Sheet for more information. WARNING Reproc-w2 Users of this equipment have an obligation and responsibility to provide the highest possible degree of infection control to patients, co-workers and themselves. The instructions in this book are meant as a guide. To avoid cross-contamination, follow all infection control policies (including for reprocessing, packing and storage) for personnel and equipment that have been established for your office, department or hospital.
Starting Imaging Before use, all equipment must be reprocessed according to expected use. WARNING T-w5 To prevent electrical shock and damage to the transducer, the connector pins in the transducer plug must always be completely dry before you connect to a system.
Connecting the Transducer WARNING GS-w4a It is essential for the patient’s safety that only the correct equipment is used. • Do not use other manufacturers’ transducers with BK ultrasound systems. • Do not use BK transducers with other manufacturers’ systems. • Do not use unauthorized combinations of transducers and needle guides.
The transducer is connected to the system using the array transducer socket on the system. To connect, flip the system’s locking lever to the right. Align the transducer plug to the system socket and insert securely. Flip the system’s locking lever to the left to lock it.
E14CL4b User Guide (16-01277-EN-11)
Reprocessing
7
When connected, the transducer complies with Type BF requirements of EN60601-1 (IEC 60601-1). WARNING T-w12 To avoid patient injury or damage to a transducer, extra caution may be required when you use a mechanical stepper cradle or robotic accessory with the transducer. This is particularly important when adjusting the cradle/bed position after the transducer has been inserted into the patient. The stepper cradle or robotic accessory may exert excessive force when the transducer position is adjusted, which could harm the patient or damage the transducer.
NOTE: BK Medical equipment only supports the CIVCO cradle and BK Medical may not be held responsible if the E14CL4b is connected to other hardware.
Changing Frequency The multifrequency imaging (MFI) control enables you to select the imaging frequency. See the applicable system user guide for instructions.
Using a Transducer Cover BK recommends the use of a sterile transducer cover to reduce the risk of crosscontamination. See the Product Data Sheet for a list of available transducer covers. Follow local guidelines for the use of transducer covers in your area. NOTE: In the United States of America, it is recommended to use transducer covers
that have been market cleared. In Canada, use only licensed transducer covers. In Europe, transducer covers must be CE-marked. WARNING TC-w1 Some transducer covers can contain latex. Because of reports of severe allergic reactions to medical devices containing latex (natural rubber), the FDA advises health-care professionals to identify their latex-sensitive patients and be prepared to treat allergic reactions promptly.
1 2 3
4
8
Apply sterile gel to the tip of the transducer or fill the cover with 1 to 2 ml of sterile water. Pull the transducer cover over the transducer. Check for air bubbles between the cover and the transducer and even out if necessary before proceeding. This improves screen imaging by preventing image artifacts caused by air bubbles. Apply a small amount of gel to the outside of the cover before imaging and reapply frequently. This creates a good acoustic contact between the skin and the transducer.
Issued 2024-01
E14CL4b User Guide (16-01277-EN-11)
Follow these precautions when putting sterile covers on a transducer: • • •
Wear sterile gloves. When using a needle guide, place it gently over the cover and secure it, following the instructions for the puncture attachment. Verify that the cover has not been damaged in the process. If it has, repeat the procedure with a new transducer cover.
Caution T-c3 Use only water-based gel (sterile if you are using a sterile transducer cover). Products containing parabens, petroleum, or mineral oils may harm the transducer or transducer cover.
Using the Transducer Control Button The transducer has two control buttons, one for the sagittal array and one for the transverse array (Fig. 1). Pressing the button activates (starts) or freezes (stops) imaging in that plane. Press the button for more than one second to make a copy of the image.
Changing Orientation To change the orientation of the image on the monitor, refer to the applicable system user guide for instructions.
Endorectal Imaging with E14CL4b E14CL4b is designed for simultaneous biplane imaging of the prostate. WARNING Colo-w1 Do not use excessive force during insertion. Do not make excessive lateral movements during or after insertion. Risk of injury or tissue damage to the patient could occur under certain circumstances. A digital palpation of the rectum may need to be carried out by a clinician prior to insertion or use of the probe as a precautionary measure.
Adjusting Image Area and Using Expanded Sector (Trapezoidal View) The width of the image area can be adjusted using the Width key on the scanner’s control panel. See the applicable system user guide for instructions. With the Expanded Sector feature and E14CL4b, you can increase the transverse sector angle from a default width of 140° to 180°. And, you can increase the default sagittal view of 65mm to a trapezoidal view, which provides an additional 15°on each side.
E14CL4b User Guide (16-01277-EN-11)
Endorectal Imaging with E14CL4b
9
Figure 3. Dotted lines indicating expanded sectors on E14CL4b.
Puncture and Biopsy Facilities E14CL4b can be used for puncture and biopsy. The needle guides are illustrated in the following pages with a brief description of their assembly, use and operating instructions.
Reusable Needle Guide UA1232 Needle guide UA1232 (Fig. 4) is designed for transperineal puncture and biopsy. It consists of: • A needle guide and a mounting ring with a lock screw. The needle guide comprises 9 parallel guide channels, spaced 5mm apart, each with an internal diameter of 2.1mm, suitable for an 14G needle.
The guide channels are angled at 0° to the transducer’s longitudinal axis and 90° to the transverse imaging plane. Note: The needle guide can be adjusted 90mm lengthwise with respect to the mounting ring using the adjustment screw .
Figure 4. Needle guide UA1232.
10
Issued 2024-01
E14CL4b User Guide (16-01277-EN-11)
To mount UA1232: 1
2 3
Loosen the lock screw and slide the attachment over the tip of the transducer until the lock screw pressure-pad meets the steel stud on the side of the transducer. The needle guide should be correctly positioned (Fig. 5) before the lock screw is tightened. No force should be used when attaching the needle guide to the transducer.
Figure 5. E14CL4b with needle guide UA1232.
All parts of the needle guide can be autoclaved or disinfected by immersion in a suitable solution.
Performing Puncture and Biopsy WARNING P-w1 Before you start imaging, verify that the type number or name of the transducer and the type number or description of the needle guide you are using match the number displayed on the monitor. Also make sure that the needle guide is positioned correctly. If the numbers do not match, or if the needle guide position is not correct, the puncture line on the monitor may not correspond to the true puncture path in the tissue. In case of any inconsistency, stop imaging, turn off the system, and contact your BK service representative.
WARNING P-w4 The puncture line on the image is an indication of the expected needle path. To avoid harming the patient, the needle tip echo should be monitored at all times so any deviation from the desired path can be corrected.
If the transducer is not sterilized, cover it with a sterile transducer cover. If the transducer cover is damaged when attaching the puncture attachment, replace it with a new cover. See the Product Data Sheet for a list of available transducer covers. Press/tap the Puncture or Biopsy control on the system to superimpose a puncture line on the scan image.
E14CL4b User Guide (16-01277-EN-11)
Performing Puncture and Biopsy
11
If more than one puncture line is available, refer to the applicable system user guide for instructions on how to change which one appears. Push the slider so the needle guide touches the perineum, then move the transducer until the puncture line transects the target. Insert the needle and monitor as it moves along the puncture line to the target. The puncture line will differ depending on the imaging plane orientation. In the sagittal plane, the puncture path is indicated by a line of dots. The distance between each puncture dot is 5mm. In the transverse plane, a single dot indicates the point at which the needle will transect the imaging plane. WARNING TC-w4 If you detach the needle guide during interventional procedures, the transducer cover could be damaged. To avoid cross-contamination, cover the transducer with a new transducer cover before reattaching the needle guide.
To remove the puncture line from the scan image, refer to the applicable system user guide for instructions. WARNING P-w5 Avoid unnecessary tissue damage. When performing a biopsy, always make sure that the needle is fully drawn back inside the needle guide before moving the transducer. .
Figure 6. Illustration of the puncture lines for puncture attachment UA1232.
Prostate Volume Determination Refer to the system user guide for instructions on how to carry out a prostate volume determination, and the best procedure to use.
Radioactive Source Implantation E14CL4b can be used with the CMS AccuseedTM Brachystepper System and with CIVCO AccuCare stepper units for radioactive seed implantation.
12
Issued 2024-01
E14CL4b User Guide (16-01277-EN-11)
Please consult the appropriate stepper documentation for instructions on Source Implantation, including Preplanning, Needle Loading and Implantation. E14CL4b should be prepared for transrectal imaging and biopsy as described earlier in this guide, and mounted and ’’locked’’ in the stepping unit. The volume study of the prostate is performed, the radiation dose planned and the needles loaded. WARNING B-w5 Always place the cradle in the ’’locked’’ position before seed implantation. When the cradle is in this position, the matrix on the stepping unit corresponds with the matrix puncture pattern in the transverse plane on the scanner’s monitor.
To superimpose the source matrix on to the monitor, refer to the system user guide for further details. Before starting source implantation, anchor the prostate to the matrix using thread or needles to prevent it moving during needle placement. Always place the needles individually, starting at the top of the matrix according to the predetermined sequence. Using a transverse view of the prostate, advance the needle. Change to the sagittal plane to find the position of the needle on the screen and monitor it during insertion. When the needle is in place, the radioactive sources can be expelled into the gland. The needle is then removed. The sagittal plane can be used to check the position of the radioactive sources. Repeat this sequence until implantation is complete. The anchors can then be removed.
Cleaning after Puncture and Biopsy WARNING Reproc-w3 Immediately after use, you must pre-clean the device until visually clean (including device lumens if existing). Conduct the thorough cleaning process as soon as possible after use in order to prevent soil drying on the surface. Dried soil can lead to inefficient cleaning, disinfection and sterilization, causing a risk of crosscontamination.
Use a suitable brush to make sure that biological material and gel are removed from all channels and grooves. See Care and Cleaning for cleaning instructions.
Disposal When the transducer is scrapped at the end of its life, national rules for the relevant material in each individual land must be followed. Within the EU, when you discard the transducer, you must send it to appropriate facilities for recovery and recycling.
E14CL4b User Guide (16-01277-EN-11)
Disposal
13
WARNING D-w1 For disposal of contaminated items such as transducer covers or needle guides or other disposable items, follow disposal control policies established for your office, department or hospital.
14
Issued 2024-01
E14CL4b User Guide (16-01277-EN-11)