Quick Reference Guide
2 Pages
Preview
Page 1
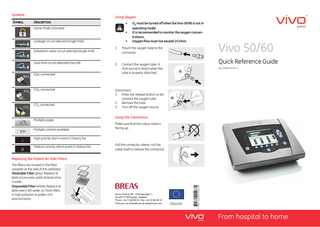
Symbols SYMBOL
Using Oxygen DESCRIPTION
•
Home Mode activated • •
Leakage circuit selected (single limb) Exhalation valve circuit selected (single limb) Dual limb circuit selected (Vivo 60) iOxy connected
FiO2 connected
CO2 connected
Multiple pages Multiple content available
O2 must be turned off when the Vivo 50/60 is not in operating mode! It is recommended to monitor the oxygen concentrations. Oxygen flow must not exceed 15 l/min.
1.
Mount the oxygen tube to the connector.
2.
Connect the oxygen tube. A click sound is heard when the tube is properly attached.
Quick Reference Guide Doc. 004987 En-Eu L-1
Disconnect: 1. Press the release button to disconnect the oxygen tube. 2. Remove the tube. 3. Turn off the oxygen source.
Using the Connectors Make sure that the colour mark is facing up.
High priority alarm event in history list Medium priority alarm event in history list
Vivo 50/60
Pull the connector sleeve, not the cable itself to release the connector.
Replacing the Patient Air Inlet Filters The filters are located in the filter cassette at the side of the ventilator. Washable Filter (grey): Replace at least once a year, wash at least once a week. Disposable Filter (white): Replace at least every 4th week, or more often in high pollution or pollen-rich environments. ENGLISH
Quick Usage Guide This is not a complete guide for the Vivo 50/60. See your manual for complete instructions.
Attach the Click-on Battery 1.
Switching On/Off Press the On/Off button on the side panel.
2.
Use a thin stick to open the cover for the click-on battery connectors. Make sure the cover is completely opened.
2.
To start treatment and enter operating mode first press and hold the Start/Stop button on the front panel.
Tilt the Vivo 50/60 into an upright position. Once in position, a clicking sound should be heard.
Release the Start/Stop button when the progress bar is filled.
1.
To stop treatment and enter standby mode first press and hold the Start/Stop button on the front panel.
2.
Release the Start/Stop button when the progress bar is filled.
3.
3.
Press the On/Off button on the side panel within 5 seconds. Press the button firmly.
Stop treatment before disconnecting the patient circuit. Connecting a single limb patient circuit:
Hold the Vivo 50/60 as shown in the picture, in order to target the click-on battery holders (marked with circles).
Start/Stop Treatment 1.
Replacing the Patient Circuit
1.
Connect the patient circuit to the patient air outlet of the ventilator. Connect the control pressure tubing to the exhalation valve control pressure outlet of the Vivo 50/60. Connect the other end of the patient circuit to the patient interface.
2.
Make sure that the circuit icon matches the connected circuit type and insert (Vivo 60).
Connecting a dual limb patient circuit (Vivo 60): 4.
Use the screw to secure the click-on battery by pressing it in and turn clockwise.
5.
When attached, the click-on battery icon will appear in the icon field.
1.
Connect one patient tube to the patient air outlet of the ventilator. Connect the other patient tube to the exhaled air inlet of the Vivo 60. Connect the other end of the patient circuit to the patient interface.
2.
Make sure that the circuit icon matches the connected circuit type and insert.
i-Button Use the i-button to get explanations about settings and alarms.
Refer to the Vivo 60 Operating Manual for instructions on the use of Adult and Paediatric patient circuits and inserts.