User and Installation Guide
86 Pages
Preview
Page 1
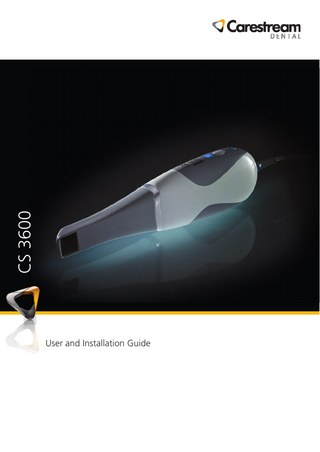
CS 3600 User and Installation Guide
Notice No part of this publication may be reproduced, stored in a retrieval system, translated to another language, or transmitted in any form by any means, electronic, mechanical, photocopied, recorded, or otherwise, without prior written permission. The information in this document is subject to change. Neither Carestream Health, Inc. nor any of its subsidiaries shall be liable for errors contained herein or for incidental damages in conjunction with the furnishing, performance, or use of this material. We recommend that you thoroughly familiarize yourself with this Guide in order to make the most effective use of your system. WARNING: We recommend that you consult the “Safety, Regulatory, and Technical Specifications User Guide” before using the CS 3600 Systems. Carestream Health is a trademark of Carestream Health, Inc. All other trademarks and registered trademarks are the property of their respective holders. US Federal law restricts this device to sale by or on the order of a dentist.
Manual Name: CS 3600 User and Installation Guide Part Number: 9J8267 Revision Number: 02 Print Date: 2016 - 12
Contents
Chapter 1
Conventions in This Guide... 1
Conventions in This Guide Chapter 2
CS 3600 Overview... 3
CS 3600 Overview
CS 3600 Holder Overview... 5 CS 3600 USB Cable Storage... 7
Chapter 3
Minimum Computer System Requirements... 9
CS 3600 Software
General Software Overview... 9
Overview
Imaging Software... 9 CS 3600 Acquisition Interface Overview... 10 Toolbar Overview... 11 Select Acquisition Type Window... 14 Preparation Check... 15 Arch Display... 15 Preferences Dialog Boxes Overview... 16 General Preferences... 16 Scanner Preferences... 17 Tools Preferences... 18
Chapter 4
Setting Up the CS 3600... 19
Setting Up the
Using the CS 3600 Desktop Holder... 21
CS 3600
Installing the CS 3600 Desktop Holder... 21 Installing the CS 3600 Wall Mount Holder... 22
Chapter 5
Using the Imaging Software... 23
Getting Started
Accessing the Acquisition Interface... 23 Accessing the Acquisition Interface Using the Imaging Software... 23 Accessing the Acquisition Interface from Your Practice Management Software... 23 Setting Up Preferences... 24 Viewing the CS 3600 Tutorials... 24 CS 3600 Tools and Tips... 25 Tooth Preparation... 25 CS 3600 Position... 25
CS 3600 User and Installation Guide (9J8267)_Ed02
iii
Important Scanning Procedures- Restoration Acquisition... 25 Scanning One Surface at a Time... 25 Scanning Each Tooth Individually... 25 Important Scanning Procedures- Orthodontic Acquisition... 26 Scanning One Surface at a Time... 26 Scanning Each Tooth Individually... 26 Important Scanning Procedures- Implant Acquisition... 26 Scanning One Surface at a Time... 26 Scanning Each Tooth Individually... 26 Scanning Metal, Crowns, or Holes... 27 Removing Soft-Tissue Artifacts, Unwanted Views, and Mismatches... 27 Preparing the CS 3600... 28 Chapter 6
Scanning Teeth on the Upper and Lower Jaw... 29
Acquiring a
Scanning the Buccal Bite Registration... 33
3D Model for
Preparation Selection... 35
Restoration
Check... 37 Drawing Margin Lines... 40 Automatically Drawing a Margin Line... 40 Manually Drawing a Margin Line... 42 Selecting 2D Images... 44 Reviewing a Scan and Removing Unwanted Views Using Scan History Check... 45
Chapter 7
Scanning Teeth on the Upper and Lower Jaw... 47
Acquiring a
Scanning the Buccal Bite Registration... 50
3D Model for
Check... 52
Orthodontics
Selecting 2D Images... 55 Reviewing a Scan and Removing Unwanted Views Using Scan History Check... 56
Chapter 8
Scanning Teeth on the Upper and Lower Jaw... 60
Acquiring a
Scanning the Buccal Bite Registration... 64
3D Model for
Using the Free Cut Tool to Cut Out the Implant Area... 66
Implants
Acquiring the Scan Body on the Implant Jaw... 68 Check... 69 Selecting 2D Images... 73
iv
Reviewing a Scan and Removing Unwanted Views Using Scan History Check... 74 Chapter 9
Cleaning, Disinfecting, and Sterilizing... 77
Maintenance Chapter 10
Factory Address... 79
Contact Information
Manufacturer’s Address... 79 Authorized Representatives... 79
CS 3600 User and Installation Guide (9J8267)_Ed02
v
1
Conventions in This Guide
Conventions in This Guide The following special messages emphasize information or indicate potential risk to personnel or equipment:
WARNING: Warns you to avoid injury to yourself or others by following the safety instructions precisely.
CAUTION: Alerts you to a condition that might cause serious damage.
Important: Alerts you to a condition that might cause problems.
Note: Emphasizes important information.
Tip: Provides extra information and hints.
CS 3600 User and Installation Guide (9J8267)_Ed02
1
2
Chapter 1 Conventions in This Guide
2
CS 3600 Overview
The CS 3600 is designed to acquire 3D still images in the following modes: •
Lower jaw Upper jaw Buccal bite registration
• •
CS 3600 Overview Figure 1 CS 3600 Components Overview
1
Reusable tip
There are two types of tips: Normal, facing downward, and Side, facing left. Tips are autoclavable for up to 20 times.
2
Mode indicators
•
Lower jaw scan mode
•
Upper jaw scan mode
•
Buccal bite registration mode
Note: The mode indicators and the power button blink rapidly if the CS 3600 is overheating. 3
Mode button
Press the button to switch between different modes.
CS 3600 User and Installation Guide (9J8267)_Ed02
3
4
Power button
• •
Press one second to power ON. Press three seconds to power OFF.
Power indicator LED: •
The CS 3600 is active.
•
When the brightness changes gradually from dark to light and light to dark, the CS 3600 is inactive, disconnected, or the tip is not installed.
•
If the light is blinking rapidly and the Overheating icon is displayed on the Acquisition interface, place the CS 3600 in the holder for 5 to 10 minutes. The CS 3600 will become inactive and cool down.
•
Power is OFF.
5
USB connection indicator
•
Connected.
•
4
Not connected.
6
Scanner connector
Plugs into the large jack on the end of the power box.
7
USB cable
One end of the cable is hard-wired to the power box, and the other end is connected to a USB port on the computer.
8
Power box/cable
Connects the scanner to the power adapter.
9
Power adapter
One end of the adapter is inserted in the small jack on the power box, and the other end is inserted in the power outlet.
Chapter 2 CS 3600 Overview
CS 3600 Holder Overview The CS 3600 holder can be used as a desktop or a wall mount holder. Place the CS 3600 in the holder when you are not using it. Figure 2 CS 3600 in Desktop Holder
Figure 3 CS 3600 in Wall Mount Holder
CS 3600 User and Installation Guide (9J8267)_Ed02
5
Note: The CS 3600 goes into inactive mode when inserted into the holder. To use it again, take it out of the holder.
Note: The CS 3600 goes into inactive mode when left idle for 5 seconds (if set on a desk, for example). To use it again, pick it up.
Note: The CS 3600 Acquisition interface displays a No Tip icon when the tip is removed. To use the CS 3600 again, put on the tip.
Note: When the CS 3600 is idle for more than an hour, it powers off.
6
Chapter 2 CS 3600 Overview
CS 3600 USB Cable Storage To avoid damaging the USB cable of the CS 3600, you should loosely coil the cable and avoid creating any sharp kinks, especially in the area where the cable connects to the CS 3600. Figure 4 Correct CS 3600 Cable Storage
Do not wrap the cable around the handle of the CS 3600 or create any sharp bends in the cable. Figure 5 Incorrect CS 3600 Cable Storage
CS 3600 User and Installation Guide (9J8267)_Ed02
7
8
Chapter 2 CS 3600 Overview
3
CS 3600 Software Overview
Minimum Computer System Requirements For the minimum computer system requirements, see the CS 3600 Safety, Regulatory, and Technical Specifications User Guide.
Important: It is MANDATORY to check that your computer system configuration is compatible with the computer system requirements for the CS 3600 software.
General Software Overview The CS 3600 system operates with the following software: • •
Imaging software CS 3600 Acquisition interface
Imaging Software Carestream’s imaging software is a user-friendly working interface that was designed and developed as a common imaging platform for all our dental digital systems. For more details, see: •
CS Imaging Software online help and the CS Imaging Software Quick User Guide
OR •
CS Orthodontic Imaging software online help and the CS Orthodontic Imaging Quick User Guide
OR •
CS OMS Imaging software online help and the CS OMS Imaging Quick User Guide
CS 3600 User and Installation Guide (9J8267)_Ed02
9
CS 3600 Acquisition Interface Overview The CS 3600 Acquisition interface enables you to acquire images in two ways: •
Partial arch scan: Several teeth in the preparation area on both the upper and lower jaws, and a buccal bite registration.
•
Full arch scan: Upper jaw, lower jaw, and buccal bite registration. Note: In some cases, you can acquire images of a single arch (partial or full) and not obtain a buccal bite registration (for example, if there are no teeth in the opposing arch), but it is recommended that you acquire both arches and a buccal bite registration when possible.
Figure 6 CS 3600 Acquisition Interface Overview 9
1 2
3
4
8
6
5
1
Title Bar: Displays: •
•
•
•
Patient’s name and type of acquisition
Minimizes the Acquisition interface.
Maximizes or restores down the Acquisition interface.
Closes the Acquisition interface.
10 Chapter 3 CS 3600 Software Overview
7
2
Acquisition Step: Displays the current step in the acquisition process.
3
Acquisition Catalog Toolbar: Enables you to select the acquisition mode.
4
Image Toolbar: Enables you to select and manage 3D images.
5
Progress Bar: Indicates the status of the image acquisition process.
6
3D Model Display Screen: Displays the 3D model created from the scan.
7
Navigation Bar: Enables you to move forward or backward in the acquisition process.
8
Video Preview Screen: Displays live video of the scan of the patient’s teeth.
9
Settings Toolbar: Enables you to export files, set preferences, and access system information and online help.
Toolbar Overview Acquisition Catalog Toolbar The acquisition catalog toolbar enables you to select the acquisition mode. Lower Jaw button: Acquires a 3D image of the lower jaw.
Upper Jaw button: Acquires a 3D image of the upper jaw.
Buccal Bite Registration button: Acquires a 3D image of the bite.
Switch button: Changes the acquisition mode from upper to lower or vice versa, if you accidentally scan teeth on the wrong jaw. Lower Jaw button: Acquires a 3D image of the scan body in the lower implant jaw when making an implant acquisition. Upper Jaw button: Acquires a 3D image of the scan body in the upper implant jaw when making an implant acquisition. Image Toolbar The image toolbar enables you to select and manage images. Intraoral Image button: Enables you to select two-dimensional intraoral images.
True Color button: Displays the 3D model in the actual color of the patient’s hard and soft tissues.
Freeze button: Prevents the 3D model from being resized and rotated.
Zoom Fit button: Scales the 3D model to the best size to fit the display region.
CS 3600 User and Installation Guide (9J8267)_Ed02 11
Show Scanning Area button: Displays the arch diagram, enabling you to indicate the teeth that are part of the model. Click the Adult or Child icon to display the appropriate arch, and select the teeth that are in the model, including the upper and lower jaw. Click the Reset button to clear the selection. This button is available after the model has been refined. Draw Margin Line button: Opens the 3D Margin Line Tool window. This button is available when making a restoration acquisition after the model has been refined. Auto Margin Line button: Draws the margin line automatically on a tooth you select on the model. This button is available when making a restoration acquisition after the model has been refined. Manual Margin Line button: Enables you to manually draw the margin line on a tooth you select on the model. This button is available when making a restoration acquisition after the model has been refined. Edit Margin Line button: Enables you to change a margin line on the model. This button is available when making a restoration acquisition after the model has been refined. Delete Selected Margin Line button: Deletes a margin line that is selected on the model. This button is available when making a restoration acquisition after the model has been refined. Select by window button: Selects the view or views by dragging the mouse to draw a selection box. Free Cut button: Selects and deletes unwanted data, such as soft tissue, in the image using a free-form shape. Split button: Displays a split-screen view of the 3D model, both with and without the scan body. This button is available when making an implant acquisition.
Delete All button: Deletes all views of the current mode.
Undo button: Cancels the last operation.
Reset button: Reverses all deletions and returns to the initial acquisition. Scan History Check button: Enables you to go backward and forward in a 3D model to check the scan. You can remove mismatched/unwanted views and re-scan areas, if necessary. Next button: Moves to the next step in the acquisition workflow.
Back button: Moves to the previous step in the acquisition workflow.
12 Chapter 3 CS 3600 Software Overview
Settings Toolbar The settings toolbar enables you to export files, set preferences, and access system information and online help. Export button: Enables you to access the folder to which you want to export the image file. Use the export function to save the acquired images for later use.
Preference Setting button: Accesses the Preferences dialog box.
About button: Accesses system information, including the firmware and software version, and CS 3600 serial number.
Help button: Accesses the online help. CS 3600 Status Icons These icons display the current status of the CS 3600. Inactive icon: Indicates the CS 3600 is in the holder or in sleep mode after being idle for 5 seconds. No Tip icon: Indicates the CS 3600 does not have a tip. Overheating icon: Indicates the CS 3600 is overheating. If this icon is displayed, place the CS 3600 in the holder for 5 to 10 minutes. The CS 3600 will become inactive and cool down. Not Connected icon: Indicates the CS 3600 is not connected. Connect icon: Click to connect the CS 3600 with the Acquisition software. Note: The Connect icon is displayed when you float the cursor over the Not Connected icon.
CS 3600 User and Installation Guide (9J8267)_Ed02 13
Select Acquisition Type Window
Orthodontics button: Select and click OK to perform an orthodontic acquisition.
Restoration button: Select and click OK to perform a restoration acquisition.
Implant button: Select and click OK to perform an implant acquisition. Click the drop-down button to select Standard Abutment or Custom Abutment. Import button: Select and click OK to access the folder from which you want to import an image file. Use the import feature to access an acquisition you have previously saved.
Note: The acquisition type or folder path you select is selected by default the next time you open the Acquisition interface.
14 Chapter 3 CS 3600 Software Overview
Preparation Check The Preparation Check section is displayed after the model has been refined and enables you to verify important restoration data before continuing with the process. Restoration Preparation Check: A list of items you must check on the restorative 3D model to verify the bite registration and preparation design. You must examine the appropriate area of the 3D model and select the corresponding option from the list before you can move to the next step. Verify the following: •Occlusal space •Undercut •Margin line Orthodontic Preparation Check: A list of items you must check on the orthodontic 3D model to verify the accuracy of the model before sending it to the imaging software. You must examine the appropriate area of the 3D model and select the corresponding option from the list before you can move to the next step. Verify the following: •No holes in the image •Jagged boundaries removed •Irregular soft tissue removed
Implant Preparation Check: A list of items you must check on the implant 3D model to verify the accuracy of the model before sending it to the imaging software. You must examine the appropriate area of the 3D model and select the corresponding option from the list before you can move to the next step. Verify the following: •Entire scan body is visible •Bite •Gum tissue is captured correctly •Adjacent teeth are captured
Arch Display The Arch Display section is displayed during refinement selection and after the model has been refined and enables you to view or hide the upper and lower jaws.
Upper: Click the Upper Jaw button to view or hide the upper jaw. Lower: Click the Lower Jaw button to view or hide the lower jaw.
CS 3600 User and Installation Guide (9J8267)_Ed02 15