Carl Zeiss
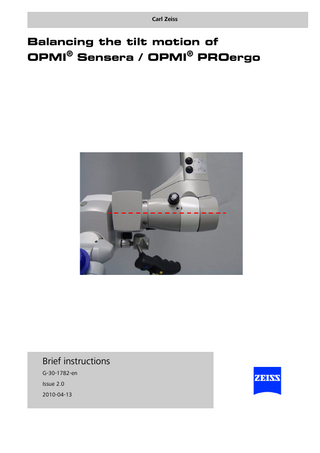
Balancing the tilt motion of OPMI Sensera and OPMI PROergo Brief instructions Issue 2.0
Brief instructions
6 Pages

Preview
Page 1
Carl Zeiss
_~ä~åÅáåÖ=íÜÉ=íáäí=ãçíáçå=çÑ lmjf∆=pÉåëÉê~=L=lmjf∆=molÉêÖç
Brief instructions G-30-1782-en Issue 2.0 2010-04-13
Balancing OPMI® Sensera / OPMI® PROergo
These brief instructions are only an excerpt from the complete user manual. They cannot replace the detailed description provided in the user manual. Therefore, make yourself thoroughly familiar with the comments and warning notes included in the complete user manual of your OPMI® (Surgical mircoscope) Sensera / OPMI® PROergo.
Balancing the tilt motion of OPMI® Sensera / OPMI® PROergo With this paper we want to draw your attention to the correct process of balancing the tilt motion. To ensure this, please strictly follow the instructions below. Balancing the tilt motion NOTE
Undesirable move! If the OPMI is in an extremely unbalanced state, the unit can move undesirably out of position.
Friciton knob
Page 2
•
Therefore hold the OPMI tightly at its handgrips before loosening friction knob (1).
•
Loosen friction knob (1). 1
Version 2.0 G-30-1782-en
Balancing OPMI® Sensera / OPMI® PROergo
•
Press button (1) until the motor of the balancing system stops. This decouples the surgical microscope from its suspension. After decoupling, the surgical microscope has adopted its center-ofgravity position. In that case the white ring (2, with marking) does not move if you turn the surgical microscope.
Decoupling
1
2 •
Check whether white ring (2) is actually in its zero position. If this is not the case, turn it manually to the zero position.
Zero position
Zero position
Version 2.0 G-30-1782-en
2
Page 3
Balancing OPMI® Sensera / OPMI® PROergo
•
Leave the surgical microscope in its center-of gravity position and press button 2. While pressing button (2), move the surgical microscope evenly back and forth by approx. 2mm until the surgical microscope body has been coupled. This is the case if white ring (1) moves along when the surgical microscope is turned.
Coupling
2
•
• Balancing
1
Continue pressing button (2) until the surgical microscope remains balanced in each position. Depending on the accessories attached, this may take some time (approx. 1 minute or longer). For checking, slightly lift the surgical microscope body and tilt it into different positions to see whether the surgical microscope body has been correctly balanced. If you pressed button (2) too long, you can correct the balance setting by pressing button (1). Tighten friction knob (3). 1
2
3
Page 4
Version 2.0 G-30-1782-en
Balancing OPMI® Sensera / OPMI® PROergo
Final test OPMI® Sensera / OPMI® PROergo At the end of any balancing procedure we recommend to verify if the entire system was set up correctly. If the system will fail such test, you need to balance the system again and repeat the final test. •
Release the friction knob (1).
•
Try to hold the ring (2) in a fixed position while rotating the surgical microscope around the axis Y. Æ If this is not possible and both parts move together, the balancing act was successful and the system is safe to use. Æ If the ring (2) moves independent of the surgical microscope, the balancing procedure was not successfull and has to be performed again.
Final test
1
2
Axis Y
Version 2.0 G-30-1782-en
Page 5
Carl Zeiss Surgical GmbH Carl-Zeiss-Strasse 22 73447 Oberkochen Germany
Fax.: + 49 (0)7364 - 20 4823 E-Mail: [email protected] Internet: www.meditec.zeiss.com