Carl Zeiss
ZEISS EXTARO 300 Quick Guide
Quick Guide
4 Pages

Preview
Page 1
Quick Guide
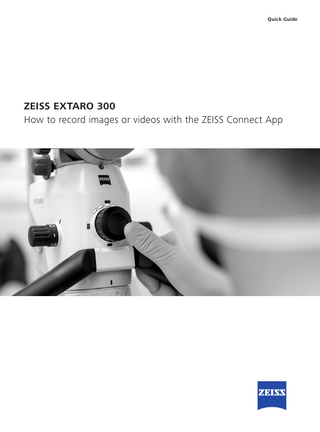
ZEISS EXTARO 300 How to record images or videos with the ZEISS Connect App
Parameters and settings for the camera and microscope have an influence on the quality of the recorded images of EXTARO 300 from ZEISS and the ZEISS Connect App. For more information about how to operate the microscope and the app, please read the corresponding user manual.
Recommended Workflow 1
2
3
Parfocality Follow these instructions to obtain a focussed image both on the monitor and through the eyepiece. • Use the image on the monitor for reference • Set surgical microscope to its highest magnification • Focus image using Varioskop ® 230 • Look through eyepieces • Adjust diopters for left and right eye until image sharpens
Factory Camera Settings Factory camera settings are optimized for our customers. If any changes are made, clicking on “restore to factory“ will return the camera to the optimized ZEISS settings.
White Balance The white balance can be adjusted, if the colors in a white light image appear unnatural. To obtain the best result, please use the “One-shot-Auto” feature and follow the instructions.
4
5
6
Magnification Select the correct magnification to obtain maximum information from the intended image with the manual 5-step apochromatic magnification changer. Magnification factors: γ = 0.4x, γ = 0.6x, γ = 1.0x, γ = 1.6x, γ = 2.5x
Light Intensity Select the correct light intensity for your observation. Rotate clockwise to increase light intensity. Rotate counterclockwise to decrease light intensity.
Focus Focus on the detail of interest. Check to see whether the image is focussed both on screen and through the eyepieces.
7
8
Recording Capturing images A short click (t ≤ 0.8s) on the center of the Mode Control knob captures an image.
Output Images – 2.1MP File format : JPEG / PNG
Recording videos A long click (t>0.8s) on the center of the Mode Control knob starts video recording. To stop the recording, repeat the long click on the center of the knob.
Videos – Full HD File format : MOV / MP4 Bit rate: 8 Mbit/s Frame rate: 30 FPS File encoding: H.264
Detailed Setting Information “Brightness” and “Color” are two main categories of the settings within the ZEISS Connect App. Specific settings can be saved for each illumination mode. After changing any settings, you can save the illumination mode in order to reuse the new parameters next time.
Parameter Brightness
Before adjustment
Adjusted Settings
Light Intensity The front face of the OPMI features 5 white LED indicators arranged in an arc above the Mode Control knob. These LEDs are designed to roughly indicate the set intensity level of the illumination under the corresponding mode. Note that the illumination intensity of each mode can be set independently and will be automatically remembered by the microscope even after it is powered off. Brightness Adjust the brightness on the screen manually to obtain a sharper image. Caution: This does not affect the light intensity!
Overexposed image. Details are not visible.
Light Meter Field The light exposure is measured in different areas of the image. Choose between “small circle”, “big circle” and “integral” to select the area.
Small
Recommended settings. Details are visible.
Big
Integral
Light Meter Mode Select “Average” or “Peak” to select the exposure limit. Choosing “Peak” allows you to adjust and focus on the brightest point during the inspection. Choosing “Average” provides a wider overview.
“Peak” setting
“Average” setting
Exposure Control Adjust the exposure manually for longer exposure times (for e.g. Fluorescence Mode ). When using manual exposure, avoid bright light around the teeth. Choose between “Auto” and “Manual”.
Very short exposure time – details cannot be analyzed due to the darkness of the image.
Longer exposure time – details can now be analyzed.
Color
Before adjustment
Adjusted Settings
Color Angle (Hue) Adjust the color angle manually. Skin-colored objects will appear either more yellow or more purple. Black Level (Lightness) Adjust the black level manually to obtain a darker or brighter image. The black level is defined as the level of brightness at the darkest (black) part of a visual image or the level of brightness at which no light is emitted from a screen, resulting in a completely black screen.
https://commons. wikimedia.org/wiki/ File:HSL_color_solid_ sphere_spherical.png
Color Saturation Adjust the color saturation manually to obtain more or less vivid pictures.
High Saturation. Colors are very vivid.
Recommended Saturation. Colors are natural.
White Balance Adjust the red and blue to obtain a colder or warmer image. Fluorescence Mode
When using the Fluorescence Mode, avoid high light levels around your working area. This can cause blurred, red images. It is also advisable to turn off the light on the handpiece.
Blurred Fluorescence Mode. Red image caused by too much light around the treatment area.
Optimal Fluorescence Mode. Image recorded with lower light levels around treatment area.
For more information please consult the user manual for ZEISS EXTARO 300 and the ZEISS Connect App.
EXTARO 300
Carl Zeiss Suzhou Co., Ltd Modern Industrial Square 3-B, No.333 Xingpu Road Suzhou Industrial Park, Suzhou China 215126 www.zeiss.com/dentistry/extaro-300
Carl Zeiss Meditec AG Goeschwitzer Strasse 51–52 07745 Jena Germany www.zeiss.com/dentistry/extaro-300 www.zeiss.com/med/contacts
EN_30_200_0086I Printed in Germany. CZ-III/2019 International edition: Only for sale in selected countries. The contents of the brochure may differ from the current status of approval of the product or service offering in your country. Please contact our regional representatives for more information. Subject to changes in design and scope of delivery and due to ongoing technical development. EXTARO 300 is a registered trademark of Carl Zeiss Meditec AG or other companies of the ZEISS Group in Germany and / or other countries. © Carl Zeiss Meditec AG, 2019. All rights reserved.
Parameter