Users Manual
169 Pages
Preview
Page 1
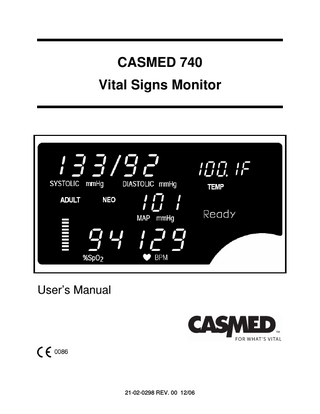
CASMED 740 Vital Signs Monitor
User’s Manual
21-02-0298 REV. 00 12/06
21-02-0298 REV. 00 12/06
2
THE CASMED 740 VITAL SIGNS MONITOR FEATURES CASMED 740 - 1
Non-Invasive Blood Pressure and Pulse Rate.
CASMED 740 - 2
Non-Invasive Blood Pressure, Pulse Rate and Pulse Oximeter. or Non-Invasive Blood Pressure, Pulse Rate and Temperature.
CASMED 740 - 3
Vital Signs Monitor with Non-Invasive Blood Pressure, Pulse Rate, Pulse Oximeter and Predictive Temperature.
IMPORTANT: This manual addresses all parameters of the CASMED 740 Vital Signs Monitor. You may have purchased a model that does not have all the parameters referred to in the manual. THIS MANUAL REMAINS SUITABLE FOR USE! Please refer to sections of the manual and the Quick Reference Guide that are applicable for the model purchased.
WARNING: The CASMED 740 Monitor is to be operated by qualified personnel only. Before use, carefully read this manual, including accessory directions for use, all precautionary information, and specifications. The user must check that the equipment functions safely and see that it is in proper working condition before being used.
21-02-0298 REV. 00 12/06
3
In the U.S. the following Caution applies:
CAUTION: Federal law restricts this device to sale by or on the order of a physician or properly licensed practitioner. First Printing: 12/2006
21-02-0298 REV. 00 12/06
4
INITIAL SETUP Before using the monitor for the first time, the following items should be performed:
• • •
Select the operating Language Select the Temperature scale (if installed) Set the monitor’s Date and Time
These items are found in the monitor’s Configuration Menu. To enter the Configuration Menu, press and hold the ALARM LIMITS and VOLUME push button keys while turning “ON” the unit.
NOTE: Unit will beep once and software version will be displayed. Steps must be completed within 60 seconds or process must be restarted.
Language Press
until the menu for language is displayed. Press either
or
to make your selection.
Temperature Scale (if installed) Press selection.
until the menu for temperature scale is displayed. Press either
or
to make your
Date Press the Day.
until the date is displayed. The day parameter is flashing. Press either
Press
one time. Press either
or
to change the Month.
Press
one time. Press either
or
to change the Year.
Press
one time. Press either
or
to change the Hour.
Press
one time. Press either
or
to change the Minute.
Press
one time to exit and save your changes.
or
to change
Time
21-02-0298 REV. 00 12/06
5
This page is intentionally left blank
21-02-0298 REV. 00 12/06
6
Manufacturers Declaration of Conformity Electronic Emissions and Immunity The Model 740 Monitor is intended for use in the electromagnetic environment specified below. The customer or the user of the Model 740 Monitor should assure it is used in such an environment. Emissions Test Compliance Electromagnetic Environment RF emissions – CISPR 11 Group 1 The Model 740 Monitor uses RF energy only for its internal function. Therefore, its RF emissions are very low and are not likely to cause any interference in nearby electronic equipment. RF emissions – CISPR 11 Class B The Model 740 Monitor is suitable for use in all establishments, including domestic establishments and Harmonic emissions Class B those directly connected to the public low-voltage power IEC 61000-3-2 supply network that supplies buildings used for domestic Voltage fluctuations / Complies purposes. flicker emissions Immunity Test
IEC 60601 Test Level
Compliance Level
Electrostatic discharge (ESD) IEC 61000-4-2
+/-6 kV contact +/-8 kV air
+/-6 kV contact +/-8 kV air
Electrical fast transient/burst IEC 61000-4-4
+/-2 kV for power supply lines +/-1 kV for input/output lines +/-1 kV differential mode +/-2 kV common mode < 5% UT (>95% dip in UT) for 0.5 cycle. 40% UT (60% dip in UT) for 5 cycles. 70% UT (30% dip in UT) for 25 cycles. < 5% UT (> 95% dip in UT) for 5 seconds.
+/-2 kV for power supply lines +/-1 kV for input/output lines +/-1 kV differential mode +/-2 kV common mode < 5% UT (>95% dip in UT) for 0.5 cycle. 40% UT (60% dip in UT) for 5 cycles. 70% UT (30% dip in UT) for 25 cycles. < 5% UT (> 95% dip in UT) for 5 seconds.
3 A/m
3 A/m
Surge IEC 61000-4-5 Voltage Dips, short interruptions and voltage variations on power supply input lines IEC 61000-4-11
Power frequency (50/60 Hz) magnetic field IEC 61000-4-8
Electromagnetic Environment Guidance Floors should be wood concrete or ceramic tile. If floors are covered with synthetic material, the relative humidity should be at least 30%. Mains power quality should be that of a typical commercial or hospital environment. Mains power quality should be that of a typical commercial or hospital environment. Mains power quality should be that of a typical commercial or hospital environment. If user of the Model 740 Monitor requires continued operation during power mains interruptions, it is recommended that the Model 740 Monitor be powered from an uninterruptible power supply or a battery. Power frequency magnetic fields should be at levels characteristic of a typical location in a typical commercial or hospital environment.
NOTE: UT is the A.C. mains voltage prior to application of the test level.
21-02-0298 REV. 00 12/06
7
Guidance and Manufacturer’s Declaration – Electromagnetic Immunity The Model 740 Monitor is intended for use in the electromagnetic environment specified below. The customer or the user of the Model 740 Monitor should insure that it is used in such an environment.
Immunity Test
IEC 60601 Test Level
Compliance Level
Electromagnetic Environment - Guidance Portable and mobile RF communications equipment should be used no closer to any part of the Model 740 Monitor, including cables, than the recommended separation distance calculated from the equation applicable to the frequency of the transmitter. Recommended separation distance:
Conducted RF IEC 61000-4-6
3 Vrms 150 kHz to 80 MHz
3 Vrms
d = 1.2√P
Radiated RF IEC 61000-4-3
3 V/m 80 MHz to 2.5 GHz
3 V/m
d = 1.2√P 80 MHz to 800 MHz d = 2.3√P 800 MHz to 2.5 GHz Where P is the maximum output power rating of the transmitter in watts according to the transmitter manufacturer and d is the recommended separation distance in meters. Field strengths from fixed RF transmitters, as determined by an electromagnetic site survey a , should be less than the compliance level in each frequency range. b Interference may occur in the vicinity of equipment marked with the following symbol:
NOTE 1 At 80 MHz and 800 MHz, the higher frequency range applies. NOTE 2 These guidelines may not apply in all situations. Electromagnetic propagation is effected by absorption and reflection from structures, objects and people. a Field strengths from fixed transmitters, such as base stations for radio (cellular / cordless) telephones and land mobile radios, amateur radio, AM and FM radio broadcast and TV broadcast cannot be predicted theoretically with accuracy. To assess the electromagnetic environment due to fixed RF transmitters, an electromagnetic site survey should be considered. If the measured field strength in the location in which the Model 740 Monitor is used exceeds the applicable RF compliance level above, the Model 740 Monitor should be observed to verify normal operation. If abnormal performance is observed, additional measures may be necessary, such as re-orienting or relocating the Model 740 Monitor. b
Over the frequency range 150 kHz to 80 MHz, field strengths should be less than 3 V/m.
Recommended Separation Distances Between Portable and Mobile RF Communications Equipment and the Model 740 Monitor The Model 740 Monitor is intended for use in an electromagnetic environment in which radiated RF disturbances are controlled. The customer or the user of the Model 740 Monitor can help prevent electromagnetic interference by maintaining a minimum distance between portable and mobile RF communications equipment (transmitters) and the Model 740 Monitor as recommended below, according to the maximum output power of the communications equipment. Separation distance according to frequency of transmitter (Meters) Rated maximum output power of transmitter (Watts)
150 kHz to 80 MHz
80 MHz to 800 MHz
800 MHz to 2.5 GHz
d = 1.2√P
d = 1.2√P
d = 2.3√P
0.01 0.1 1 10 100
0.12 0.38 1.2 3.8 12
0.12 0.38 1.2 3.8 12
0.23 0.73 2.3 7.3 23
For transmitters operating at a maximum output power not listed above, the recommended separation distance d in meters can be estimated using the equation applicable to the frequency of the transmitter, where P is the maximum output power rating of the transmitter in watts according to the transmitter manufacturer. NOTE 1 At 80 MHz and 800 MHz, the separation distance for the higher frequency range applies. NOTE 2 These guidelines may not apply in all situations. Electromagnetic propagation is affected by absorption and reflection from structures, objects and people.
21-02-0298 REV. 00 12/06
8
WARRANTY POLICY MONITOR (CASMED 740)
NOTE: For all U.S. government accounts please see the Warranty Addendum at www.va.casmed.com. All products are sold by CAS Medical Systems, Inc. under the warranties set forth in the following paragraphs. Such warranties are extended only with respect to the purchase of this product directly from CAS Medical Systems, Inc. or CAS’s Authorized Distributors as new merchandise and are extended to the first buyer thereof, other than for resale. The CASMED 740 Monitor is warranted for a period of twenty-four (24) months. All products, excluding printers, if applicable, are warranted to be free from functional defects in materials and workmanship and to conform to the description of the product contained in the Operator/Service Manual, published specifications, and accompanying labels and/or inserts, provided that the same is properly operated under conditions of normal use in accordance with applicable safety and regulatory requirements, and that replacements and repairs are made in accordance with the instructions provided by CAS Medical Systems, Inc. The same warranty conditions are made for a period of twelve (12) months with respect to printer and battery. A ninety (90) days warranty is provided for non-disposable accessories such as reusable SpO2 sensors, reusable temperature probes and other accessories provided by CAS as part of the original purchase. CAS warrants disposable or single-patient-use products, including blood pressure cuffs, for out-of-box failure only. Reusable blood pressure cuffs are warranted for one year. Where the accessory is not a CAS Medical Systems, Inc. manufactured product, the manufacturer’s own warranty applies. Warranty of accessories purchased separately from listed suppliers will be the responsibility of such listed suppliers. Damage to any part through misuse, neglect, or accident, or by affixing any accessories or attachments other than CAS, Statcorp, Masimo®, Nellcor®, Nonin®, and Welch Allyn® manufactured accessories or attachments, is not covered by this warranty. The foregoing warranties shall not apply if the product has been configured, modified, adjusted or repaired other than by CAS Medical Systems, Inc. or by persons expressly authorized by CAS Medical Systems, Inc., or not in accordance with written instructions provided by CAS Medical Systems, Inc., or if the product has been subjected to misuse, negligence, or accident. This warranty is void if the printer is used with any paper other than that specified by CAS Medical Systems, Inc.
21-02-0298 REV. 00 12/06
9
CAS reserves the right to perform warranty service operations in its own factory, at an authorized repair facility, or at the customers’ site. CAS Medical Systems, Inc.’s sole and exclusive obligation and Buyer’s sole and exclusive remedy under the above warranties, is limited to repairing or replacing, free of charge, a product which is reported in writing or via telephone to CAS Medical Systems, Inc., has a Return Material Authorization (RMA) number assigned and which is returned during normal business hours, transporting charges prepaid to: CAS Medical Systems, Inc. 44 East Industrial Road Branford, CT. 06405 USA Telephone: +1 203 488 6056 Fax: +1 203 488 9438 E-mail: custsrv@casmed.com CAS MEDICAL SYSTEMS, INC. SHALL NOT BE OTHERWISE LIABLE FOR ANY DAMAGES INCLUDING, BUT NOT LIMITED TO, INCIDENTAL DAMAGES, CONSEQUENTIAL DAMAGES OR SPECIAL DAMAGES. THERE ARE NO EXPRESS OR IMPLIED WARRANTIES WHICH EXTEND BEYOND THE WARRANTIES HEREINABOVE SET FORTH. CAS MEDICAL SYSTEMS, INC. MAKES NO WARRANTY OF MERCHANTABILITY OR FITNESS FOR A PARTICULAR PURPOSE WITH RESPECT TO THE PRODUCT OR PARTS THEREOF.
21-02-0298 REV. 00 12/06
10
HOW TO CONTACT US
CAS Medical Systems, Inc 44 East Industrial Road Branford, CT 06405 U.S.A.
Authorized Representative in European Union: Mossa Consulting GmbH Bollbrügg 22 23570 Lübeck Germany
Phone: (800) 227-4414 (203) 488-6056
Phone: +49-4502-880-557
Fax: (203) 488-9438
Fax: +49-4502-880-559
E-Mail: custsrv@casmed.com sales@casmed.com techsrv@casmed.com
E-Mail: mossa.rod@t-online.de Should service be required, contact the dealer in the country of purchase.
Web: www.casmed.com
Copyright 2003 CAS Medical Systems, Inc. All rights reserved. No part of this manual may be reproduced without the written permission of CAS Medical Systems, Inc. CAS reserves the right to make changes to this manual and improvements to the product it describes at any time without notice or obligation.
21-02-0298 REV. 00 12/06
11
This page is intentionally left blank
21-02-0298 REV. 00 12/06
12
CASMED 740 Monitors
TABLE OF CONTENTS 1.
INTRODUCTION AND INTENDED USE... 21 INTRODUCTION ... 21 INDICATIONS FOR USE... 21 CONTRAINDICATIONS ... 21 BRIEF DEVICE DESCRIPTION ... 21 PATIENT ENVIRONMENT ... 23 DEFINITION OF TERMS... 24
2.
UNPACKING THE MONITOR... 27 INITIAL INSPECTION... 27 MONITOR CHECKLIST... 27 OPTIONAL MOUNTING ACCESSORIES... 28
3.
SYMBOLS... 31
4.
SAFETY MEASURES AND WARNINGS ... 39 AUTOMATIC SAFETY FEATURES ... 43
5.
BLOOD PRESSURE MONITORING... 47 CUFF SELECTION AND APPLICATION ... 47 NIBP HOSES ... 49
6.
PULSE OXIMETRY MONITORING... 53 TAKING A SpO2 MEASUREMENT ... 53 FINGER CLIP SENSORS...53 DISPOSABLE FLEX - TYPE SENSORS ...54 MASIMO® OXIMETER (if so equipped)... 55 ATTACHING THE CABLES ...55 REMOVING THE INTERFACE CABLE ...56 MASIMO MESSAGES ...56 NELLCOR® OXIMETER (if so equipped) ... 57 ATTACHMENT PROCEDURE ...57 REMOVING THE INTERFACE CABLE ...57 NONIN® OXIMETER (if so equipped)... 58 ATTACHING THE SENSOR CABLE ...58 REMOVING THE SENSOR CABLE...58
7.
TEMPERATURE MONITORING ... 61 WELCH ALLYN TEMPERATURE... 61 TAKING AN ORAL TEMPERATURE ...61 TAKING A RECTAL TEMPERATURE ...63 TAKING AN AXILLARY TEMPERATURE...65 INSERTING & REMOVING PROBE WELL (SureTemp Plus® Only) ...67
21-02-0298 REV. 00 12/06
13
CASMED 740 Monitors
8.
MONITOR OPERATION ... 71 FRONT PANEL... 71 DIGITAL DISPLAY AND INDICATORS ...72 FRONT PANEL CONTROLS ...74 INFRARED (Ir) DATA PORT ...77 REAR PANEL ... 78 AC / DC CONNECTION ...79 FUSE COMPARTMENT ...79 BATTERY COMPARTMENT...79 TEMPERATURE PROBE ELECTRICAL CONNECTION...79 EQUIPOTENTIALITY GROUND POST ...80 EXTERNAL DEVICE INTERFACE...80 LEFT SIDE VIEW ... 80 CUFF HOSE CONNECTION...81 SpO2 SENSOR CONNECTION...81 RIGHT SIDE VIEW ... 82 TEMPERATURE HOLDER ...82 MONITOR OPERATING INSTRUCTIONS ... 83 ADULT/ NEONATE OPERATING MODE ...83 TURNING THE CASMED 740 MONITOR “ON” ...83 FRONT PANEL INTENSITY CONTROL...85 DISPLAYING THE TIME ...85 MANUAL MODE FOR BLOOD PRESSURE DETERMINATION ...85 AUTOMATIC CYCLE FOR BLOOD PRESSURE DETERMINATION...87 STAT MODE ...87 HISTORY MODES... 88 EVENT HISTORY (EVENT-Ev)...89 TREND HISTORY (TREND-Tr)...90 PRINT HISTORY ...90 CLEARING HISTORY ...91 REAL TIME CLOCK (RTC) ...91 PATIENT ALARM MODE ... 91 CHANGING ALARM LIMITS ...92 SAVING ALARM LIMITS ...92 RESTORE FACTORY DEFAULTS ...92 ALARM LIMIT VALUES ...93 AUDIBLE AND VISUAL INDICATORS ...94 CLEARING ALARMS...95 NIBP PATIENT ALARMS ...95 HIGH / LOW %SpO2 ALARMS ...95 SpO2 PULSE RATE ALARM...95 EQUIPMENT ALARMS...96 ADJUSTING THE AUDIO ALARM VOLUME...96 ADJUSTING THE SpO2 “BEEP” VOLUME ...96 2-MINUTE AUDIO SILENCE ...96 PERMANENT AUDIO ALARM SILENCE...97 ALARM LIMITS OFF...98
21-02-0298 REV. 00 12/06
14
CASMED 740 Monitors MONITOR CONFIGURATION ... 98 ENTERING THE CONFIGURATION MENU...98 SAVING YOUR CHANGES ...99 SOFTWARE REVISIONS ...99 SELECTING THE LANGUAGE ...100 SELECTING THE PATIENT MODE...100 SELECTING THE POWER-OFF DELAY TIME ...101 SELECTING THE TEMPERATURE SCALE...101 AUDIO ALARM SILENCE (SILENCE/RESET Pushbutton)...101 2-MINUTE AUDIO ALARM SILENCE...102 PERMANENT AUDIO ALARM SILENCE...102 ALARM LIMITS OFF ...102 MAP VALUE ENABLE / DISABLE...103 SET THE SpO2 ALARM DELAY...103 SETTING THE DATE ...104 SETTING THE TIME ...104 DAYLIGHT SAVING TIME OPTION...105 BATTERY POWER... 105 CHECKING BATTERY STATUS...107 AUTO OFF FEATURE... 108 POWER FAIL... 108 USER MESSAGES... 108 SpO2 USER MESSAGES ...109 TEMPERATURE FUNCTION USER MESSAGES ...110 ERROR MESSAGES ON THE MESSAGE WINDOW ...113
9.
EXTERNAL PRINTER... 119 PRINTER OVERVIEW ... 119 PRINTER CONTROLS AND INDICATORS... 120 PRINTER OPERATION... 121 DIRECT CONNECTION ...121 INFRARED CONNECTION ...121 CHARGING THE PRINTER BATTERY ... 123 INSTALLING PAPER... 123 REPLACING THE BATTERY PACK ... 124 INSTALLING A NEW BATTERY PACK ... 125
10. CLEANING... 129 CLEANING OVERVIEW ... 129 THE MONITOR...129 THE DISPLAY...130 CUFFS ...130 TUFF-CUFF ...130 SAFE-CUFF ...130 SOFTCHECK ...130 ULTRACHECK...130 PNEUMATIC TUBING ...131 PRINTER ...131
21-02-0298 REV. 00 12/06
15
CASMED 740 Monitors SpO2 INTERCONNECT CABLE...131 SpO2 SENSORS...131 TEMPERATURE PROBES ...132 PROBE WELL (SureTemp Plus)...132
11. MAINTENANCE ... 135 MAINTENANCE INTERVALS ... 135 TEST MODE ... 135 ENTER THE TEST MODE ... 135 EXIT THE TEST MODE... 136 LED CHECK ... 136 CALIBRATION CHECK ... 136 SYSTEM PRESSURE ...136 OVERPRESSURE...137 PNEUMATIC PRESSURE CHECKS ...137 TEMPERATURE CALIBRATION CHECK... 139 OXIMETRY CALIBRATION CHECK ... 140 REPLACING THE MONITOR BATTERY... 140 REMOVING THE BATTERY ...140 INSTALLING THE BATTERY...141 CHANGING THE FUSES ... 141 STORAGE ... 142
12. EXTERNAL DEVICE INTERFACING... 145 OVERVIEW... 145 RS232 ... 145 NURSE CALL INTERFACE... 145
13. ACCESSORIES ... 149 BLOOD PRESSURE CUFFS ... 149 Tuff-Cuff® ...149 UltraCheck®...149 Safe-Cuff™ ...150 INFLATION HOSES ... 150 OXIMETRY ... 150 Masimo...150 Nellcor ...151 Nonin...151 TEMPERATURE... 152 Welch Allyn ...152 OTHER ACCESSORIES ... 152 MONITOR CONFIGURATIONS ... 153
14. GLOSSARY ... 157 15. SPECIFICATIONS ... 161 16. PURCHASING RECORD ... 169
21-02-0298 REV. 00 12/06
16
CASMED 740 Monitors
FIGURES Figure 1: Patient Environment... 23 Figure 2: Cuff Application ... 47 Figure 3: Cuff Positioning ... 48 Figure 4: SpO2 Finger Clip Sensor Application ... 53 Figure 5: Flex – Type Adult Application ... 54 Figure 6: Flex V – Type Infant Application ... 54 Figure 7: Flex – Type Neonatal Application ... 54 Figure 8: Loading the Probe Cover... 61 Figure 9: Location of Sublingual Pockets... 62 Figure 10: Loading the Probe Cover... 64 Figure 11: Loading the Probe Cover... 66 Figure 12: Inserting & Removing the Probe Well ... 68 Figure 13: Front Panel Views... 71 Figure 14: Front Panel Controls ... 74 Figure 15: 740 Rear Panel View... 78 Figure 16: 740M Rear Panel View... 79 Figure 17: Left Side Panel Views ... 80 Figure 18: Right Side Panel View ... 82 Figure 19: Turning the Monitor On... 83 Figure 20: Printer Controls and Indicators ... 120 Figure 21: Sample Printouts ... 122 Figure 22: Paper Installation... 123 Figure 23: Opening the Battery Door... 124 Figure 24: Installing the New Battery ... 125 Figure 25: Removing the Monitor Battery Pack... 140 Figure 26: DB9 Male Connector Pin Layout... 146
21-02-0298 REV. 00 12/06
17
CASMED 740 Monitors
TABLES Table 1: Parts of the System ... 23 Table 2: Selectable Initial Inflation Pressures ... 85 Table 3: Default Alarm Values ... 93 Table 4: Audible and Visual Indicators ... 94 Table 5: Software Revisions... 99 Table 6: SureTemp® Temperature Error Codes... 111 Table 7: SureTemp Plus® Temperature Error Codes ... 112 Table 8: Error Messages on the Message Window ... 113 Table 9: DB9 Pin Out ... 146 Table 10: Monitor Configurations ... 153
21-02-0298 REV. 00 12/06
18
CASMED 740 Monitors
Section
1
Introduction and Intended Use
21-02-0298 REV. 00 12/06
19
CASMED 740 Monitors
21-02-0298 REV. 00 12/06
20