CHRISTIE +
VeinViewer Flex User Guide Rev 3 Feb 2018
User Guide
70 Pages
Preview
Page 1
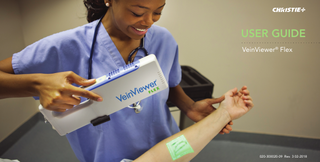
USER GUIDE VeinViewer® Flex
020-300020-09 Rev. 3 02-2018
TABLE OF CONTENTS
i
CHAPTER ONE: INTRODUCTION ... 1 INTENDED USE ...1 INDICATIONS FOR USE ...1 CONTRAINDICATIONS ...1 CHAPTER TWO: WARNINGS AND SAFETY NOTICES ... 3 SYMBOLS DEFINITIONS ...3 GENERAL SAFETY AND WARNINGS ...5 CHAPTER THREE: VEINVIEWER FLEX DESCRIPTION ... 9 PARTS LIST ...9 VEINVIEWER FLEX UNIT ...10 CONTROL PANEL ...11 OPTIONAL ACCESSORIES ...12 CHAPTER FOUR: VEINVIEWER FLEX SETUP... 13 CHARGING THE BATTERY ...13 INSTALLING THE BATTERY ...15
VEINVIEWER FLEX USER GUIDE
020-300020-09 Rev.3 (02-2018)
ii
TABLE OF CONTENTS
REMOVING THE BATTERY ...16 ATTACHING THE WRIST STRAP ...17 ATTACHING VEINVIEWER FLEX TO S-MOUNT ...24 CHAPTER FIVE: START-UP PROCEDURE ... 27 POWERING VEINVIEWER FLEX ...27 POWERING OFF VEINVIEWER FLEX ...28 CHAPTER SIX: OPERATING INSTRUCTIONS ... 29 FOCUSING ...29 FOCUSING PROCEDURE ...29 IMAGING MODES ...31 IMAGING FEATURES ...32 IMAGE CAPTURE PROCEDURE ...33 PROJECTED IMAGE DISPLAY ...34 STATUS INDICATOR ...34 SOFTWARE VERSION ...35 CHAPTER SEVEN: LICENSE, SOFTWARE AND FIRMWARE UPGRADE ... 37
020-300020-09 Rev.3 (02-2018)
VEINVIEWER FLEX USER GUIDE
TABLE OF CONTENTS
iii
VEINVIEWER FLEX CONNECT SOFTWARE INSTALLATION ...37 FLEX CONNECT INSTALLATION ...37 CONNECTING VEINVIEWER FLEX TO YOUR PC ...38 VEINVIEWER FLEX CONNECT IMAGE MANAGEMENT ...38 CHAPTER EIGHT: MAINTENANCE ... 39 CLEANING ...39 VEINVIEWER FLEX DISPOSAL ...40 CHAPTER NINE: SERVICE AND SERVICEABILITY ... 41 SERVICEABLE ITEMS BY USER ...42 CHAPTER TEN: TROUBLESHOOTING ... 43 DROP EVENT ...43 CHAPTER ELEVEN: TECHNICAL SPECIFICATIONS ... 55 VEINVIEWER FLEX TECHNICAL SPECIFICATIONS ...55 EQUIPMENT CLASSIFICATION ...56
VEINVIEWER FLEX USER GUIDE
020-300020-09 Rev.3 (02-2018)
CHAPTER ONE: INTRODUCTION Please carefully read the information in this manual in its entirety and review these materials periodically to ensure that you will be able to use VeinViewer® Flex confidently and correctly. CHAPTER ONE: INTRODUCTION
This manual is a reference for using VeinViewer Flex. It does NOT provide training in venous identification or clinical practices. This manual covers the setup and use of VeinViewer Flex and includes a table of contents to help you find the information you need. If additional information is needed, contact Christie Medical Holdings at www.veinviewer.com, via e-mail at info@veinviewer.com or call Christie Technical Support toll-free at 1-877-SEE-VEIN (1-877-733-8346). For international calls, dial +1-901-721-0330.
INTENDED USE VeinViewer Flex is a non-invasive, handheld electro-optical visual aid device designed to detect superficial blood under the skin, and project an image of the blood pattern onto the surface of the skin of neonatal, pediatric, and adult patients.
1 INDICATIONS FOR USE VeinViewer Flex is intended to image subcutaneous blood patterns on the surface of the skin. The projected blood patterns may be interpreted by the clinician to determine intravascular or interstitial blood patterns, such as: •blood within vessels, for example, veins, •the blood flowing through the vessels, for example, venous refill, •and/or blood within the interstitial space, for example, hematoma. The projected image pattern may also be used to demonstrate intravenous (IV) fluids displacing blood during IV flushes. VeinViewer Flex is intended to be used by trained Health Care Professionals such as, but not limited to, Licensed Doctors, Nurse Practitioners (non-CRNA), Emergency Medical Technicians, Registered Nurses, Anesthesiologists, Vascular Access Technicians, Phlebotomists, Infusion Nurses, to perform vascular access.
CONTRAINDICATIONS VeinViewer Flex is not intended to be used for imaging of veins in the eyes, in tissue differentiation, as a diagnostic device or as a form of treatment. VeinViewer Flex is not intended to be used near equipment that may emit strong magnetic fields such as MRI equipment. VeinViewer Flex is not intended to be used to diagnose or verify the presence of a medical condition. It is not to be used outside or in direct sunlight.
VEINVIEWER FLEX USER GUIDE
020-300020-09 Rev.3 (02-2018)
2
CHAPTER ONE: INTRODUCTION
This page has been intentionally left blank.
020-300020-09 Rev.3 (02-2018)
VEINVIEWER FLEX USER GUIDE
CHAPTER TWO: WARNING AND SAFETY NOTICES
3
Observe the safety precautions outlined in this section to obtain maximum personal safety and to protect your VeinViewer Flex. CHAPTER TWO: WARNINGS AND SAFETY NOTICES
Consult accompanying documentation. Note: This symbol is blue on the product.
SYMBOLS DEFINITIONS Symbols are used in this guide and apply to hazards or unsafe practices which could result in personal injury or property damage. See the information below for definitions of symbols.
SN
Serial number Battery
Storage temperature limits WARNING: Indicates a potentially hazardous situation which, if not avoided, could result in serious injury or loss of life. Storage humidity limits
CAUTION: Indicates a hazardous situation which, if not avoided, may result in minor or moderate injury or damage.
i
Provides important recommendations and information for efficient, trouble-free use.
VEINVIEWER FLEX USER GUIDE
Storage pressure limits
Manufacturer
020-300020-09 Rev.3 (02-2018)
4
CHAPTER TWO: WARNING AND SAFETY NOTICES
On/Standby
Fragile - Handle With Care
Date of manufacture (YYYY-MM)
This End Up
WEEE - Do Not dispose of this product in household waste. This product MUST be disposed of in accordance with local directives as established in the EU for the disposal of electronic equipment.
Class IIa device complies with European Directive 93/42/EEC
Keep Dry
Canadian Standards Association mark.
Consult operating instructions
Weight
European representative
RoHS - Restriction of Hazardous Substances Directive 2011/65/EU
Serial number
020-300020-09 Rev.3 (02-2018)
VEINVIEWER FLEX USER GUIDE
CHAPTER TWO: WARNING AND SAFETY NOTICES
InMetro certification
5
GENERAL SAFETY AND WARNINGS This safety section contains important information for the safe operation and use of this product.
Australian regulatory compliance mark
Federal (USA) law restricts this device to sale by or on the order of a physician
WARNING: DO NOT use this product or any available optional equipment without first completely reading and understanding the instructions outlined in this manual and any additional instructional material such as service manuals or instruction sheets supplied with this product or optional equipment. If you are unable to understand the warnings, cautions or instructions within this manual, contact Christie Technical Support before attempting to use this equipment. Failure to do so could result in injury or damage.
WARNING: DO NOT make any modifications to this equipment beyond the instructions provided in this manual or instruction sheets supplied with this product or optional equipment. Failure to do so, could result in injury or damage.
VEINVIEWER FLEX USER GUIDE
020-300020-09 Rev.3 (02-2018)
6
CHAPTER TWO: WARNING AND SAFETY NOTICES WARNING: VeinViewer Flex components are specifically designed and manufactured for use in conjunction with VeinViewer Flex. Components, parts and accessories designed by other manufacturers have not been tested by Christie and are not recommended for use with VeinViewer Flex. This could result in an increase of electromagnetic emissions or decrease in electromagnetic immunity, and/or affect the safety and effectiveness of VeinViewer Flex. Use ONLY the components listed in the VeinViewer Flex Parts List.
WARNING: DO NOT connect any other medical devices directly to VeinViewer Flex. This could cause unexpected failure of the device and VeinViewer Flex. VeinViewer Flex should not be used adjacent to, or stacked with other equipment not specified in this manual. If adjacent use is necessary, VeinViewer Flex should be observed to verify normal operation in the configuration in which it will be used, prior to starting any type of medical procedure. Portable and mobile RF communications equipment can affect VeinViewer Flex. Refer to the Technical Specification included in this manual. Failure to do so could result in injury or damage.
020-300020-09 Rev.3 (02-2018)
WARNING: DO NOT leave VeinViewer Flex unattended. Failure to do so could result in strangulation or entanglement with AC Power Adapter, USB cables or wrist strap.
WARNING: Store this equipment out of the reach of infants and children. Failure to do so could result in a choking hazard caused by swallowing a small part that has become detached from VeinViewer Flex or its accessories.
WARNING: Special precautions exist for VeinViewer Flex regarding EMC. VeinViewer Flex needs to be set-up and put into service according to the EMC information provided in the Technical Specifications in this manual. Failure to do so could result in injury or damage.
VEINVIEWER FLEX USER GUIDE
CHAPTER TWO: WARNING AND SAFETY NOTICES
WARNING: Connect ONLY IEC60950 or IEC60601 certified equipment to VeinViewer Flex.
CAUTION: In case of an accidental drop event, DO NOT operate VeinViewer Flex. The drop event may affect the effectiveness of VeinViewer Flex. See CHAPTER TEN: TROUBLESHOOTING.
VEINVIEWER FLEX USER GUIDE
7
CAUTION: DO NOT look directly into the imaging light source when the VeinViewer Flex power is ON as the light output is very bright. Due to the bright light output, provide the patient with Medical Facility issued eye protection when imaging neonatal patients or when imaging vasculature around the eyes or on the scalp. Refer to your institution's guidelines concerning eye safety procedures.
CAUTION: DO NOT touch, strike, or otherwise damage the glass lens of VeinViewer Flex. Please follow the recommended cleaning methods in CHAPTER EIGHT: MAINTENANCE.
020-300020-09 Rev.3 (02-2018)
8
CHAPTER TWO: WARNING AND SAFETY NOTICES CAUTION: In rare instances, shallow arteries may be detected and projected by near-infrared devices. VeinViewer Flex does not distinguish between venous or arterial vessels. Along with standard vascular access practice, palpation should be performed in addition to visualization with VeinViewer Flex of venous refill and valve detection of any blood patterns prior to vascular access to better ensure vein identification. Failure to do so could result in misidentification of an artery as a venous target.
CAUTION: Christie endeavors to supply a wide variety of VeinViewer Flex products to meet the needs of the end user and patient; however, interpretation and final application of VeinViewer Flex is the sole responsibility of the Health Care Professional using the device. Christie recommends that the Health Care Professional rely on standard health care practices prior to starting or during any type of medical procedure.
020-300020-09 Rev.3 (02-2018)
VEINVIEWER FLEX USER GUIDE
CHAPTER THREE: VEINVIEWER FLEX DESCRIPTION
9
VeinViewer Flex is designed for ease of use. VeinViewer Flex utilizes visible and near-infrared light for vascular imaging to illuminate and project the subcutaneous venous structure directly onto a patient’s skin. AVIN™ (Active Vascular Imaging Navigation) allows the user to assess multiple access points with a real-time digital image.
Part Number
Description
134-002102-xx
VeinViewer Flex Unit
003-003987-xx
AC Power Adapter - Manufacturer: XP Power, Manufacturer P/N:VEP24US09
The optional Stability Mount (S-Mount) allows VeinViewer Flex to be positioned over any part of the anatomy, leaving the clinician’s hands free to perform the procedure, our trademarked EOP™ (Eyes On Patient) technique.
003-003988-xx
Battery (QTY: 2) - Manufacturer: Inspired Energy, Manufacturer P/N: NB2037CD
003-003986-xx
Battery Charger - Manufacturer: Energy Access Inc, MFG P/N: CCC-3162
003-004015-xx
USB Cable
CHAPTER THREE: VEINVIEWER FLEX DESCRIPTION
The expected service life of VeinViewer Flex is 5 years. 003-003990-xx
Wrist Strap
003-003989-xx
Storage Bag
003-003993-xx
S-Mount Arm (QTY: 2) [Quick Release Bracket and Screw Assembly (QTY: 2)]
003-003992-xx
C-Clamp Base, Super Clamp
020-300020-xx
VeinViewer Flex User Guide
PARTS LIST CAUTION: Verify that the following items are included with your VeinViewer Flex. If any item is missing, contact your VeinViewer Flex representative or Christie Technical Support. Use ONLY those items included in the Parts List. Failure to do so, may result in injury.
VEINVIEWER FLEX USER GUIDE
000-102937-xx
DVD In-Service Training Video
000-102936-xx
VeinViewer Flex Connect Software CD
020-300020-09 Rev.3 (02-2018)
10
CHAPTER THREE: VEINVIEWER FLEX DESCRIPTION
Controls, indicators, and features are illustrated and described below.
VEINVIEWER FLEX UNIT
1
Control Panel
2
Power Inlet
3
Battery Door Lock
4
Battery Door
5
Wrist Strap Attachment
6
Arm Mount Attachment
7
USB Communication Port
8
Projection Window
9
Fan Inlet
10
Fan Exhaust
11
Serial Label
12
National Differences Label
020-300020-09 Rev.3 (02-2018)
VEINVIEWER FLEX USER GUIDE
CHAPTER THREE: VEINVIEWER FLEX DESCRIPTION
11
CONTROL PANEL
1
Power Button
2
Status Indicator
3
f1 Button: Resize*
4
f2 Button: MaxBright*
5
Image Capture Button*
4
6
Image Mode Button
5
Universal Fine Detail* Inverse*
1 3
2
6
*Requires license upgrade to activate. See CHAPTER SEVEN: LICENSE, SOFTWARE AND FIRMWARE UPGRADES.
VEINVIEWER FLEX USER GUIDE
020-300020-09 Rev.3 (02-2018)
12
CHAPTER THREE: VEINVIEWER FLEX DESCRIPTION
OPTIONAL ACCESSORIES Soft Travel Case (p/n 003-003983-xx) Use this optional Case for easy portability and storage of VeinViewer Flex and accessories. Car Charge Adapter (p/n 003-003984-xx): Manufacturer - Vanson Electronics p/n VAS-5591-A0. Use the car charge adapter to charge the Battery in a vehicle. Note that the Car Charge Adapter is only for powering the Battery Charger and will not power VeinViewer Flex. 1. Unwrap the Car Charge Adapter and insert to the 12 V jack on the back of the Battery Charger. 2. Insert the Car Charge Adapter to the car power receptacle. 3. Follow instructions from CHARGING THE BATTERY IN CHAPTER FOUR: VEINVIEWER FLEX SETUP.
020-300020-09 Rev.3 (02-2018)
VEINVIEWER FLEX USER GUIDE
CHAPTER FOUR: VEINVIEWER FLEX SETUP
13
CHAPTER FOUR: VEINVIEWER FLEX SETUP
WARNING: Failure to store and/or operate VeinViewer Flex within the recommended operating temperature and humidity parameters, could result in product deterioration, or lead to electrical shock. See CHAPTER ELEVEN: TECHNICAL SPECIFICATIONS for operating and storage specifications.
CAUTION: Inspect all parts for possible shipping damage before using. In case of damage, DO NOT use VeinViewer Flex. Contact the Christie Technical Support department for further instruction. Failure to do so may affect the safety and effectiveness of VeinViewer Flex.
CHARGING THE BATTERY WARNING: Keep VeinViewer Flex dry. Do not store or operate VeinViewer Flex and components outside the recommended storage or operating temperature and humidity range, or in dusty areas. Failure to do so could lead to electrical shock, and/or result in reduction of the performance of VeinViewer Flex.
i
There may be instances in which condensation may develop on the inside of the projection window when the device is moved from areas where extreme temperature and humidity changes are experienced. Should this occur, please allow VeinViewer Flex to acclimate or until condensation is no longer visible.
VEINVIEWER FLEX USER GUIDE
i
The Battery is not fully charged upon delivery of VeinViewer Flex. To maintain optimal performance, the Battery should always be fully charged prior to using VeinViewer Flex.
The battery life is designed to provide about 300 full charge/discharge cycles. The battery should be replaced after this period in order to maintain optimal performance of VeinViewer Flex. Optimum battery storage is achieved when the battery is stored at room temperature. Exposure to high temperatures will prevent the battery from being used or from being charged. It is recommended that the battery is recharged if it is stored longer than 6 months.
020-300020-09 Rev.3 (02-2018)
14
CHAPTER FOUR: VEINVIEWER FLEX SETUP WARNING: The Battery is a lithium-ion battery, which may explode if not replaced, used, handled or disposed of properly. Dispose of the Battery as required by local ordinances or regulations. Use only batteries supplied by Christie as replacements. Use only the Battery Charger provided by Christie. Other Battery Chargers have different voltage and terminal polarities, and their use may produce heat and smoke or even result in fire or rupture.
Battery Charger LED Definitions
1
LED
2
OFF-No battery detected
3
Green flashing-Fast charging
4
Green solid-Fully charged
5
Yellow solid-Suspend: Battery Charge Interrupt
6
Red flashing-Error
1 2 3 4 5 6
020-300020-09 Rev.3 (02-2018)
VEINVIEWER FLEX USER GUIDE
CHAPTER FOUR: VEINVIEWER FLEX SETUP
15
Battery Charger
1
9V Inlet - Wall Outlet
2
12V Inlet - Car Outlet
i
When powered off with the Battery installed, VeinViewer Flex enters a low-power stand-by mode, which will drain the Battery over approximately 72 hours. To maintain battery charge over extended periods, remove the Battery from the device. 1
2
1. Unwrap the AC Power Adapter and connect the Battery Charger output plug to the 9V jack on the back of the charger. 2. Insert the pronged plug into a wall receptacle. 3. Match the grooves on the end of the Battery to the grooves in the Battery Charger cradle and insert the Battery into the Battery Charger; the battery should snap in place. The LED indicator on the Battery Charger will blink indicating the Battery is charging. 4. The Charger Status Indicator will illuminate solid green when the Battery is fully charged.
VEINVIEWER FLEX USER GUIDE
The estimated Battery life is up to approximately 2 hours of continuous run time when fully charged. Recharge time is estimated at approximately 4 hours.
INSTALLING THE BATTERY 1. Rotate the Battery Door Lock counterclockwise to access the battery compartment. 2. Match the grooves on the end of the Battery to the grooves in the battery compartment. 3. Press the Battery completely into the battery compartment. Once the Battery is fully seated, an audible snap will be heard. 4. Close the Battery Door. 5. Rotate the Battery Door Lock clockwise until it stops.
i
The Status Indicator will blink three times, when the Battery is installed and when the AC Power Adapter in not connected.
020-300020-09 Rev.3 (02-2018)
16
i
CHAPTER FOUR: VEINVIEWER FLEX SETUP The VeinViewer Flex Battery is NOT charging when it is installed in the battery compartment and VeinViewer Flex is plugged in via the AC Power Adapter. See the Battery Charging Section in this chapter.
Unlock (counter-clockwise)
2
Lock (clockwise)
Pull the battery tab directly out from the battery compartment.
i
Battery Door
1
REMOVING THE BATTERY
1
Do not bend the battery tab over the edge of the battery compartment or pull down on the battery tab to remove the battery as this may put undue stress on the battery tab.
2
Battery
Battery
Battery Label Tab
Battery Label Tab Battery
CAUTION: Do not hold VeinViewer Flex by the Battery Door Lock or touch the Lock while operating VeinViewer Flex as this may result in unintentional release of the Battery Door.
020-300020-09 Rev.3 (02-2018)
Battery Label Tab
VEINVIEWER FLEX USER GUIDE