cnsystems
cnap Monitor Quick Guide sw 5.2 ver 1.5.4 April 2016
Quick Guide
44 Pages
Preview
Page 1
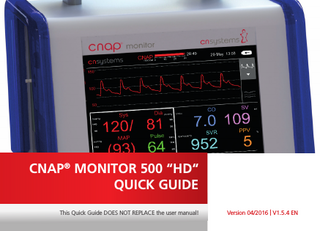
CNAP® MONITOR 500 “HD“ QUICK GUIDE This Quick Guide DOES NOT REPLACE the user manual!
Version 04/2016 | V1.5.4 EN
2
CONTENT
SET UP
MEASUREMENT
FAQs
NAVIGATION
FUNCTIONS: FAST ACCESS
Hemodynamic Parameters...5 Set Up Checklist for fast Set Up...6 Power Up CNAP® Monitor... 7 Prepare CNAP® Monitor for Measurement - Components...8 Prepare CNAP® Monitor for Measurement - Connections...9 Connecting to a Patient Monitor...10 Zeroing of CNAP® and patient monitor...11 Overview CNAP® Monitor Patient Set Up ...12 Choose correct CNAP® finger sensor size...13 Place CNAP® finger sensor and CNAP® Controller...14 Place NBP Cuff ...15 Measurement Select Measurement Mode / Start Measurement...16 Started Measurement: Perfusion Index / Signal Quality...17 Choose Patient Category / Enter Biometric Data...18 Stop / Resume Measurement...19 Navigation Navigation Frames...20 Function of Navigation Frames...21 3
4
CONTENT Functions Fast Access
FAQs: 1. 2. 3. 4. 5. 6. 7. 8. 9. 10. 11.
Main Keys and Status Indicators... 23 The “SETUP“ Key...25 Calibration Modes: Function / Benefits... 26 Triggering A Manual NBP - Fast Access...27 When is it recommended to trigger a manual NBP?...28 “Change Finger“ manually...29 How can I change alarm settings for current measurement?...31 How can I change alarm settings permanently?...32 Enabling hemodynamic parameters for a measurement?...33 How can I improve measurement quality?...34 How can I adjust trend, signal and time settings?...35 The battery?...36 Service intervals for the CNAP® Monitor? ... 37 What to do if CNAP® needs service ?...38 SERVICE HOTLINE ?...39 Where can I get additional information?...40 How can I contact CNSystems directly? ...41
HEMODYNAMIC PARAMETERS CNAP® Monitor Measurement Type BP
BP + PPV
BP + HD
CNAP
continuous noninvasive arterial pressure, sys, dia, mean
x
x
x
NBP
noninvasive oscillometric blood pressure sys, dia
x
x
x
Pulse
pulse rate
x
x
x
PPV
pulse pressure variation
x
x
SVV
stroke volume variation
x
CO
continuous noninvasive cardiac output
x
CI
cardiac index
x
SV
stroke volume
x
SVI
stroke volume index
x
SVR
systemic vascular resistance
x
SVRI
systemic vascular resistance index
x
®
5
SET UP
6
CHECKLIST
SET UP CHECKLIST STEP 1
Start the device and connect the CNAP® Controller Cable (orange connectors) to CNAP® Monitor and CNAP® Controller (see also p.7,9)
STEP 2
Use the indicator on the CNAP® Controller to find the correct CNAP® finger sensor size for the patient. (see p. 13)
STEP 3
Slide the finger sensor over two neighbouring fingers, and fix the CNAP® Controller on the forearm using the Velcro fixation cuff. (see p. 14)
STEP 4
Be sure that the CNAP® Controller is in the center of the forearm cuff so that the patient can freely bend his / her wrist. (see p.14)
STEP 5
Select the right NBP cuff size for the patient using the indicator on the inside of the NBP cuff and connect the black hose to the CNAP® Monitor. (see p.15)
STEP 6
Fit the NBP cuff on the patient‘s upper arm. The NBP cuff can be placed ipsilaterally or contralaterally to the CNAP® finger sensor. (see p.15)
STEP 7
Start measurement by clicking “Start New Measurement“. Choose patient category “Adult“ or “Pediatric“. (see p.16, 18)
During CNAP ® initialisation the patient needs to be in a stable position.
! ATTENTION During general anesthesia start CNAP before or after the induction phase! ®
POWER UP CNAP® MONITOR 1 Press POWER ON / OFF button
2 When alarm sounds,
confirm by pressing the yellow alarm button.
SET UP
7
SET UP
8
PREPARE CNAP® MONITOR FOR MEASUREMENT COMPONENTS 1 CNAP® Monitor 1
2 CNAP® Controller Cable 3 CNAP® Controller
2 6
3
4 CNAP® Finger sensor
5
5 NBP Cuff
4
2
6 NBP Air hose 3
4
5
6
PREPARE CNAP® MONITOR FOR MEASUREMENT CONNECTIONS
3 Connect NBP air
hose to NBP Cuff
1 Connect the controller cable to the orange connector of the CNAP ® Controller.
4
2 Connect finger
sensor to black connection of CNAP ® Controller.
Connect the NBP air hose and the CNAP ® Controller cable to the CNAP ® Monitor.
in straight, not ! ATTENTION Plug tilted!
SET UP
9
SET UP
10
CONNECTING TO A PATIENT MONITOR 1
Interface cable
Prepare patient monitor Interface Cable and connect it to the arterial port of your patient monitor.
2
Transducer Cable connect to
3
Connect Transducer cable and patient monitor interface cable.
! ATTENTION
Select right color from list in user manual (Chapter 4-5-2) and connect it to the BP wave out port on the CNAP ® Monitor.
Zeroing neccessary! (see next page)
BP Wave Out port
ZEROING OF CNAP® AND PATIENT MONITOR 1 Go to parameter frame on CNAP ® Monitor: *click* 2 Select IBP: Zeroing Start - *click* oi
n
f p a tie n t m o n go
*click* it o
r
Ze
*click*
r
then zero transducer on patient monitor
*click*
3 Stop Zeroing on CNAP ®: Select IBP: Zeroing Stop - *click*
TIP
SET UP
CNAP ® Zeroing is automatically active when the CNAP ® Monitor is on and connected to the patient monitor but no measurement has been started so far. 11
SET UP
12
OVERVIEW: PATIENT SET UP Connections
NBP Cuff
CNAP® Controller
CNAP® Finger sensor
STEP 1. CHOOSE CORRECT CNAP® FINGER SENSOR SIZE AVAILABLE SIZES: small, medium or large
1
Put proximal phalanx of index finger on indicator of CNAP ® Controller align with the grey line on the left.
SET UP
B 2
Choose the sensor size indicated on the shortest bar which is still visible.
! ATTENTION
2
Always choose the larger sensor if you are in doubt about the size!
13
SET UP
14
STEP 2. PLACE CNAP® FINGER SENSOR AND CNAP® CONTROLLER
! ATTENTION 1
Slide the finger sensor over two neighbouring fingers, make sure that it is not placed on the finger joints! NOTE
slide back fully!
2 Make sure that the
CNAP ® Controller is placed in central position of the slide and fix the strap.
12 hours before lifetime expiration of the finger sensor a message appears. It automatically disappears and does not affect measurements. Please make sure to contact your local distributor in time for a new sensor. See also: Operators Manual – chapter 16.1
STEP 3. PLACE NBP CUFF 1
Choose the right NBP cuff from 4 different sizes by using the size indicator on the inside of the cuff. See also: Operators Manual – chapters 3.2.3 and 10.
2
Fasten NBP cuff on the upper arm (ipsilaterally or contralaterally to arm with fingersensor). Align marker (white arrow) with the brachial artery in the crook of the arm.
SET UP
3 15
MEASUREMENT
16
SELECT MEASUREMENT MODE / START MEASUREMENT 1 Once the patient set up is completed, select the measurement mode in the pop-up menu from three options: > BP only > BP + PPV > BP + HD (full hemodynamics)
2 Confirm by clicking the wheel.
*click*
To start the measurement, select “Start New Measurement“ and confirm with the click wheel.
3
NOTE
BP + PPV and BP + HD must be enabled to be selectable. Contact your distributor for a licence key if you cannot select these options.
STARTED MEASUREMENT 1 Once measurement has started, finger sensor checks perfusion index (PI):
TIP If perfusion is poor (=red), try pushing the finger sensor to the back of the finger, warming the hand (use exam glove or towel), changing finger sensor size, or changing hands.
no signal
good perfusion
2 At the same time menu window
opens for choosing patient category and for entering biometric data (see next page). Calibration to NBP reference value also takes place. MEASUREMENT
! ATTENTION • •
Keep patient still, do not move hand! No changes in body posture!
17
MEASUREMENT
18
CHOOSE PATIENT CATEGORY AND ENTER BIOMETRIC DATA 1 Choose patient category (Adult or Pediatric) in the pop-up menu and enter biometric patient data (for full hemodynamics). This is important as NOTE alarm ranges and NBP inflation pressure are different!
2 Confirm with “ok“ by clicking the wheel.
*click*
3 Calculation of hemodynamic parameters starts; display after a few seconds.
Before starting any interventions, make sure that the calibration has been completed: numerical values should not have gray background anymore!
! ATTENTION
*click*
STOP / RESUME MEASUREMENT 1
Press the Start/Stop Button to STOP measurement (e.g. when finished or to readjust set-up).
! ATTENTION Do not remove the CNAP ® finger sensor when measurement is still in progress! STOP MEASUREMENT FIRST!
2
MEASUREMENT
RESUME a measurement with the Start/Stop Button (e.g. after readjusting set-up, patient transfer, etc.) Patient data remain displayed! 19
NAVIGATION
20
NAVIGATION FRAMES The monitor has a clickwheel and 5 different “frames“ on the screen to access all menus / functions.
Alarm frame Signal & Trend frame
Signal and Trend View selector frame
*turn*
*click* clickwheel
Parameter frame (= default)
Hemodynamic frame