Dräger Medical
Zeus Breathing System Disassembly/Assembly Guide
1 Page

Preview
Page 1
D-7417-2014
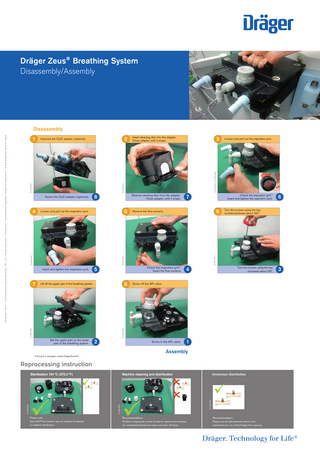
Dräger Zeus® Breathing System Disassembly/Assembly
3
D-7418-2014
Screw the CLIC adapter (optional).
Remove cleaning disc from the adapter. Close adapter until it snaps.
8 5
Loosen and pull out the inspiration port.
Check the expiration grill.* Insert and tighten the expiration port.
7 6
Remove the flow sensors.
D-7421-2014
D-7420-2014
4
Insert and tighten the inspiration port.
Check the inspiration grill.* Insert the flow sensors
5 8
Lift off the upper part of the breathing system.
Set the upper part on the lower part of the breathing system.
Turn the screws using the key clockwise about 120°.
4
Screw off the APL valve.
2
Screw in the APL valve.
1
Assembly * If the grill is damaged, contact DrägerService®.
Reprocessing instruction
D-7425-2014
Please note: SpiroLife® flow sensors are not suitable for plasma or radiation sterilization.
Immersion disinfection
D-7350-2011
Machine cleaning and disinfection
D-7426-2014
Sterilization 134 °C (273.2 °F)
6
Turn the screws using the key counterclockwise about 120°.
D-7424-2014
D-7423-2014
7
Loosen and pull out the expiration port.
D-7419-2014 / D-7442-2014
2
Insert cleaning disc into the adapter. Close adapter until it snaps.
D-7416-2014
1
Unscrew the CLIC adapter (optional).
D-7422-2014
90 69 002 | 08.14-1 | Communications & Sales Marketing | PP | LE | Printed in Germany | Chlorine-free – environmentally compatible | Subject to modifications | © 2014 Drägerwerk AG & Co. KGaA
Disassembly
Recommendation:
Recommendation:
Position components so that all interior spaces and surfaces are completely flushed and water can drain off freely.
Please use the disinfectants listed in the Instructions for use of the Dräger flow sensors.
3