ERBE
VIO 300 D V2.1x to V2.7x and VIO 200 D V2.1x to V2.3x Service Manual July 2013
Service Manual
80 Pages
Preview
Page 1
Service Manual
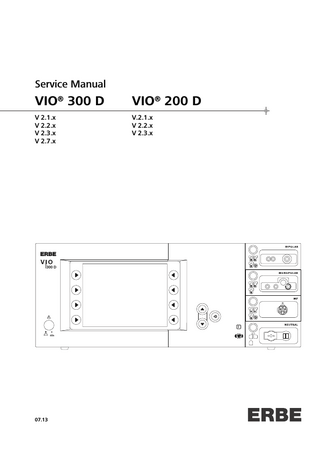
VIO® 300 D
VIO® 200 D
V 2.1.x V 2.2.x V 2.3.x V 2.7.x
V.2.1.x V 2.2.x V 2.3.x
ERBE 300 D
07.13
Service Manual
VIO® 300 D VIO® 200 D
Registered trademarks of ERBE Elektromedizin GmbH: APC®, APC 300®, AUTO CUT®, AUTOCUT®, BICISION®, BiClamp®, CLASSIC COAG®, CLASSIC CUT®, CLEVERCAP®, DeCo®, DRYCUT®, ENDO CUT®, ENDOCOAG®, ENDOCUT®, ERBE®, ERBE logo (design mark), ERBECRYO®, ERBEFLO®, ERBEJET®, ERBELift®, ERBOKRYO®, FIAPC®, FORCEDAPC®, Hybrid knife®, HybridKnife®, Hydro-Jet®, ICC 200®, ICC 80®, NESSY®, NESSY Ω®, PRECISE APC®, PRECISEAPC®, Preflow®, PULSEDAPC®, ReMode®, REMODE®, SWIFT COAG®, SWIFTCOAG®, The Color Blue®, TWIN COAG®, VIO®.
Servicea Manual Art. No. 80116-287
All rights to this manual, in particular rights of duplication, dissemination and translation, are reserved. No part of this manual may be reproduced in any form (by photocopying, microfilming or other methods) or processed, duplicated or disseminated by the use of electronic systems without the written consent of ERBE Elektromedizin GmbH. The information contained in this manual may be amended or supplemented without prior notice and represents no obligation on the part of ERBE Elektromedizin GmbH. Printed by ERBE Elektromedizin Printed in Germany Copyright © ERBE Elektromedizin GmbH, Tübingen 2013
Table of Contents
Table of Contents
1
Safety information... 7 Classification of the safety information...7 Knowledge of the User Manual...7 Protection from the risk of electric shock...7 Electrostatically sensitive components...8 Liability and warranty...8
2
Modifications... 9 From VIO version 2.2.x...9 From VIO version 2.3.x...9 From VIO version 2.7.x...10
3
Controls... 11 Controls at the front...11 Controls at the rear...12
Technical Data... 13
5
Setup... 15
80116-287 07.13
4
General information...15 Overview of settings for Setup level 1...15 Overview of settings for Setup level 2...16 Call up Setup...20 Change settings...20
6
Remedying malfunctions... 21 Safety information...21 ERROR list...21 Abbreviations of Error displays... 21 A/E-Errors... 22 B-Errors... 25 C-Errors... 37 D-Errors... 39 F-Errors... 40 2,3,5,6-Errors... 41 4 (NE)-Errors... 43 9-Errors... 44
5 / 80
Table of Contents
7
Maintenance and servicing... 45 Who is allowed to perform servicing and maintenance work?... 45 What is a technical safety check?... 45 How often does a technical safety check have to be performed?... 45
80116-287 07.13
Technical safety check – step by step... 46 Safety information... 46 Testing and measuring equipment... 47 User manual and visual inspections... 48 Tests to be conducted in accordance with the national specifications and regulations... 48 DC resistance... 49 Performance tests... 50 Footswitch activation... 52 Fingerswitch activation... 53 Instrument recognition MF receptacle... 54 Automatic start mode... 55 Automatic stop mode... 56 Spark monitor... 57 HF power output CUT... 59 HF power output COAGULATE... 62 Performance test upgrades... 65 Monitor circuits... 69 Bipolar resection adapter (VIO 300 D from V 2.2.x only)... 76
6 / 80
1 • Safety information
CHAPTER 1
Safety information
Classification of the safety information WARNING!
The WARNING! safety indication refers to a risk of personal injury.
CAUTION!
The CAUTION! safety indication refers to a risk of damage to property.
ATTENTION!
The ATTENTION! safety indication refers to a risk which can cause equipment to become unserviceable.
IMPORTANT!
The IMPORTANT! designation indicates application information and other particularly important information.
Knowledge of the User Manual
80116-287 07.13
The user manuals relating to the units form part of this service manual. Familiarity with the user manuals, in particular the procedures for setting up, commissioning and handling described in the manuals, is a prerequisite for the performance of servicing work.
Protection from the risk of electric shock WARNING!
The supply voltage must match the voltage specified on the rating plate. Connect the unit / the equipment cart to a properly installed grounded outlet. Only use the ERBE power cord or an equivalent power cord for this purpose. The power cord must bear the national test symbol. For safety reasons, multiple outlets and extension cords should not be used. If their use is unavoidable, they also must be provided with proper grounding.
WARNING!
Unplug the power cord from the outlet before exchanging parts of the unit or cleaning it.
WARNING!
Do not plug a wet power cord into the unit or into an outlet.
7 / 80
1 • Safety information
WARNING!
Do not touch any unprotected wires or conductive surfaces while the unit is opened and under voltage.
WARNING!
Blown line fuses may only be replaced by a competent technician. Only replacement fuses of the rating specified on the unit's name plate may be used. Before resuming operation the unit must be subjected to a performance test by a competent technician.
Electrostatically sensitive components CAUTION!
This unit contains electrostatically sensitive components. Work at an anti-static workplace while repairing the unit. Wear a grounding armband while working with electrostatically sensitive components. Hold the circuit boards by their non-conducting corners. Use an anti-static container for transporting electrostatically sensitive components and the circuit boards.
Liability and warranty Adjustments, tests, modifications, maintenance and repair work may only be performed by ERBE or persons trained by ERBE. If the work is not performed by trained persons, ERBE accepts no liability and warranty rights become void. It is recommended that the technical safety check also be performed by ERBE or persons trained by ERBE. ATTENTION!
8 / 80
Only use original ERBE spare parts. The manufacturer accepts no liability and the warranty rights becomes void if original spare parts are not used.
80116-287 07.13
ATTENTION!
2 • Modifications
CHAPTER 2
Modifications
From VIO version 2.2.x Hardware No changes
Software Component affected
Description of the modification
Bipolar resection adapter
The bipolar resection adapter can be connected to the MF receptacle on the VIO. Supplement to the safety check to test the bipolar resection adapter.
Setup 2 settings
80116-287 07.13
Generator adjustment
New setup setting ° modes Generator adjustment is possible without APC 2.
From VIO version 2.3.x Hardware No changes
Software Component affected
Description of the modification
Setup 2 settings
New setup setting AUTO START Limit
9 / 80
2 • Modifications
From VIO version 2.7.x Hardware No changes
Software Description of the modification
Setup 2 settings
New setup setting BiCision SC Info.
80116-287 07.13
Component affected
10 / 80
3 • Controls
CHAPTER 3
Controls
IMPORTANT!
This chapter contains an overview of the controls of the unit(s). The relevant User Manual for the unit(s), knowledge of which is assumed for servicing work, provides detailed information about how to use the unit(s).
Controls at the front 12
ERBE
16 17 6
13
7
80116-287 07.13
8
11
14 15
9
F
10
18
Fig. 3-1
1
Power Switch
2–9
Selection buttons
10
Up/Down buttons
11
Enter button
12 – 15
Focus buttons
16
Pilot lamps for footswitches
17
Pilot lamp for AUTO START
18
Pilot lamps for neutral electrodes
11 / 80
3 • Controls
Controls at the rear
12 / 80
1
Footswitch sockets
2
ECB socket (ERBE Communication Bus)
3
Potential equalization terminal
4
Power supply module with fuses
80116-287 07.13
Abb. 3-2
4 • Technical Data
CHAPTER 4
Technical Data
Power connection Rated supply voltage
100 V – 120 V ± 10 %
220 V – 240 V ± 10 %
Rated supply frequency
50 / 60 Hz
50 / 60 Hz
Line current
8A
4A
Power input in standby mode
40 watts
40 watts
Power input with max. HF output
500 watts / 920 VA
500 watts / 920 VA
Terminal for grounding (potential equalization)
yes
yes
Power fuses
T 8 A H / 250 V
T 4 A H / 250 V
80116-287 07.13
Operating mode Intermittent operation
ON time 25% (e.g. activated for 10 sec. / deactivated for 30 sec.)
Dimensions and weight Width x height x depth
410 x 165 x 380 mm
Weight
9.5 kg
Ambient conditions for transport and storage of unit Temperature
-40 °C to + 70 °C
Relative humidity
10% – 95%
Ambient conditions for operation of unit Temperature
+10 °C to + 40 °C
Relative humidity
15% – 80%, noncondensing
13 / 80
4 • Technical Data
Acclimatizing If the unit has been stored or transported at temperatures below +10 °C or above +40 °C, the unit will require approx. 3 hours to acclimatize at room temperature.
Standards II b
Protection class as per EN 60 601-1
I
Type as per EN 60 601-1
CF
80116-287 07.13
Classification according to EC Directive 93/42/EEC
14 / 80
5 • Setup
CHAPTER 5
Setup
General information This unit has two Setup levels. The first level is accessible to users and service staff. The second level is only for use by the service staff.
Overview of settings for Setup level 1
80116-287 07.13
Accessible to users and service personnel.
Setting
Available from
Description
Brightness
V 2.1.x
Setting the display brightness in 16 levels.
System volume
V 2.1.x
Setting the volume of activation tones in 16 levels. The activation tones must be clearly audible!
Key volume
V 2.1.x
Setting the button volume in 16 levels.
Viewing angle
V 2.1.x
Rough graduation of display brightness in 3 levels.
Power display
V 2.1.x
A bar diagram is shown on the display on activation of the output indicator. The bar diagram provides a dynamic display of the delivered output during activation. At the end of activation, Pmax shows the maximum delivered output, and Pavg the mean value of the delivered output over the activation period. The green line in the bar diagram represents the power limitation selected.
Display UpMax
V 2.1.x
Display of maximum HF voltage [Vp] on activation of the unit. In the user manual for the instrument or on the instrument itself the maximum electrical capacity is given in [Vp]. If the HF voltage exceeds the capacity of the instrument, the instrument may be damaged. Select a reduced effect to avoid this.
AUTO START 1
V 2.1.x
Input of start delay for the AUTO START function. The start delay value for AUTO START 1 depends on the value entered for AUTO START 2 but is always below the start delay value of AUTO START 2. A start delay between 0.0 and 9.5 s is possible.
15 / 80
5 • Setup
Setting
Available from
Description
AUTO START 2
V 2.1.x
Input of start delay for the AUTO START function. The start delay value for AUTO START 2 depends on the value entered for AUTO START 1 but is always above the start delay value of AUTO START 1. A start delay between 0.1 and 10 s is possible.
Service program
V 2.1.x
This menu item leads to the second Setup level.
Overview of settings for Setup level 2
IMPORTANT!
This setup menu is only available in English depending on the language setting selected on the unit.
Setting
Available from
Description
Date
V 2.1.x
Self-explanatory.
Time
V 2.1.x
Self-explanatory.
Identifier
V 2.1.x
Enter an label/identifier for the unit. The specified identifier is displayed on the input screen.
Neutral electrode
V 2.1.x
single surface, dual surface, either way, dynamic. On delivery, the unit is set to neutral electrode “dual surface”.
AUTO START
V 2.1.x
Setting for whether AUTO START is permitted as an activation type.
AUTO START Limit
V 2.3.x
On: AUTO START function with power limitation of 50 Watt (factory setting) Off: AUTO START function with no power limitation
Time limit
V 2.1.x
Setting the time period after which activation is automatically ended: 1 to 99 s or OFF
Display time
V 2.1.x
Setting the length of time for which indicator window and error messages appear on the display: 1 to 15 s or OFF.
Automatic time
V 2.1.x
Setting the length of time for which an input window appears on the display: 3 to 29 s or Not automatic.
Start screen
V 2.1.x
Selection of start screen: Guide or List of Programs.
16 / 80
80116-287 07.13
Only accessible for service personnel. Password-protected.
5 • Setup
Setting Expert mode
Available from V 2.1.x
Description If the expert mode is activated, the following settings are also available: – Temperature monitoring for neutral electrodes – Advanced setting options for ENDO CUT I and Q – Advanced setting options for BiClamp
80116-287 07.13
– Advanced setting options for PRECISE APC Language
V 2.1.x
Self-explanatory.
APC supply
V 2.1.x
Self-explanatory.
APC AutoPurge
V 2.1.x
The instrument is purged with gas automatically when it is plugged into the APC receptacle and an instrument that is already plugged into the APC receptacle is purged with gas automatically when the unit is started up.
APC Purge Duration
V 2.1.x
Selection of time for which the instrument is purged with gas automatically: 0 to 10 s.
APC PurgeFlow
V 2.1.x
Selection of purge flow (in %) at which the instrument is purged with gas automatically. Purge flow relates to the default COAG-Flow setting stored in the instrument.
max. APC cyl.pressure
V 2.1.x
Setting of maximum cylinder pressure in the argon cylinder used. Correct reporting on the cylinder level display on the HF surgical unit depends upon the maximum cylinder pressure setting of the actual argon gas bottle used: 100 to 240 bar.
Sound sample
V 2.1.x
Selection of type of warning signals.
Decoupling C (C = capacitor)
V 2.1.x
Setting on the decoupling capacitor. MAX: Decoupling capacitor with maximum capacity. MIN: Decoupling capacitor with minimized capacity. At this setting, neuromuscular stimuli are reduced in the PULSED APC mode.
BiCision SC Info
V 2.7.x
Extended short circuit detection for BiCision: In case an electrical connection is established between the instrument branches (e.g. through the advanced instrument blade) during activation. On: extended short circuit detection is activated, advisory message is shown. Off: extended short circuit detection is deactivated, no advisory message is shown.
17 / 80
5 • Setup
Available from
°-Modes
V 2.2.x
Activation/deactivation of the ° modes
Next safety check
V 2.1.x
Self-explanatory.
Test programs1
V 2.1.x
Error list: Stores all errors detected and signaled by the control panel.
V 2.1.x
Event list: Stores all events (=information and activations) in a looped memory.
V 2.1.x
Version list: Shows the software versions of all connected components. Option “safe config.” is available.2
V 2.1.x
EEPROM: Shows memory usage by the application program on EEPROM.
V 2.1.x
HF-CPU error list: Stores all errors detected and signaled by the “CPU + Sensors”; up to 16 entries.
V 2.1.x
No. HF errors: Records the frequency of errors detected and signaled by the “CPU + Sensors”.
V 2.1.x
APC error list: Stores all errors detected and signaled by the APC.
V 2.1.x
No. APC errors: Records the frequency of errors detected and signaled by the APC.
V 2.1.x
Operating time: Runtime meter or ON counter for add-on modules, if these modules have a corresponding counter.
V 2.1.x
Loudsp. test: Unit checks the loudspeaker function. Three different tones must be heard.
V 2.1.x
CAN looped mem.: Displays the CAN messages before the last error occurred. The test program was integrated for product development for debugging.
V 2.1.x
ScreenTest: Tests the function of the screen. A total of 12 rectangular color segments have to be displayed, each of the four in the color ranges red, green and blue.
V 2.1.x
Error list IIF/NE: Stores all errors detected and signaled by the IIF (instrument interface) and the NE (Nessy2).
V 2.1.x
Hardware TP: Branching to the hardware test programs.
18 / 80
Description
80116-287 07.13
Setting
5 • Setup
Setting
Available from
Description
V 2.1.x
Upgrade list: Indicates which upgrades have been installed.
V 2.1.x
Reset Passwords: Deactivates all passwords assigned for user programs. It is not possible to delete only one password for a specific user program. The assigned passwords are activated again after restarting the unit.
V 2.1.x
Enable Kali (only relevant for VIO 200 D): Makes it possible to increase the HF power limitation for SWIFT COAG to 150 W. When switching off, the unit resets the increase back to the standard power limitation of 120 W automatically.
80116-287 07.13
1. Test programs not explained here are not relevant for the service technicians. 2. "safe config." saves the receptacle configuration of the unit detected by the system. The receptacle configuration must be saved by the service technician after each software update and each time the unit is upgraded or converted. For this purpose compare the receptacle configuration indicated on the "Version list" with the physical configuration on the unit. If they agree, save the receptacle configuration with "safe config."
19 / 80
5 • Setup
Call up Setup IMPORTANT!
Within a menu there are different ways to scroll forwards: (a) with the Down button or (b) with the selection button next to the "next" menu item. Only variant (a) is used in this manual.
ERBE
6 7 9 8
12 10
F
Call up Setup level 1
1. Call up "Guide" window. 2. Select menu item "Other functions". 3. Select menu item "Setup". The unit switches to Setup level 1. See above table for settings that can be changed here.
Call up Setup level 2
1. 2. 3. 4.
Call up Setup level 1 as described above. Use the Down button (10) to scroll to the setting "Service program". Select setting "Service program". Enter VIOD as the password: Use the Up/Down buttons (9/10) to select the letters, confirming each of the four letters with the adjacent selection button and then jumping forward to enter the next letter. Repeat this procedure until all four letters have been entered. 5. Confirm the complete password using the Enter button (12). The unit switches to Setup level 2. See above table for settings that can be changed here.
Change settings 1. Select the setting to be changed using the adjacent selection button (1...8). The setting is highlighted. 2. Change the setting with the Up/Down buttons (9/10). 3. Confirm the changed setting with the Enter button (12).
20 / 80
80116-287 07.13
Fig. 5-1
6 • Remedying malfunctions
CHAPTER 6
Remedying malfunctions
Safety information ATTENTION!
Adjustments, technical tests, modifications, maintenance and repair work may only be performed by ERBE or persons trained by ERBE. If the work is not performed by trained persons, ERBE accepts no liability and warranty rights become void.
ERROR list
80116-287 07.13
Abbreviations of Error displays A:
APC 2-Errors
B:
Control panel-Errors
C:
CPU + Sensors-Errors
D:
IES 2-Errors (=Smoke evacuation system)
E:
VEM 2-Errors
F:
Footswitch-Errors
2,3,5,6:
IIF-Errors (=Instrument Interface) of corresponding receptacle slot
4 (NE):
Nessy2-Errors
9:
EIP 2-Errors (=ERBE Irrigation Pump)
21 / 80