GN Otometrics
MADSEN AccuScreen Probe and Accessories Handling Guide Rev 02
Handling Guide
8 Pages

Preview
Page 1
Probe and Accessories Handling Guide
Probe and Accessories Handling Guide
Probe and Accessories Handling Guide
Probe tip replacement To remove the probe tip from the MADSEN AccuScreen probe hold the probe body between your thumb and index finger.
Hold the probe tip with your thumb and index finger as shown on the picture and pull the probe tip and probe body apart. Do not use excessive force.
You can also rest the tip of the probe tip on the thumb, place the index finger on the top of the probe tip and lift it off the probe body in the direction of the arrow. Do not use excessive force.
Probe and Accessories Handling Guide
Probe cleaning
Probe tip cleaning
Use a wet tissue with alcohol to clean the probe cable and the surface of the probe body. Wipe only with disinfectants and make sure that liquid does not enter the probe body.
Caution: The probe tip usually does not come into contact with the skin or secretion from the ear canal, as it is covered by the ear tip, but you should check the channels in the probe tip every time you have used the probe. Even small amounts of cerumen or vernix can block the probe channels or be deposited on the probe tip.
Important: For periodical cleaning of the probe body, contact your authorized service department. Caution: The probe body contains sensitive components. Never clean the sound apertures in the probe body mechanically or with liquids. Doing so may cause damage to the probe. Caution: Even the slightest amount of moisture may dissolve any residual cerumen and contaminate the sensitive parts in the body of the probe.
Note: Clean or replace the probe tip according to established infection control procedures for the setting in which you are working. Remove the probe tip from the probe body. Use the cleaning wire to clean the sound channels in the probe tip. Always clean from the rear end of the probe tip. Make sure you wipe any debris from the cleaning wire with a disinfectant before pulling it back through the sound channels. The probe tip must be completely dry before placed on the probe body. Caution: Probe tips should be disposed of according to local regulations. You should always comply with local hygienic standards.
Probe and Accessories Handling Guide
Ear tip selection and placement Ear tips are disposables and should not be cleaned. Select an ear tip that fits the patient’s ear canal. You may have to try out a number of sizes in order to select the appropriate size.
It is much easier to attach and remove the ear tip if you turn it gently. When you do so, make sure to hold the probe by the probe body and not by the cable.
Gently push the ear tip onto the probe tip until it rests firmly against the base of the probe.
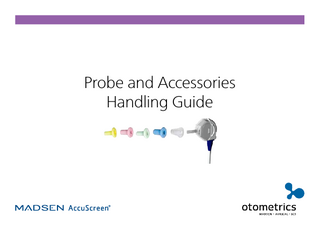
The MADSEN AccuScreen ear tips are available in silicone and foam in 6 different sizes: Ear tip
Size
Order number: 50/bag
Order number: 250/bag
Pastel yellow
3.7 mm
8-68-32100
8-68-32110
Pastel green
4.0 mm
8-68-32101
8-68-32111
Pastel pink
4.5 mm
8-68-32102
8-68-32112
Pastel blue
5.0 mm
8-68-32103
8-68-32113
Transparent tree tip
4-7 mm
8-68-32104
8-68-32114
Foam tip
7-13 mm
8-68-32105
-
Probe and Accessories Handling Guide
The new probe tip is designed so that the probe tip and the ear tip create the sound channels compared to the old one where the sound channels are inside the probe tip.
The probe tip is a bit longer than the old one and therefore, if you are familiar with the MADSEN AccuScreen Classic, you may find that you have to select a different ear tip size than you were used to.
Probe and Accessories Handling Guide
Probe placement in the ear canal A correct placement of the probe in the ear canal secures a stable and good probe fit required for obtaining fast and reliable test results. When you have fitted an ear tip on the probe, gently pull the pinna back and slightly down and insert the probe in the ear canal, twisting the probe slightly as you insert it.
The probe can be inserted with the probe cable pointing either upwards or downwards, depending on which direction fits best. Make sure that the probe fits well. If available, the probe cable clip can be used to fixate the probe cable e.g. on the patient’s clothes. Any leakage may increase the test duration because of distortion and excessive noise.
It is important that the probe tip points in the direction of the tympanic membrane and not towards the ear canal wall (see illustration below).
Correct probe placement.
Wrong probe placement.
Probe and Accessories Handling Guide
Order numbers For AccuScreen: 8-69-41100 Probe for TEOAE/DPOAE 8-69-41101 Probe for TEOAE For AccuScreen Classic: 8-69-26400 Probe for TEOAE 8-69-26401 Probe for TEOAE/DPOAE
1-12-61001 Probe tip (10 pcs) 8-69-41700 Probe tip cleaning tool (5 pcs) 8-69-41300 AccuScreen Starter Kit (ear- & probe tips and cleaning tool)
Notes:
Copyright notice No part of this guide may be reproduced, stored in a retrieval system, or transmitted, in any form or by any means, electronic, mechanical, photocopying, recording, or otherwise, without the prior written consent of GN Otometrics A/S. Copyright© 2013, GN Otometrics A/S Printed in Denmark by GN Otometrics A/S, Denmark. All information, illustrations, and specifications in this guide are based on the latest product information available at the time of publication. GN Otometrics A/S reserves the right to make changes at any time without notice.
GN Otometrics, Europe. +45 45 75 55 55. info@gnotometrics.dk GN Otometrics, North America. 1-800-289-2150. sales@gnotometrics.com www.otometrics.com
Specificatio ns are su bject to ch ange without notice. Copyright © GN Ot om et r ic s. 2014/05. 7-2 6-8 300 -EN/0 2. Part no . 7 -26 -83000-EN.
Probe and Accessories Handling Guide