Operation Manual
12 Pages
Preview
Page 1
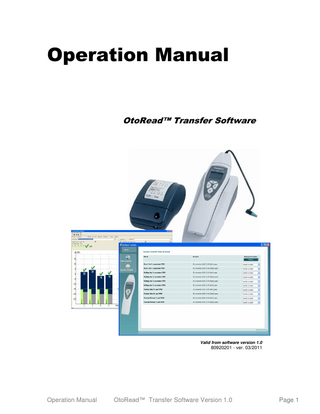
Operation Manual
OtoRead™ Transfer Software
Valid from software version 1.0
80920201 - ver. 03/2011
Operation Manual
OtoRead™ Transfer Software Version 1.0
Page 1
Table of Contents 1.1
Software Requirements ... 3
1.2
Hardware Requirements ... 3
1.3
Installation of OtoRead™ Transfer Software ... 3
1.4
Adding OtoRead™ Transfer as a new Instrument in OtoAccess™ ... 4
1.5
Transferring Patient Details to the OtoRead™ ... 5
1.5.1
Creating Patients for Transfer to the OtoRead™ HHU ... 5
1.5.2
Transfer Patients to the OtoRead™ HHU ... 5
1.5.3
How to get the entire Patient List from OtoAccess™?... 6
1.5.4
Sorting the Patients ... 6
1.5.5
Selecting the Patients for Transfer ... 7
1.5.6
Transferring the Patients ... 7
1.6
How to use the uploaded Patients on the OtoRead™ HHU ... 8
1.7
Downloading Test Results to OtoAccess™ ... 9
1.8
Viewing Patient Details & Results and the Transfer of Data ... 9
1.8.1 1.9
Viewing OAE recordings via the PC ... 10
FAQ ... 11
OtoRead™ ™ Transfer software can be used by: OtoRead™ Screener+ (ver. 7.70.xx) (DP & TE & DP custom) can upload/download patient data.
Screener + After docking the OtoRead™ Handheld Unit (HHU) in the cradle, you should download any patient data that needs to be kept. After removal of the OtoRead™ HHU from the cradle, any stored data on HHU will be erased once a new recording is made.
OtoRead™ Clinical & Standard does not support patient data transfer.
Operation Manual
OtoRead™ Transfer Software Version 1.0
Page 2
1.1 Software Requirements 1. OtoRead™ Transfer software version 1.0 patient data transfer 2. OtoAccess™ database to store the patient data on the PC 3. OtoRead™ module v1.67 to display the files downloaded to OtoAccess™
1.2 Hardware Requirements 1. 2. 3. 4. 5.
OtoRead™ Firmware version 770.xx – view at startup on the HHU USB to serial converter cable Serial RS232 cable OtoRead™ cradle Computer
1.3 Installation of OtoRead™ Transfer Software -
Insert the OtoRead™ Transfer CD-ROM into the CD-ROM drive Open the OtoRead™ Transfer folder via Windows Explorer and double click on the Setup exe. file Follow the installation process
Operation Manual
OtoRead™ Transfer Software Version 1.0
Page 3
1.4 Adding OtoRead™ Transfer as a new Instrument in OtoAccess™ The addition of OtoRead™ Transfer as an instrument under OtoAccess™ is done automatically during installation. If you need to change the parameters for OtoRead™ Transfer: - Launch OtoAccess™ – Click on the Menu item “File”, then click on “Setup”. - In the Setup click on the Instruments tab and add the new instrument.
If you need to change the communication channel on a previously created OtoRead™ Instrument, delete the current OtoRead™ Transfer instrument and then re-create the OtoRead™ Transfer instrument with the new settings. Make sure that the COM port selected in OtoAccess™ is the same as the COM port under OtoRead™ Transfer software in the General Setup.
Operation Manual
OtoRead™ Transfer Software Version 1.0
Page 4
1.5 Transferring Patient Details to the OtoRead™ 1.5.1 Creating Patients for Transfer to the OtoRead™ HHU -
Launch OtoAccess™ Create the patients to transfer to the OtoRead™ HHU – see below.
1.5.2 Transfer Patients to the OtoRead™ HHU
-
Double click on the OtoRead™ Transfer software (from any patient) Under the OtoRead™ Transfer software, follow in instructions below:
By default this option will display all patients which do not contain measurement data yet.
Operation Manual
OtoRead™ Transfer Software Version 1.0
Page 5
1.5.3 How to get the entire Patient List from OtoAccess™? -
Click Menu, Setup and General Setup
-
On the pop-up below, uncheck the item below
1.5.4 Sorting the Patients
Operation Manual
OtoRead™ Transfer Software Version 1.0
Page 6
1.5.5 Selecting the Patients for Transfer Click on the patient you wish to transfer. Hold down the Ctrl button on your keyboard to select multiple patients (Example A). Hold down the Shift button on your keyboard to select all or a group of patients (Example B).
Example A
Example B
You can also double click on the patient of interest to transfer the patient to the Selected Clients list.
1.5.6 Transferring the Patients
Once you have selected the patients you wish to transfer, click on the “Add” button to move them to the Selected Clients list. The patients listed in the Selected Clients list are now ready to be transferred to the OtoRead™ HHU. In the example below the OtoRead™ is not connected. In order to transfer the patients you need to place the OtoRead™ in the cradle, turn it on and then click the transfer button.
Operation Manual
OtoRead™ Transfer Software Version 1.0
Page 7
1.6 How to use the uploaded Patients on the OtoRead™ HHU Remove the OtoRead™ HHU from the cradle and turn it on. The patient names will show on the display – select the desired patient by using the right and left buttons.
To begin testing with the selected patient, press the down button to reach the test menu. From the test Menu press the Right or Left button to test the right or left ear. All tests conducted will be associated with the selected patient until a new patient is selected. To select a new patient, turn the HHU off and back on again. Use the right/left buttons to scroll through the stored names and press the down arrow to select a new patient. The HHU will accept 100 patient names per upload and can save 250 test records. There is a maximum limitation of 5 recordings for each patient.
Operation Manual
OtoRead™ Transfer Software Version 1.0
Page 8
1.7 Downloading Test Results to OtoAccess™ Open the OtoRead™ transfer software from OtoAccess™. Click on the Session transfer button.
If the picture of the OtoRead™ is not present (on the above screen) the OtoRead™ is not connected or turned on. For each client in the list, an action must be taken before clicking on “Transfer”. 1. Skip recording 2. Transfer to client (in OtoAccess™ database) 3. Create new
1.8 Viewing Patient Details & Results and the Transfer of Data Within the Session Transfer screen, the patient details and the test results for each ear are displayed. Click on ”Transfer” to start the transfer from OtoRead™ to the clients stored in OtoAccess™.
Operation Manual
OtoRead™ Transfer Software Version 1.0
Page 9
After the transfer/download has been completed, a dialog box will ask if you want to delete data from the OtoRead™ . Click “yes” if the patients are no longer needed on the OtoRead™ .
If you click “no” in above dialog box you will not be able to add other patients to the OtoRead™ HHU. The OtoRead™ HHU must be clear of patient details/data in order to upload new patient details.
1.8.1 Viewing OAE recordings via the PC To display the OAE recordings via the PC, the OtoRead™ Module must be installed. Open OtoAccess™, select the desired patient and then double click on the recording you wish to view. This will start up the OtoRead™ Module.
Operation Manual
OtoRead™ Transfer Software Version 1.0
Page 10
Please refer to the OtoRead™ Module manual for more details.
1.9 FAQ How to find the COM port on the PC? Find Device manager by right clicking on My Computer. Select properties, hardware and then device manager. The example below shows that a USB to serial converter is attached to COM3.
Operation Manual
OtoRead™ Transfer Software Version 1.0
Page 11
I do not want to save a patient’s OAE recordings to the OtoAccess™ database If you have measurements on OtoRead™ that you do NOT want to save/transfer to Otoaccess™, the only way to delete these are by clicking skip under the transfer option and then clicking on transfer. When the dialog box appears, select “yes” to delete the patients from the OtoRead™ HHU.
I need to add an extra patient to the OtoRead™ HHU You cannot add or transfer a patient to the OtoRead™ HHU if there are patient details already stored on the HHU. Performing this action in the software will delete the patients currently stored on the HHU. Take care not to delete stored patient recordings before adding new patients to the device. If you know you may need to test extra unknown patients during the day, it is recommended to add some dummy patients (e.g., Patient 1, Patient 2 etc), so you can store the data on the HHU. You will then be able to transfer this data to OtoAccess™ and rename the patient later.
The OtoRead™ HHU switches off by itself too quickly The OtoRead™ has a power save function and will turn off after 1 minute (default) without use. You can extend the power off time up to 10 minutes via the HHU menu.
Why does the “Testing” LED flash when the HHU is in the cradle? When the OtoRead™ is turned on and placed in the cradle with a connection to a PC, the “Ready” LED will be green and the “Testing” LED will flash orange to indicate it ready for PC use. You will also see “Waiting on PC” on the HHU display.
Operation Manual
OtoRead™ Transfer Software Version 1.0
Page 12