Interacoustics
Air Fx Instructions for Use Aug 2015
Instructions for Use
31 Pages
Preview
Page 1
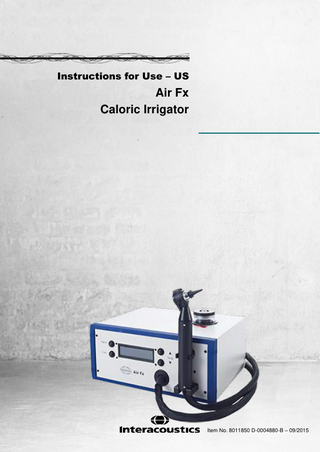
Instructions for Use – US
Air Fx Caloric Irrigator
Item No. 8011850 D-0004880-B – 09/2015
Table of Contents 1
INTRODUCTION ... 1 1.1 1.2 1.3 1.4
2
UNPACKING AND INSTALLATION ... 5 2.1 2.2 2.3 2.4 2.5 2.6 2.7
3
Maintain Distilled Water Level... 11 Attaching the Speculum ... 11 Select Automatic Control of the Irrigator ... 12 Select the Irrigation Temperature ... 13 Perform the Irrigation ... 15 Safety16 Draining the Water Reservoir ... 16
MAINTENANCE ... 19 4.1 4.2 4.3 4.4 4.5
5
Unpacking and Inspection ... 5 Storage ... 5 Marking ... 6 Connection Panel Dictionary ... 7 Preparing the Irrigator for First Use ... 8 Installing the Air Fx USB Drivers ... 8 Using Air Fx in Conjunction with Interacoustics VNG Software ... 8
OPERATING INSTRUCTIONS ... 11 3.1 3.2 3.3 3.4 3.5 3.6 3.7
4
About this Manual ... 1 Intended Use ... 1 Product Description ... 2 Warnings and Precautions ... 3
General Maintenance Procedures ... 19 How to clean Interacoustics Products ... 19 Concerning Repair ... 20 Warranty... 20 Component Disposal ... 21
GENERAL TECHNICAL SPECIFICATIONS ... 23 5.1 Device Specifications ... 23 Appendix A ... 25 Appendix B ... 27
Air Fx Irrigator Instructions for Use - US
Page 1
1 Introduction 1.1
About this Manual
This manual is valid for the Air Fx Air Irrigator. Manufacturer:
Manufactured for: Interacoustics A/S Audiometer Allé 1 5500 Middelfart Denmark Tel.: +45 6371 3555 Fax: +45 6371 3522 E-mail: [email protected] Web: www.interacoustics.com By: Micromedical Technologies, Inc. 10 Kemp Drive Chatham, IL 62629 USA Tel: +1 217-483-2122 Fax: +1 217-483-2122 www.micromedical.com
Copyright © March 2012 by Interacoustics. All rights reserved. Information in this document is subject to change without notice. Companies, names, and data used in example herein are fictitious unless otherwise noted. No part of this document may be reproduced or transmitted in any form or by any means, electronic or mechanical, for any purpose, without express written permission of Interacoustics or its licensees. Windows®, Windows XP®, and Windows 7® are trademarks of the Microsoft Corporation. Other trademarks are the property of their respective owners.
1.2
Intended Use
The Air Fx air irrigator dispenses cool or warm air to perform caloric tests for vestibular diagnosis. The Air Fx requires the operator to aim the air stream at the tympanic membrane through the patient’s ear canal, creating a differential in ear temperatures and resulting in the patient’s eyes displaying nystagmus. The Air Fx is used in conjunction with the Interacoustics VN415/VO425 VNG systems during caloric testing. The Air Fx will interface with the computer when using Interacoustics VNG software version 7.06 or later. All personnel who operate the Air Fx should familiarize themselves with the contents of this manual prior to using the Air Fx with a patient. Additional training can be requested via Interacoustics or one of their sales representatives. The Air Fx micro-controller technology is very simple to use and maintains an accurate temperature of dispensed air. Air Fx has an otoscope handle with an integrated light. The otoscope handle uses disposable specula and has an LED, which lights the eardrum without obstructing the air flow or view of the ear canal. The otoscope handle has a magnifying glass designed to improve visibility of the tympanic membrane. Air Fx uses a USB cable to communicate with the host computer. Interacoustics software version 7.06 and later can coordinate testing with the Air Fx irrigator so the operator starts recording eye movements when starting the irrigation from the handle. The USB cable also is used to configure the Air Fx irrigator’s default temperature settings whether used as a standalone device or used in conjunction with the Interacoustics VNG software.
Air Fx Irrigator Instructions for Use - US
Page 2
The intended use of this product is for irrigation of the patient’s external auditory canal with either warm or cool air for the purpose of assessing the peripheral vestibular system. The product is intended to be used by a trained professional in a clinic, hospital, or rehab setting. The appropriate patient population includes children and adults with normal external auditory canal and middle ear anatomy. Do not perform irrigation on patients with tympanic membrane perforations.
Air Fx requires minimal maintenance. If service is required, please contact Interacoustics or one of their sales respresentatives.
1.3
Product Description
The Air Fx air irrigator dispenses cool or warm air to perform caloric tests for vestibular diagnosis. The systems consist of the following included and optional parts: Qty Included parts: 1 1 1 pack 1 pack 1 1 1
Designation Air Fx Power cord IEC 10 Amperes Speculum Ø 2.75 mm Speculum Ø 4.25 mm 60cc syringe and tube USB Cable, 3m (9.8ft) User’s Manual
Accessories: Specula (34 pieces) - 2.75mm size (Recommended for irrigation) - 4.25mm size (Recommended for viewing the tympanic membrane) Irrigator specula used with the Air Fx, recommended to be replaced for each patient Drain & Fill Kit Used to fill and drain water from internal plastic tubing
Hose Management Tape used to coil the handle for storage purposes.
Air Fx Irrigator Instructions for Use - US
1.4
Page 3
Warnings and Precautions
Throughout this manual the following meaning of warnings, cautions and notices are used:
WARNING indicates a hazardous situation which, if not avoided, could result in death or serious injury. CAUTION, used with the safety alert symbol, indicates a hazardous situation which, if not avoided, could result in minor or moderate injury. NOTICE is used to address practices not related to personal injury.
Interacoustics – Steps marked with the Interacoustics logo are automatically performed by the USB interface with Interacoustics VNG software.
Air Fx Irrigator Instructions for Use - US
Page 4
Air Fx Irrigator Instructions for Use - US
Page 5
2 Unpacking and Installation 2.1
Unpacking and Inspection
Check box and contents for damage When the instrument is received please check the shipping box for rough handling and damage. If the box is damaged it should be kept until the contents of the shipment have been checked mechanically and electrically. If the instrument is faulty please contact your local distributor. Keep the shipping material for the carrier’s inspection and insurance claim. Keep carton for future shipment The Air Fx Air Irrigator comes in its own shipping carton, which is specially designed for the Air Fx Air Irrigator. Please keep this carton. It will be needed if the instrument has to be returned for service. If service is required please contact your local distributor. Reporting Imperfections Inspect before connection Prior to connecting the product it should once more be inspected for damage. All of the cabinet and the accessories should be checked visually for scratches and missing parts. Report immediately any faults Any missing part or malfunction should be reported immediately to the supplier of the instrument together with the invoice, serial number, and a detailed report of the problem. In the back of this manual you will find a "Return Report" where you can describe the problem. Please use "Return Report" Please realise that if the service engineer does not know what problem to look for he may not find it, so using the Return Report will be of great help to us and is your best guarantee that the correction of the problem will be to your satisfaction.
2.2 Storage Environmental Conditions The Air Fx may not be used in rooms where there are explosion risks. The equipment is not suitable for use in the presence of flammable anesthetic mixtures with air or oxygen or nitrous oxide.
IEC 60601-1 Standards Compliance Class I device for protection against electric shock Type B Applied Part for degree of protection against electric shock IPX0 rating for degree of protection against the ingress of water (i.e. the system can be damaged if any water is spilled on the electronic equipment) To avoid the risk of electrical shock, the Air Fx must only be connected to a supply mains with protective earth. Medical electrical equipment needs special precautions regarding electromagnetic compatibility (EMC) and needs to be installed and put into service according to the EMC information provided. Portable and mobile radio frequency (RF) communications equipment (e.g. cell phones, personal data assistants, etc.) can affect medical electrical equipment. This equipment should not be used at close distances to the equipment. Power frequency magnetic fields should be at levels characteristic of a typical location in a typical commercial or hospital environment.
Air Fx Irrigator Instructions for Use – US
Page 6
Performance Conditions Temperature 10°C ~ 40°C of Room 60°F ~ 104°F Relative Humidity See chart
Storage Conditions Temperature 4°C ~ 52°C of Room 40°F ~ 125°F Relative Humidity 10% ~ 90%
If the Air Fx is stored in near freezing conditions, allow time to thaw the unit prior to using with patients. To prevent condensation in the device, operate at temperature and humidity below the graphed line. % RH %RH vs. Temp °F % RH 100% 90% 80% 70% 60% 50% 40% 60
65
70
75
80
85
90
2.3 Marking The following marking can be found on the instrument: Symbol Explanation Type B applied parts. Patient applied parts that are not conductive and can be immediately released from the patient. Refer to instruction manual or WEEE (EU-directive) This symbol indicates that when the end-user wishes to discard this product, it must be sent to separate collection facilities for recovery and recycling. Failing to do so may endanger the environment. Year of manufacture
Air Fx Irrigator Instructions for Use – US
Page 7
2.4 Connection Panel Dictionary
A
C
G
D
B
F E
Figure 1 Front Panel Diagram A Specifies Warm Irrigation to be performed / returns to standby state B Specifies Cool Irrigation to be performed / returns to standby state C Adjust temperature set point up 1°C D Adjust temperature set point down 1°C E Hose connection F Handle support G LCD output screen
A
B
C
E
D G
F H
I
Figure 2 Rear Panel Diagram A B C D E
Exhaust fan Air Inlet Filter USB B Connector Power Switch Fill / Drain Valve
F G H I
Fuse Ground Screw AC Input Fill / Drain Water Outlet
Air Fx Irrigator Instructions for Use – US
Page 8
2.5 Preparing the Irrigator for First Use The Air Fx requires a power source with ground and either 115VAC or 230VAC, based on the model of the device. The Air Fx is ventilated by a fan at the back of the device. Do not place the Air Fx near a radiator or other heating source. Provide at least 10 cm (4 in) of free space behind the unit to provide adequate circulation. Filling the Water Reservoir The Air Fx will be shipped from Interacoustics without any distilled or demineralized water in the reservoir. Please fill according to the following instructions. The Air Fx cannot be used without adequate distilled or demineralized water present in the water reservoir. The distilled or demineralized water must be added before applying power. Failure to maintain the proper level of fresh distilled or demineralized water can result in permanent damage to the unit. 1. Unscrew the cap to the water reservoir on the top of the irrigator. 2. Fill the reservoir with distilled or demineralized water up to 1cm from the top as shown by the water level label. 3. Connect the syringe and tubing to the Fill / Drain Water Outlet (see Figure 2). Fully push the tubing into the Fill / Drain Water Outlet (about 1” of tubing), and then gently pull on the tubing to verify the connection is secure. 4. Switch the Fill / Drain Valve to the Fill / Drain position. 5. Draw back the syringe to draw the air out of the internal tubing and draw the distilled or demineralized water into syringe. 6. Set the Fill / Drain Valve to the Run position. 7. Disconnect the syringe from the tubing and squirt any distilled or demineralized water drawn back into the reservoir. 8. Reconnect the syringe. 9. Repeat steps 4 to 8 to draw the air out again. Repeat this drawing process until all of the air is removed from the internal lines, leaving only distilled or demineralized water drawn into the syringe. Draw at least 2 full syringes of distilled or demineralized water. 10. Set the Fill / Drain Valve to the Run position. 11. Disconnect the syringe and tubing. The tubing can be removed by pushing on the sides of the gray gasket around the tubing while pulling on the tubing. 12. Screw the cap back on the water reservoir. 13. Turn on the Air Fx. Run for one minute. Turn off the Air Fx. Repeat steps 3 through 11 to ensure the air bubbles have been removed from the system.
2.6 Installing the Air Fx USB Drivers The device drivers will need to be installed whether the Air Fx is used as a standalone device or used in conjunction with the Interacoustics VNG software. Connect the USB cable to the back of the irrigator and to an available USB port on your computer. Use a dedicated USB port for the irrigator to prevent having to reinstall the drivers at a later time. Once the irrigator is connected to the computer, turn on the Air Fx. Windows will launch the “Found New Hardware Wizard” and automatically install the drivers.
2.7 Using Air Fx in Conjunction with Interacoustics VNG Software Interacoustics VNG 7.06 software and later can be set to work in conjunction with the Air Fx air irrigator. By default the software will enable communication with the Air Fx irrigator. If the Air Fx irrigator is sent for service or has USB connection issues, then manual control can be enabled from the Inteacoustics software. Launch the Interacoustics software, then go to Setup > System. Change the “Irrigator Control” option to Manual if the Air Fx is not to communicate with the Interacoustics software. The default setting is Interacoustics to coordinate recording between the Interacoustics software and Air Fx irrigator. Click on OK to exit Setup and save changes.
Air Fx Irrigator Instructions for Use – US
Page 9
Air Fx should be powered on before selecting a caloric test. If the irrigator is not connected, close VNG and re-launch the VNG module with the irrigator USB cable connected. If you have an Interacoustics Aqua Stim irrigator connected to the VNG, turn the Aqua Stim irrigator power switch to OFF so Interacoustics VNG can communicate only with the Air Fx irrigator.
Air Fx Irrigator Instructions for Use – US
Page 10
Air Fx Irrigator Instructions for Use - US
Page 11
3 Operating instructions 3.1
Maintain Distilled Water Level
Prior to testing, verify fresh distilled or demineralized water level is visible in the water reservoir above the top of the irrigator case. If the water level is too low, then unscrew the cap to the water reservoir and add distilled or demineralized water up to 1cm from the threads as shown by the label. Screw the cap back snugly on the water reservoir to prevent evaporation. DO NOT USE tap water as minerals in water will be deposited on critical internal components and will cause damage that is not covered by warranty.
3.2
Attaching the Speculum
In order to use the Air Fx, you have to use a speculum on the tip of the otoscope head. The specula are single use only and must be replaced for each new patient. Interacoustics recommends the use of 2.75mm diameter specula to better deliver the air to the tympanic membrane. The 4.25mm speculum can be used to view the ear canal and tympanic membrane when looking for any ear wax build-up. To assemble a speculum on the ear tip of the handle, you have to insert it on the tip of the otoscope and turn it clockwise about 45°. A small plastic tip will be locked in the metal part of the head and will fix the speculum on the handle. Pull gently on the speculum to verify it is secure.
Figure 3 Place Speculum on Otoscope Head
Figure 4 Turn Speculum Clockwise to Lock, Pull Gently on Speculum to Verify It’s Secure
Specula are latex free and silicone free. Be aware not to put too much torque on the speculum or you will break the plastic nub on the inside of the speculum, preventing the speculum from securing to the handle. Once this tip is broken, the speculum cannot be secured again on the handle. The speculum can be removed from the handle by first turning the speculum counterclockwise to unlock. The speculum must be tight to prevent air leaks that will reduce the caloric stimulation response.
Air Fx Irrigator Instructions for Use - US
3.3
Page 12
Select Automatic Control of the Irrigator
If you have an Interacoustics VN415/VO425 video recording system, then you can set up the Interacoustics software to automatically control the IA Air Fx irrigator. In the configure test menu for caloric testing, select the stimulus tab and then select Air Fx control and choose your temperatures. In this menu you can also choose a test time in seconds. The air temperature default is set to 30°C for cold irrigation and 44°C for warm irrigation. The irrigation time is set for 60 seconds.
Air Fx Irrigator Instructions for Use - US
3.4
Page 13
Select the Irrigation Temperature
Select the irrigation you wish to perform from the Interacoustics software by first clicking on the caloric test icon and then selecting the green arrow to start/stop a test a caloric test. From the pop-up menu click the button for the irrigation you would like to start and then press ok to begin the test process.
The Irrigator will be automatically initiated to the correct temperature setting (cool or warm default temperature). A pop-up menu will show you the status of the irrigator preparing the desired temperature.
When the irrigator reaches the desired temperature, an indicator tone will sound and a dialog box will appear letting you know you can now begin testing.
You may now lift the irrigator handle and position the irrigator tip in the ear canal. Once the tip is properly positioned and the patient has been instructed, press the start button on the irrigator handle and the caloric test recording time will start. After the designated time is reached another indicator tone will sound and the air flow will stop. The recording will continue until the selected caloric test completion time is reached. The elapsed test time will appear in the software.
Air Fx Irrigator Instructions for Use - US
Page 14
Note: if you manually change the temperature on the Air Fx itself by depressing one on the temperature buttons during the preparing stage, it will also change the temperature in the Interacoustics software. If you cancel the test at any time the irrigator will go into rest mode until you click on the green arrow button to start another caloric test. If you attempt to manually change the temperature on the irrigator once you have already collected data you will receive an error message warning you that the temperature change is not allowed.
If the irrigator is not properly plugged into the computer’s USB port, when the green arrow button is pushed to start the caloric test, the following message will appear:
If the Air Fx is used as a stand-alone device without Interacoustics’ VNG software, then press the Cool button to select the Cool Irrigation or press the Warm button to select the Warm Irrigation. The desired temperature can be adjusted up or down by using the front panel temperature adjustment push buttons. This temperature adjustment will only be effective for this irrigation. If you want to adjust the default cool or warm temperature, see the section Error! Reference source not found.. Recommended caloric irrigation sequence is warms first, then cools. After the last warm irrigation, push the cool irrigation button and allow the irrigator to run for 5 to 7 minutes before performing the cool irrigation. This 5-7 minute period is the standard recommended duration between irrigations when changing temperature to allow the patient’s ears to equilibrate. The time will also produce a more accurate air irrigation temperature, even if the irrigator display reads ‘Ready’ before the 5-7 minutes have elapsed.
Air Fx Irrigator Instructions for Use - US
Page 15
The irrigator front panel LCD display will show the irrigation method (Cool or Warm) followed by the desired irrigation temperature (24°C) and the current temperature (e.g. 23.4°C).
Cool:
24°C
23.4°C
Irrigation will be available after the desired temperature has been reached and stabilized. Once this occurs, the Air Fx will emit an indicator tone and will display “Ready” below the irrigation information.
Cool: Ready
3.5
24°C
24.2°C
Perform the Irrigation An audiologist or physician should inspect the patient’s ear with an otoscope prior to testing, looking for infection, open wounds, wax impaction, or a perforated eardrum. If any of these are observed, DO NOT proceed with irrigation using the AirFX irrigator.
Prior to irrigation, the patient should be supine with their head elevated 30 degrees. The patient’s head should be at an elevation within 12 inches (higher or lower) relative to the irrigator height. Irrigating with the patient elevation too high or too low will adversely affect the irrigation flow rate. Once the selected irrigation temperature has been reached, the Irrigator will beep and say “Ready”. Place the speculum gently into the external ear canal, then click the button on the irrigator handle to begin air flow. Direct the speculum at the ear drum. Once the irrigator button has been pushed to begin testing the air will continue to flow until either the preselected test time is reached or until you press Stop in the software icon tool bar
.
Caloric test eye movement recording will begin automatically after the irrigator’s handle button has been pressed. During irrigation, the display will show the elapsed test time.
If the irrigation needs to be suddenly aborted, remove the speculum from the ear and direct air flow elsewhere. The irrigator air flow will continue until the pre-selected irrigation time has elapsed, at which time an indicator tone will sound and air flow will stop. Continue eye movement recording and follow normal caloric testing protocol (e.g. alerting tasks, look for peak response, test for fixation suppression etc). The irrigator will be automatically set to the next irrigation’s temperature when you select the next irrigation subtest from the menu dialog box.
Air Fx Irrigator Instructions for Use - US
Page 16
Once the final irrigations have been completed, remove the speculum from the ear tip of the handle and clean the handle tip with Sani-Cloth wipes.
3.6
Safety
The Air Fx air irrigator uses distilled or demineralized water to maintain the temperature in the cooler / heater element. While the temperature of the coolant is not displayed, it is monitored. If the coolant temperature goes over a certain limit, the unit will stop operation and an “Over Temp Error” message is displayed. This error could be a result of insufficient water in the water reservoir or bubbles in the water line. Operating the irrigator in very cold (<10°C conditions can also cause this error). Make sure the irrigator has warmed up slowly to room temperature before operating.
Over Temp Error Call TechSupport The air delivery temperature is also monitored for safety. If this temperature exceeds 50°C, the irrigator will stop operation and an “Air Temp Error” message will be displayed.
Air Temp Error Call TechSupport If either of these conditions occurs, then shut down the irrigator and isolate the problem (ambient temperature too low, bubbles in the water line, distilled or demineralized water level too low etc.). Contact Interacoustics’ Service Department or your local service representative if the problem cannot be resolved. Set the Air Fx irrigator near the edge of the table or cart in order for the hose to hang down, allowing the handle to rest properly in its cradle. When the irrigator is not in use, coil the Air Fx handle tubing using the hose management tape while still allowing the handle to be secured in the cradle.
3.7
Draining the Water Reservoir
The Air Fx should have the water reservoir on the top of the irrigator filled with distilled or demineralized water . If the distilled or demineralized water needs to be drained prior to shipment or flushed before adding new distilled or demineralized water, then the Air Fx should be drained according to the following instructions. Do not store irrigator in a location below 0°C (32°F) . 1. Unscrew and remove the water reservoir cap on the top of the irrigator. 2. Connect the supplied plastic syringe and tubing to the Fill / Drain Water Outlet on the back of the irrigator. Push the syringe plastic tubing fully into the Fill / Drain Water Outlet connector, and then gently pull on the tubing to verify the connection is secure and will not leak. 3. Switch the Fill / Drain Valve to the Fill / Drain position. 4. Draw back the syringe to draw the distilled or demineralized water out of the internal tubing and water reservoir. 5. Set the Fill / Drain Valve to the Run position.
Air Fx Irrigator Instructions for Use - US
Page 17
6. Disconnect the syringe from the tubing and squirt any distilled or demineralized water into a waste container. 7. Reconnect the syringe tubing and repeat steps 3 to 7 to draw the distilled or demineralized water out again. Repeat this drawing process until all of the distilled or demineralized water is removed from the internal lines, until only air is drawn into the syringe. 8. Set the Fill / Drain Valve to the Run position. 9. Disconnect the syringe and tubing. The tubing can be removed by pushing in the gray gasket around the tubing with your finger nails while pulling on the tubing to remove. 10. Screw the cap back on the water reservoir.
Air Fx Irrigator Instructions for Use - US
Page 18