Interacoustics
OtoRead Standard & Clinical Operation Manual Rev 2.0 June 2013
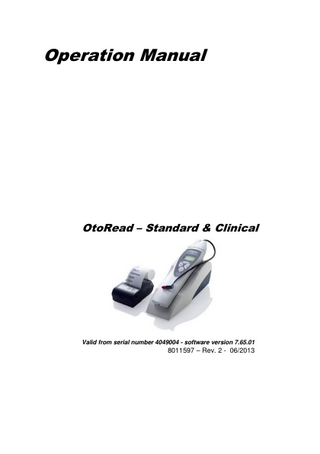
Operation Manual
75 Pages
Preview
Page 1
Operation Manual
OtoRead – Standard & Clinical
Valid from serial number 4049004 - software version 7.65.01
8011597 – Rev. 2 - 06/2013
Table of Contents Intended Use ... 1 Important Safety Instructions ... 2 Precautions ... 2 Warranty ... 4 Printer AC Power Source Precautions ... 5 Use of Rechargeable Batteries ... 6 Cleaning and Disinfecting the Unit ... 7 Waste Disposal ... 7 Introduction ... 8 What is the OtoRead Instrument? ... 8 How are the Results Stored and Reported? ... 9 Definition of OAEs ... 9 Measurement of OAEs ... 10 Basic Functions ... 12 Quick Start ... 12 Connection to the Printer ... 12 Loading Paper into the Printer ... 13 Attaching the Eartips ... 14 Connecting the Extension Cord ... 15 Probe Tip Replacement ... 16 Operating Instructions ... 17 Testing in the Default Modes ... 18 Noise Sources ... 24 Printing the Test Results ... 24 Setting the Clock ... 25 Changing Instrument Settings ... 28 Test Mode ... 28 Clearing Test Results ... 29 Auto-Shutdown Time... 29 Save Mode / Storing Test Results ... 30 Minimum Amplitude... 31 Clock Mode ... 31 Language ... 32 Reset to Default ... 32 Advanced Options for DPOAE Testing ... 33 Instructions for Customizing a Test Protocol ... 33 Selecting the Number of Test Frequencies... 34 Selecting the Frequency Range ... 34 Setting the Level of the Primary Tones ... 35
Setting the Averaging Time ... 36 Setting the PASS SNR Level ... 36 Setting the Number of Frequencies for PASS ... 37 Save Protocol ... 38 Advanced Options for TEOAE Testing ... 39 Selecting the Frequency Range ... 40 Setting the Averaging Time ... 40 Setting the PASS SNR Level ... 41 Setting the Number of Frequencies for PASS ... 42 Save Protocol ... 43 Interpreting Test Results ... 44 Understanding the Display ... 44 Understanding the DPOAE Printed Results... 45 Understanding the TEOAE Printed Results ... 46 A Note about Rounding of Results ... 47 Operation Panel Dictionary... 48 Program Flowchart ... 51 Technical Specification ... 53 Preset Test Protocols ... 54 Parts ... 55 Unpacking and inspection ... 56 Contents of Shipment... 56 Reporting Imperfections ... 57 Care and Maintenance ... 57 Troubleshooting ... 58 Appendix A: Test Sequence ... 59 Comment about Variations in the SNR Estimate ... 60 Appendix B: Pass/Refer Criteria ... 62 Appendix C: Obtaining PASS at 4 kHz ... 65 Appendix D: High Frequency DPOAE Measurements ... 66 Important Considerations When Monitoring... 67 Instructions for Averaging Results ... 68 Producing the Desired Eardrum SPL ... 69 A Reminder about Technique ... 69 Return Report ... 71
Intended Use The OtoRead™ OAE Test Instrument is designed to be a screening device for hearing loss. Sensitivity and specificity of this type of device are based on the test characteristics defined by the user, and may vary depending on environmental and operating conditions. The presence of otoacoustic emissions suggests normal outer hair cell function, which in turn correlates to normal hearing. However, a passing result using this instrument is not an indication that the full auditory system is normal. Thus, a PASS result should not be allowed to override other indications that hearing is not normal. A full audiologic evaluation should be administered if concerns about hearing sensitivity persist. A REFER test result should not be assumed to be an indicator of a lack of auditory function; however, it should be followed with full audiologic diagnostic testing. NOTE: Under certain circumstances, especially in low-humidity environments, common electrostatic discharge may cause this instrument to turn itself off. This effect causes no permanent damage, and the instrument may be turned on again by the normal procedure of holding the DOWN button.
OtoRead Std./Clin.
Intended Use
Page 1
Important Safety Instructions The OtoRead™ Otoacoustic Emission Test System should be used only by those individuals trained to perform the testing for which it has been designed. No person should attempt to use this instrument without the necessary knowledge and training to understand how this equipment is to be properly utilized and interpreted.
Note: The OtoRead Instrument probe tip must not be inserted into an ear at any time without a disposable eartip properly affixed.
Precautions READ THIS ENTIRE MANUAL BEFORE ATTEMPTING TO USE THIS SYSTEM. WARNING indicates a hazardous situation which, if not avoided, could result in death or serious injury. CAUTION, used with the safety alert symbol, indicates a hazardous situation which, if not avoided, could result in minor or moderate injury. NOTICE is used to address practices not related to personal injury Use this device only as described in this manual. Use only the disposable eartips designed for use with this instrument. Never insert the probe tip into the ear canal without affixing an eartip.
OtoRead Std./Clin.
Introduction
Page 2
The eartips are disposable and for single use only. Do not clean or reuse eartips. Disposable 1.5v AA/UM-3/R6 Alkaline batteries are recommended for use with OtoRead. If other batteries are used, they must be 1.6v AA Nickel Zinc rechargeable batteries. Care must be taken to avoid bending the battery clips with incorrect sized batteries. Do not mix battery types and do not mix old and new batteries. Remove the batteries from the instrument if it will not be used for 4 weeks or more. Do not immerse the unit in any fluids. See Page 7 of this manual for proper cleaning procedures. Do not drop or otherwise cause undue impact to this device. If the instrument is dropped or otherwise damaged, return it to the manufacturer for repair and/or calibration. Do not use the instrument if any damage is suspected. Use and store the instrument indoors only. Do not use this instrument or its accessories in temperatures below 4°C/40°F or above 38°C/100°F, or in relative humidity of more than 90%. Do not attempt to open or service the instrument. Return the instrument to the manufacturer for all service. Opening the instrument case will void the warranty. Do not operate the printer if the power supply has a damaged cord or plug. See the instructions on the following page. Do not expose the printed results to sunlight or heat. Printing on thermal paper fades with exposure to light or heat.
OtoRead Std./Clin.
Introduction
Page 3
Photocopies of test results should be made if the records are to be kept indefinitely.
Although the instrument fulfils the relevant EMC requirements precautions should be taken to avoid unnecessary exposure to electromagnetic fields, e.g. from mobile phones etc. If the device is used adjacent to other equipment it must be observed that no mutual disturbance appears.
Warranty INTERACOUSTICS warrants that:
The OtoRead is free from defects in material and workman ship under normal use and service for a period of 24 months from the date of delivery by Interacoustics to the first purchaser. Accessories are free from defects in material and workmanship under normal use and service for a period of ninety (90) days from the date of delivery by Interacoustics to the first purchaser.
If any product requires service during the applicable warranty period, the purchaser should communicate directly with the local Interacoustics service centre to determine the appropriate repair facility. Repair or replacement will be carried out at Interacoustics’ expense, subject to the terms of this warranty. The product requiring service should be returned promptly, properly packed, and postage prepaid. Loss or damage in return shipment to Interacoustics shall be at purchaser's risk. In no event shall Interacoustics be liable for any incidental, indirect or consequential damages in connection with the purchase or use of any Interacoustics product. This shall apply solely to the original purchaser. This warranty shall not apply to any subsequent owner or holder of the product. OtoRead Std./Clin.
Introduction
Page 4
Furthermore, this warranty shall not apply to, and Interacoustics shall not be responsible for, any loss arising in connection with the purchase or use of any Interacoustics product that has been:
repaired by anyone other than an authorized Interacoustics service representative; altered in any way so as, in Interacoustics judgement, to affect its stability or reliability; subject to misuse or negligence or accident, or which has had the serial or lot number altered, effaced or removed; or improperly maintained or used in any manner other than in accordance with the instructions furnished by Interacoustics.
This warranty is in lieu of all other warranties, express or implied, and of all other obligations or liabilities of Interacoustics, and Interacoustics does not give or grant, directly or indirectly, the authority to any representative or other person to assume on behalf of Interacoustics any other liability in connection with the sale of Interacoustics products. INTERACOUSTICS DISCLAIMS ALL OTHER WARRANTIES, EXPRESSED OR IMPLIED, INCLUDING ANY WARRANTY OF MERCHANTABILITY OR FOR FUNCTION OF FITNESS FOR A PARTICULAR PURPOSE OR APPLICATION.
Printer AC Power Source Precautions READ THIS SECTION CAREFULLY BEFORE USE The printer AC power source converts main voltage (120V AC or 220V AC) to a low voltage (7V DC) for powering the printer. Use only the power source supplied for this purpose. This product is for indoor use only. Do not expose to water or excessive dust.
OtoRead Std./Clin.
Introduction
Page 5
This product is not suitable for operation in the presence of flammable anesthetic mixture with air or with nitrous oxide. Do not cover the power source body as it may result in excessive heating. The power source operates when the plug is inserted into an outlet. To turn it off, remove the plug from the outlet. The outlet must be easily accessible and located near the printer. Should a faulty condition occur, remove the plug from the outlet immediately.
Use of Rechargeable Batteries The OtoRead is designed for use with 1.5v AA/UM-3/R6 Alkaline batteries. Rechargeable batteries are not recommended for use with the OtoRead, however should you choose to use them, the OtoRead requires the use of 1.6v high voltage Nickel Zinc rechargeable battery types. Other types of rechargeable batteries such as 1.2v Nickel-Metal Hydride rechargeable batteries must not be used as they do not provide enough power to the device. Rechargeable batteries can typically be purchased in a 4 pack with a charger. A 3-5 hour fast charger is recommended as this type charges the batteries at a lower current, increasing the life of the batteries. The PowerGenix ZR-PGX5HRAA-4B, 3-5-Hour Fast Charger with 4 AA 1.6v High Voltage Rechargeable Batteries fit this description. Be aware that using rechargeable batteries may cause the following: 1. The low battery message generated by the instrument mail fail to be triggered. In this case, the instrument display may go blank or the instrument may fail to power on without warning. If this occurs, replace the current batteries with newly recharged batteries.
OtoRead Std./Clin.
Introduction
Page 6
2. Some rechargeable batteries tend to be slightly longer in length than regular alkaline AA batteries. This may cause the battery contacts to be pushed outwards. When returning to use standard alkaline AA batteries, it may be found that the alkaline batteries no longer make proper contact. Ensure that the rechargeable batteries used are the same length as standard alkaline AA batteries.
Cleaning and Disinfecting the Unit Wipe the surface with a cloth slightly dampened with mild detergent or normal hospital bactericides. Do not immerse the unit. Do not clean the unit with isopropyl alcohol or other solvents.
Waste Disposal Note: Within the European Union it is illegal to dispose electric and electronic waste as unsorted municipal waste. Electric and electronic waste may contain hazardous substances and therefore has to be collected separately. Such products will be marked with the crossedout wheeled bin shown below. The cooperation of the user is important in order to ensure a high level of reuse and recycling of electric and electronic waste. Failing to recycle such waste products in an appropriate way may endanger the environment and consequently the health of human beings. Disposal of batteries must be made according to national regulations.
OtoRead Std./Clin.
Introduction
Page 7
Introduction The purpose of the OtoRead test system is to provide a rapid measurement and documentation of Distortion Product Otoacoustic Emissions (DPOAEs) or Transient Evoked Otoacoustic Emissions (TEOAEs) at several frequencies.
What is the OtoRead Instrument? The OtoRead Otoacoustic Emission test instrument is a hand-held device designed to provide an objective measure of outer hair cell function through the measurement of cochlear emissions. It consists of the handheld unit, printer, single-use eartips and other accessories. The OtoRead instrument may be used as a screening tool or in conjunction with conventional tests as part of a full audiological evaluation. The OtoRead instrument contains the hardware and software for generating the test stimuli, measuring and displaying the OAEs, and storing the results until they are printed. The plastic housing contains circuit boards that provide the signal processing and display the test results. The instrument also contains 4 AA/UM-3/R6 alkaline batteries to power the device. The instrument uses a liquid-crystal display (LCD) and three light-emitting diodes (LEDs) to provide a visual display of test data and test conditions to the operator. The probe houses a microphone and two speaker tubes which produce test stimuli and measure the sound pressure level (SPL) present in the sealed ear canal. Interface of the instrument to the ear canal is accomplished through disposable eartips made of industrial elastomer, which fit onto the probe tip. The disposable eartips are color coded to facilitate easy selection by size. Four membrane-type push buttons located on the keypad of the device allow the user to control testing and printing, and to reset test protocols. Printing will commence upon placement of the instrument into the cradle (if the printer is turned on).
OtoRead Std./Clin.
Introduction
Page 8
How are the Results Stored and Reported? When the OtoRead is set in its default settings, the instrument will store the results from one patient (left and right ear) in its non-volatile memory for subsequent printing. However, the OtoRead instrument can store up to 250 test results. The results are displayed via the LCD on the front of the device and are stored in the device’s internal memory. After testing is completed, results can be printed using the printer. Test results are stored in the non-volatile memory so the operator can delay printing until a later time if desired.
Definition of OAEs What Are DPOAEs? Distortion Product Otoacoustic Emissions (DPOAEs) are acoustic signals that can be detected in the ear canal of a person with normal outer hair cell function, subsequent to stimulation of the auditory system with a pair of pure tones at frequencies f1 and f2. The resulting emission of interest is the distortion product tone at the frequency 2f1-f2. What Are TEOAEs? Transient Evoked Otoacoustic Emissions (TEOAEs) are acoustic signals that can be detected in the ear canal of a person with normal outer hair cell function, subsequent to stimulation of the auditory system with a series of wideband clicks. What Do Otoacoustic Emissions Results Tell Us? Available evidence suggests that otoacoustic emissions (OAEs) are generated by the cochlea’s outer hair cells, and that the presence of OAEs is an indication that the outer hair cells are normal. Although OAE test data provide no indication of inner hair cell function, or of hearing ability, current research indicates that the majority of hearing-impaired individuals will be identified by a simple OAE test. Patients who fail to generate OAEs should be rescreened and/or referred for additional audiological testing.
OtoRead Std./Clin.
Introduction
Page 9
Measurement of OAEs How Does the OtoRead Device Measure DPOAEs? The OtoRead instrument generates a series of test tones, directs them into the ear canal, and then measures the level of the DPOAE tone generated by the cochlea. By using different test frequencies, the OtoRead device provides an estimate of outer hair cell function over a wide range of frequencies. How Does the OtoRead Device Measure TEOAEs? The OtoRead instrument generates a series of clicks, directs them into the ear canal, and then analyzes the spectrum of the returning signal, separating the noise and emission. By using band pass filters, the OtoRead device provides an estimate of outer hair cell function over a wide range of frequencies. How Does the OtoRead Device Work? The digital signal processor in the instrument generates two pure tones (f1 and f2) for DPOAEs or a series of wideband clicks for TEOAEs through a digital-to-analog converter. These tones or clicks are presented to the ear via speaker tubes located in the probe. A microphone in the probe measures the sound in the ear canal and transmits the signal to the analogto-digital converter. The digital signal processor then uses Fast-Fourier Transforms (FFTs) to filter the signal into narrow frequency bands, and detects any emissions present. The level of these emissions can be compared with the level of the noise. The SPL and frequencies of the test tones and the averaging time used to process the signals can be determined by the tester through adjustable settings maintained in static memory within the OtoRead instrument. What Frequency Range of Hearing is estimated? DPOAEs: Approximately 1 kHz to 12 kHz (depending on the frequency range selected). Since the health of the hair cells in the region of the f2 test frequency are estimated, and a) the 2f1-f2 emission frequency is at about six-tenths of the f2 frequency, b) emissions tend to be weak below 600 Hz or so, and c) the ambient noise tends to be highest at low frequencies, the lowest f2 test frequency that can be routinely measured is about 1 kHz. TEOAEs: Roughly 500 Hz to 4 kHz. OtoRead Std./Clin.
Introduction
Page 10
TEOAEs can be reliably recorded at lower frequencies than DPOAEs, but cannot be measured reliably above 4 kHz
OtoRead Std./Clin.
Introduction
Page 11
Basic Functions Quick Start These steps will allow you to quickly start using the OtoRead OAE Test System. Be sure to perform the necessary otoscopic examination prior to testing. Read the entire manual before testing patients. Step 1 Insert 4 AA/UM-3/R6 Alkaline batteries into the OtoRead . Step 2 Place an eartip as far down as possible on the probe tip. Step 3 Turn on the OtoRead by pressing the large DOWN arrow button. Step 4 Select the test ear by pressing the LEFT or RIGHT arrow key. Step 5 Insert the eartip deeply into the patient’s ear canal to obtain a seal. When a seal is obtained, the OtoRead will automatically begin the test first calibrating and then testing emissions. The red ERROR LED will illuminate if there is noise in the environment. This flashing is normal and will often occur and testing can be made anyhow, though it may influence the result. Once the testing is finished, the unit will display “PASS” or “REFER” on the LCD display. Step 6 When testing is completed on both ears, turn the printer on by pressing the round button on top and place the hand-held unit on the cradle. The most recent test results for both ears will automatically print out.
Connection to the Printer Connect the appropriate end of the connector cable into the port located on the underside of the cradle. After firmly pushing the broad connector end into place, turn the screws on either side to tighten it. Return the cradle to right side up. OtoRead Std./Clin.
Basic Functions
Page 12
The end of the connector cable should be plugged firmly into the inlet at the rear of the printer. The fat side on the connector (look for arrow) goes to the bottom of the printer. Finally, plug the appropriate ends of the power cord into the power adapter and an outlet. To turn the printer on, press the button on the front. The printer indicator light will flash green briefly and then continue flashing orange to indicate it is ready to receive data from the OtoRead unit. The printer will automatically power off after one minute of inactivity.
Figure 1
Loading Paper into the Printer Open the lid by pushing on the sides, insert paper roll as shown, and close the lid.
Figure 2
OtoRead Std./Clin.
Basic Functions
Page 13
Battery pack insertion: Insert battery as shown
Figure 3 Power on: Push POWER BUTTON for two seconds to power ON or OFF. One short beep will be heard at power ON, two short beeps at power OFF. Green Power Indicator will be lit if battery powered
Attaching the Eartips The OtoRead instrument comes with a box of disposable eartips that fit a variety of ear canal sizes. The probe tip must have an eartip attached before inserting it into an ear canal. The eartip kit has 12 different size eartips that are color-coded for easy selection. The determination of the appropriate eartip size should be made by persons with proper training and experience.
OtoRead Std./Clin.
Basic Functions
Page 14
The eartip must seal the ear canal. The best test results are obtained when the eartip is inserted deeply into the ear canal instead of flush with the ear canal opening. Caution must be taken, however, to ensure that the eartip does not extend too deeply into the ear canal. Use only the eartips approved for use with the instrument. The eartips are disposable and should be replaced after each patient. Do not attempt to clean or reuse these eartips. After selecting an eartip, push it onto the probe tip until it is flush against the base of the probe tip. The sound outlet tubes on the probe tip are recessed to minimize the likelihood of clogging. If the probe tip does become plugged or clogged, it must be replaced. See the section Probe Tip Replacement on page 16 for further information. To remove the eartip, grasp the eartip at the base and twist it while pulling it straight off the end of the probe tip.
Connecting the Extension Cord It is possible to extend the reach of the OtoRead by pulling off the top and inserting the extension cord between the instrument and the top (see Figure 2). A regular test situation can be seen in Figure 3. The extension of the OtoRead is particularly useful in situations where more flexibility is needed e.g. as in Figure 4.
Figure 2
OtoRead Std./Clin.
Basic Functions
Page 15
Figure 3
Figure 4
Probe Tip Replacement To replace the probe tip, squeeze the tabs as shown in the picture Figure 5. The tabs should audibly snap off the probe assembly. Pull the probe tip directly off the probe and discard it.
Figure 5
Figure 6
Figure 7
Figure 8
Obtain a replacement probe tip and orient the tip as shown in the picture Figure 7. The probe tip will only fit on one way; be careful not to force the tip in place. Push the tip directly down onto the probe. Once the probe tip is in place on the probe, push firmly downward on the top of the tabs one at a time until a click is heard. Tug lightly on the probe tip to verify that the tip is securely attached. NOTE: If the probe tip is not inserted completely, the OtoRead will not perform a test.
OtoRead
Setup
Page 16
Operating Instructions Preparing the Patient for Testing Otoscopic examination of the patient’s ear canals should be performed prior to testing. Excessive cerumen or vernix in the ear canals may interfere with the test and give invalid or incomplete results. Patients with excessive cerumen, debris, or foreign bodies in the ear canals should be referred to an audiologist or physician for removal of the blockage prior to testing. Place the patient in a position that will allow the OtoRead to be held steady while testing is in progress. The patient should remain still and quiet while the test is performed. Control Buttons The OtoRead instrument uses 4 buttons to control all functions of the instrument. These buttons are arranged in a directional cursor format. The arrows on the keys (LEFT, RIGHT, UP, DOWN) correspond to the arrows that are used on the screen. The screen will indicate which button to push by showing the appropriate arrow. NOTE: The UP key will always bring the instrument back to either the previous menu or the main menu. The UP key will also turn the unit off when the instrument is at the Main Menu. Turning On the Instrument To turn on the OtoRead instrument, press the DOWN key located below the instrument’s display screen. Two small lights (yellow and green) will appear briefly just above the display screen. The green ready light will remain on. Display # 1 will quickly appear. This display will indicate the type of instrument (standard or combo), software version, serial number, and operating mode (DP, TE, DP custom or TE custom). If the batteries have sufficient power, the OtoRead instrument will automatically check the date and time settings. If there are no date/time errors detected, the Main Menu (Display # 2) will appear on the display. OtoRead Std./Clin.
Operating Instructions
Page 17