Mcube Technology Co
BioCon-700 In Depth User Guide v2 April 2020
In Depth User Guide
6 Pages
Preview
Page 1
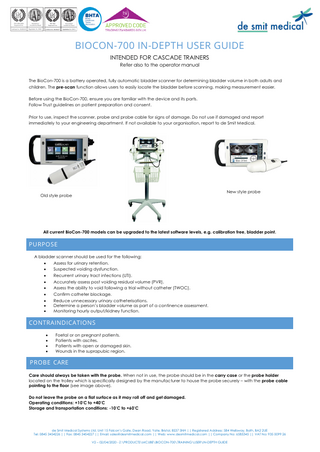
BIOCON-700 IN-DEPTH USER GUIDE INTENDED FOR CASCADE TRAINERS Refer also to the operator manual The BioCon-700 is a battery operated, fully automatic bladder scanner for determining bladder volume in both adults and children. The pre-scan function allows users to easily locate the bladder before scanning, making measurement easier. Before using the BioCon-700, ensure you are familiar with the device and its parts. Follow Trust guidelines on patient preparation and consent. Prior to use, inspect the scanner, probe and probe cable for signs of damage. Do not use if damaged and report immediately to your engineering department. If not available to your organisation, report to de Smit Medical.
New style probe
Old style probe
All current BioCon-700 models can be upgraded to the latest software levels, e.g. calibration free, bladder point.
PURPOSE A bladder scanner should be used for the following: • Assess for urinary retention. • Suspected voiding dysfunction. • Recurrent urinary tract infections (UTI). • Accurately assess post voiding residual volume (PVR). • Assess the ability to void following a trial without catheter (TWOC). • Confirm catheter blockage. • Reduce unnecessary urinary catheterisations. • Determine a person’s bladder volume as part of a continence assessment. • Monitoring hourly output/kidney function.
CONTRAINDICATIONS • • • •
Foetal or on pregnant patients. Patients with ascites. Patients with open or damaged skin. Wounds in the suprapubic region.
PROBE CARE Care should always be taken with the probe. When not in use, the probe should be in the carry case or the probe holder located on the trolley which is specifically designed by the manufacturer to house the probe securely – with the probe cable pointing to the floor (see image above). Do not leave the probe on a flat surface as it may roll off and get damaged. Operating conditions: +10°C to +40°C Storage and transportation conditions: -10°C to +60°C
de Smit Medical Systems Ltd, Unit 15 Falcon’s Gate, Dean Road, Yate, Bristol, BS37 5NH || Registered Address: 584 Wellsway, Bath, BA2 2UE Tel: 0845 3454226 || Fax: 0845 3454227 || Email: [email protected] || Web: www.desmitmedical.com || Company No: 6585345 || VAT No: 935 0099 26 V2 – 02/04/2020 - Z:PRODUCTSMCUBEBIOCON-700TRAININGUSERIN-DEPTH GUIDE
ACCURACY • •
+/- 15% 100 – 999ml (i.e. 300ml = +/- 45ml) Or +/- 15ml 0 – 100ml (i.e. 50ml = +/- 15ml)
UNDERSTANDING SYMBOLS
Male Female Scan depth 18cm
Child Scan depth 8cm
Information Missing Scan Data For access to the onRecalls previous scan board quick start guide. (only while switched on)
Calibration reminder Appears one year after the last calibration.
Options only displayed on newer models, upgrade available Any unsaved scan results will be lost when the scanner is powered off. Newer models do not require routine calibration, please confirm with your engineering department. To upgrade your device to the latest software contact de Smit Medical.
BATTERY FUNCTION The battery is integral and charged whilst in place in the scanner. There is no need to remove or have a spare battery. On screen battery status indicator:
Full charge
~70%
~30% Charge battery at this stage
Fully discharged battery, charge for 10 minutes before use
Indicates the external power adaptor is connected
It is recommended that the scanner is NOT kept on charge when not in use. A fully discharged battery will take up to 6 hours to fully charge.
CONNECTIONS Probe cable port (‘D’ connector) Computer connection
Power cable (‘D’ connector)
To disconnect the probe, squeeze the springloaded clips as indicated and pull.
There is no need to disconnect probe from the scanner once assembled.
de Smit Medical Systems Ltd, Unit 15 Falcon’s Gate, Dean Road, Yate, Bristol, BS37 5NH || Registered Address: 584 Wellsway, Bath, BA2 2UE Tel: 0845 3454226 || Fax: 0845 3454227 || Email: [email protected] || Web: www.desmitmedical.com || Company No: 6585345 || VAT No: 935 0099 26 V2 – 02/04/2020 - Z:PRODUCTSMCUBEBIOCON-700TRAININGUSERIN-DEPTH GUIDE
AC POWER CONNECTION & SD MEMORY CARD
Connect the DC power ‘D’ connector, like charging a mobile phone. Ensure the writing is facing forward as shown above.
Charge light should show: Green: battery fully charged Orange: battery receiving charge.
To eject the SD card, press the top of SD card. Insert the SD card into the slot until you can hear a faint clicking sound.
TAKING A READING Clean the probe and unit before and after use. Excess ultrasound gel should be removed from the probe using a clean paper towel. Wipe the probe using detergent wipes following manufacturer’s guidance and Trust recommendations. Switch the scanner ON by pressing the POWER BUTTON (for older models press and hold until the screen lights up). Select patient type For female patients who have had a hysterectomy, please select male.
Male Female Scan depth 18cm
Child Scan depth 8cm
Children are patients less than 120cm tall & weighing less than 25kg (8cm scan depth).
For best results, only use a recognised ultrasound transmission gel. Apply ultrasound gel directly onto the probe, position the probe midline on the patient’s abdomen approximately 3 cm above the symphysis pubis (pubic bone). With the SCAN KEY ON THE PATIENT’S RIGHT HAND SIDE, with the head on the patient icon pointing towards the patient’s head as depicted below.
Pubic bone
Press any scan key once to display a live pre-scan image.
Bladder
Uterus
Using ‘bladder point’ if fluid is present, you will see a pink cross (if you don’t have bladder point function an upgrade is available). NB: a larger pink cross indicates a larger volume and a smaller pink cross indicates a smaller volume.
Fluid will show up as a black area- not always clearly visible in small volumes. To locate the best/largest view of the bladder (whilst still in the pre-scan window) slowly alter the angle or pressure of the probe until you find the largest (black) image of the bladder possible- with the green vertical in the centre. It is not necessary to move the probe head across the abdomen, just a slight adjustment of the angle.
de Smit Medical Systems Ltd, Unit 15 Falcon’s Gate, Dean Road, Yate, Bristol, BS37 5NH || Registered Address: 584 Wellsway, Bath, BA2 2UE Tel: 0845 3454226 || Fax: 0845 3454227 || Email: [email protected] || Web: www.desmitmedical.com || Company No: 6585345 || VAT No: 935 0099 26 V2 – 02/04/2020 - Z:PRODUCTSMCUBEBIOCON-700TRAININGUSERIN-DEPTH GUIDE
KEY MESSAGES It is not essential to align the pink cross with the green centre line. It is important to have the green vertical line near the centre of the bladder. You will not always see the bladder clearly- or the pink cross, if the bladder is very small. Scan key options:
Pre-scan
Once satisfied, HOLD THE PROBE STILL maintaining position and pressure and press any scan key again to capture a reading. Reading will take approximately 4 seconds. DO NOT remove probe from patient during capture. The results screen will then appear.
CHILD MODE On newer/upgraded models of the BioCon-700, when in the child setting, the scan depth (8cm) is highlighted (in the Pre-Scan window) with a yellow marker to help confirm the entire bladder is captured. If the bladder encroaches beyond the child scan depth marker (8cm), SELECT EXIT AND SCAN AGAIN having selected the appropriate adult patient setting (scan depth 18cm). When in child mode, the scan depth marker will be displayed on the results screen (see image below). Child scan depth marker, 8cm pre-scan window
de Smit Medical Systems Ltd, Unit 15 Falcon’s Gate, Dean Road, Yate, Bristol, BS37 5NH || Registered Address: 584 Wellsway, Bath, BA2 2UE Tel: 0845 3454226 || Fax: 0845 3454227 || Email: [email protected] || Web: www.desmitmedical.com || Company No: 6585345 || VAT No: 935 0099 26 V2 – 02/04/2020 - Z:PRODUCTSMCUBEBIOCON-700TRAININGUSERIN-DEPTH GUIDE
CONFIRMATION OF VALID READING •
For larger volumes ensure the outer edge of the bladder is visible within the cross hairs and that no section of the bladder has been missed.
• •
Very small bladder volumes may not show up clearly. The BioCon-700 displays readings up to 999ml. Greater readings will be shown as 999+ml.
Horizontal view
Vertical view
Bladder Save max. volume scan result if desired
Scanned area outline
Print max. volume scan result if desired
12 plane image view
Data transfer to EPR if desired
Current reading
New patient (data set)
Patient ID
Maximum volume captured (of all scans on current patient)
Check bladder is contained within the cross hairs
If the probe is positioned on the patient’s midline, you often will not need to move the probe head at all. Just a slight change of angle and/or pressure is required to capture the bladder.
ACCURACY OF MEASUREMENT The following cases may adversely affect ultrasound transmission and the accuracy of the measurement: • When a patient has had supra-pubic or pelvic surgery. • A patient with catheter in his or her bladder. • A patient with scars, sutures, staples or incisions in his or her abdomen. • Use of unsuitable ultrasound gel. • Air bubbles between probe head and the skin of the patient. • An excessively obese patient. • Use of the probe with an unclean probe head. • Inappropriate patient position.
ENTERING A PATIENT ID A patient ID can only be entered once the scan result has been obtained. Tap on the grey field next to Tag: (ID: on older models). A keyboard will allow you to enter patient ID (maximum 10 characters) Tap OK, press Save (if desired) as your scan results and ID will not be retained once the NEW PATIENT option has been selected or the scanner has been powered off. Print, save or transfer data to EPR is optional.
CHANGING DATE AND TIME It is recommended that no other sections under setup are accessed or changed, other than date & time settings and selfdiagnostic test. Refer to the user manual or FAQs detailed on our website. Select Setup from the homepage, then select date/time. Older models Set date and time and select OK Newer models
Software upgrades available, contact de Smit Medical for more details. de Smit Medical Systems Ltd, Unit 15 Falcon’s Gate, Dean Road, Yate, Bristol, BS37 5NH || Registered Address: 584 Wellsway, Bath, BA2 2UE Tel: 0845 3454226 || Fax: 0845 3454227 || Email: [email protected] || Web: www.desmitmedical.com || Company No: 6585345 || VAT No: 935 0099 26 V2 – 02/04/2020 - Z:PRODUCTSMCUBEBIOCON-700TRAININGUSERIN-DEPTH GUIDE
SELF-DIAGNOSTIC TEST ONLY AVAILABLE ON NEWER MODELS (UPGRADE AVAILABLE) If you accidently drop your probe, or doubt the accuracy of the scan result, you may want to perform a functional selfdiagnostic test. A visual inspection is recommended. This is not a calibration. Tap the General function in the Setup and tap Self-Diagnostic, shown below.
This screen opens to the selfdiagnostic screen, and the most recently completed self-diagnosis appears on the screen, shown below.
Tap Scan on the screen and the self-diagnostic will be started. The results will appear, use the shift icons to see the results.
Check all three screens to ensure it has passed all tests. If failed, press Scan again to redo the test. If it still shows fail, press print and return unit to your engineering department or contact de Smit medical. Tap EXIT when you have completed the self-diagnostic test.
CHANGING THE PRINTER PAPER The BioCon-700 utilises a thermal printer and requires no ink. As the printer paper nears the end of the roll, a pink line will appear.
Open the printer housing door by lifting the adjacent grey lever and remove the unwanted remnants of the spent roll.
With the new printer paper roll in one hand, unroll a small length and insert into the unit ensuring that the paper feeds from the top (back) of the roll.
Leaving a small amount of paper exposed, close the printer housing door until it clicks shut.
If after changing the paper the printer doesn’t print, check that the new paper roll has been inserted correctly, score the paper to see if it makes a mark (right way up), then re-insert the paper.
The BioCon-700 should be cleaned and disinfected in accordance with the manufacturer’s guidance and Trust recommendations.
Please ensure the probe head is inserted the correct way up in the trolley with the wire pointing downwards. Supporting materials: cleaning instructions, quick start guide, FAQs, training videos, clinical training package are all available by contacting de Smit Medical
de Smit Medical Systems Ltd, Unit 15 Falcon’s Gate, Dean Road, Yate, Bristol, BS37 5NH || Registered Address: 584 Wellsway, Bath, BA2 2UE Tel: 0845 3454226 || Fax: 0845 3454227 || Email: [email protected] || Web: www.desmitmedical.com || Company No: 6585345 || VAT No: 935 0099 26 V2 – 02/04/2020 - Z:PRODUCTSMCUBEBIOCON-700TRAININGUSERIN-DEPTH GUIDE