medtronic
Autolog IQ Quick Setup Guide July 2020
Quick Setup Guide
4 Pages

Preview
Page 1
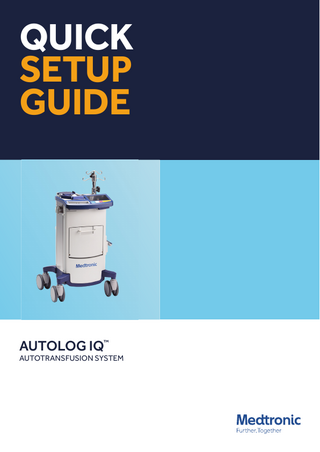
QUICK SETUP GUIDE
AUTOLOG IQ™
AUTOTRANSFUSION SYSTEM
BLOOD COLLECTION SYSTEM SETUP
Read the entire Medtronic autoLog IQ™ Autotransfusion System User Manual before using the autoLog IQ™ system. This Quick Setup Guide is not a substitute for the complete User Manual. It is only intended to assist the operator in the setup of the autoLog IQ™ autotransfusion system.
1.
2.
3.1
3.2
4.
5.
6.
7.
Attach the step-down connector to the bottom of the collection reservoir. Ensure that the connector is fully secured.
Attach the blue-capped suction/anticoagulant line connector to either the blue-capped or white-capped inlet port on top of the collection Reservoir.
Close the clamp on the step-down connector before the kit setup is complete. Ensure that the clamp is fully closed.
Close the roller clamp on the suction/anticoagulant line.
Place the collection reservoir into the reservoir holder. Attach a vacuum line to the yellow-capped port on the collection reservoir.
Turn on the device power by pressing
Attach the other end of the vacuum line to the vacuum overflow trap of the device.
Attach Turn on the vacuum by pressing
BLOOD COLLECTION SYSTEM SETUP
WASH KIT SETUP
(CONT’D)
8.
If necessary, adjust the vacuum setting using the Vacuum drop-down menu on the Main Screen.
9.
Spike the anticoagulant container. If the container is nonvented, open the vent cover on the drip chamber.
10.1
Before blood collection, open the roller clamp and prime the collection reservoir with a minimum of 100 mL of anticoagulant solution.
10.2
Reduce the anticoagulant flow to a ratio of approximately 15 mL of solution to 100 mL of blood.
1.
2.
3.
4.
5.
6.
7.
8.
The message appears: Kit is not installed. Lock the bowl cover.
Install the waste bag onto the waste bag pins.
Attach the saline wash solution containers to a lower IV pole hook.
Remove the holding bag from the wash kit and hang it on an upper IV pole hook. Close the clamps on the 2 red- capped outlet lines that each include a membrane port.
Place the wash kit in the cradle arm and remove the wash kit cover.
Place the bowl in the centrifuge chamber with the yellow- capped waste line outlet tubing facing the waste bag. Refer to the markings on the top panel.
Remove the waste bag from the wash kit. Confirm that the drain valve is closed on the waste bag.
Align the centrifuge markings with the vertical assemblies on the bowl. To lock the bowl, simultaneously press down on the bowl and turn it clockwise until a click is heard.
WASH KIT SETUP
BLOOD PROCESSING SETUP
(CONT’D)
9.
10.
11.1
11.2
12.
13.
14.
15.
Insert the yellow-capped connector into the yellow-capped inlet port on the waste bag. Confirm that there are No kinks in the waste line.
Pull the pump lever and hold it open. Stretch the pump tubing around the pump head and over the pump outlet tubing guide. Release the pump lever.
The message appears: Insert the kit in the valve and the pump. Press to resume.
Press . The message appears: Connect the saline line and reservoir. Press to resume.
Place the manifold into the recessed cavity. Place the 3 manifold tubing lines into the tubing guides, and ensure that each tube is fully seated in each guide.
Spike the middle manifold tubing into the saline bag or bags. Note: If using one saline bag, confirm that the clamp on the unused saline line is closed.
Place the single tubing line of the manifold into the air detector. Close the manifold cover. Rotate the manifold cover latch until the lock indicators are aligned.
Connect the left-hand tube of the manifold to the blue-capped stepdown connector at the bottom of the reservoir, and then open the clamp on the step-down connector.
1.
Press . The message appears: Machine stopped. Press to enable self start.
2.1
Press to activate the self-start mode. The message appears: Selfstart enabled. Press to manually start.
2.2
The device automatically starts when it detects approximately 800 mL of blood in the reservoir for at least 5 seconds. Note: To begin the fill before 800 mL is collected, press
Medtronic Australasia Pty Ltd 2 Alma Road Macquarie Park, NSW 2113 Australia Tel: +61 2 9857 9000 Fax: +61 2 9889 5167 Toll Free 1800 668 670
Medtronic New Zealand Ltd Level 3 - Building 5, Central Park Corporate Centre 666 Great South Road Penrose, Auckland 1051 Fax: +64 9 918 3742 Toll Free: 0800 377 807
medtronic.com.au medtronic.co.nz
UC201708091EE ANZ © Medtronic 2020 All rights reserved. Printed in Australia 07/20 [8022-072020]