Neoprobe Corporation
neoprobe System
Model 2300 Gamma Detection System (with Bluetooth) Operation Manual Rev July 2014
Operation Manual
40 Pages
Preview
Page 1
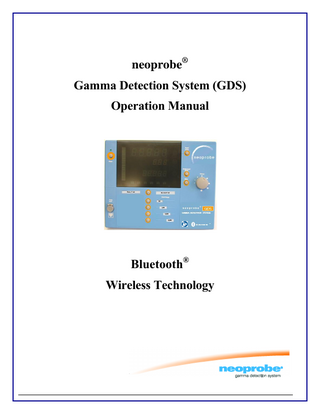
neoprobe® Gamma Detection System (GDS) Operation Manual
Bluetooth® Wireless Technology
neoprobe® GDS Operation Model
“neoprobe®”, “neo2000®”, and “Devicor®” word marks and “neoprobe®” logo are registered trademarks of Devicor® Medical Products, Inc. "Bluetooth®" word mark and logos are owned by Bluetooth SIG, Inc. and any use by Devicor® or its representatives is under license.
Devicor® Medical Products, Inc. 300 E-Business Way, Fifth Floor Cincinnati, OH 45241 USA Tel: 1-877-926-2666 Fax: 1-888-260-6362 e-mail: customerservice@mammotome.com URL: www.mammotome.com
Made in U.S.A. This document is sole property of Devicor® Medical Products, Inc. Any duplication, reproduction, or transmission of document or any of its content to unauthorized parties without prior written permission of Devicor® Medical Products, Inc. is prohibited.
© 2014 DEVICOR® MEDICAL PRODUCTS, INC. ALL RIGHTS RESERVED.
AW-000887
Page 2 of 38
neoprobe® GDS Operation Model
TABLE OF CONTENTS 1.
INTRODUCTION ... 4
2.
EQUIPMENT ASSEMBLY ... 5
3.
DYNAMIC PITCH MODE (DEFAULT) ... 7
4.
BINARY PITCH MODE (OPTION) ... 13
5.
TERMINOLOGY AND SYMBOLS ... 17
6.
POTENTIAL APPLICATIONS ... 19
7.
CLEANING & DISINFECTION ... 20
8.
MAINTENANCE ... 24
9.
SYSTEM SPECIFICATIONS ... 30
10. AUTHORIZED ACCESSORIES ... 36 11. WARNINGS, CAUTIONS AND NOTES ... 37
AW-000887
Page 3 of 38
neoprobe® GDS Operation Model
1. INTRODUCTION The neoprobe® Gamma Detection System console, with BLUETOOTH® wireless technology, detects presence of gamma rays emitted from radioactive isotopes in body organs or tissue. System provides an increasing or decreasing sound and visual indicator (Count Bar) that vary in pitch as level of gamma radioactivity increases or decreases. Intended use
Electronic medical device for detecting and quantifying gamma radiation
Indications
Used externally and intraoperatively to detect radioactive emissions from body tissues or organs where radiopharmaceuticals are administered. There are no known contraindications in the application or use of the device.
Detecting gamma radiation with a hand-held probe is based on inverse square law of physics which allows detection of radiation emitted from a small source. Placing probe close to radioactive site increases number of counts detected and localization occurs. Excision of lesion is then performed using standard surgical technique. Gamma detection protocols that control use of large, highly collimated scintillation detectors may require modifications when used in conjunction with hand-held gamma probe. NOTE: User is responsible to determine suitability of product for use in any surgical procedure. Contact Devicor regarding questions for intended use of product. CAUTION: United States Federal law restricts this device to sale by or on order of a physician. CAUTION: Read Warnings, Cautions and Notes section before operating product. CAUTION: Clean and sterilize probe and collimator before use; use sterile surgical probe cover if not sterilized. NOTE: Save packing material to return product for service. NOTE: Accessories packaged separately from control unit (console) during shipment. Verify you have received all items ordered. Visual Indicators and Controls Visual information and data viewed on LED screen. Visual information displayed in Liquid Crystal fonts and translated in this manual; example - “No Linc” is displayed as “no linc” “on LED screen.
FRONT
AW-000887
REAR
Page 4 of 38
neoprobe® GDS Operation Model Number
Name
Number
Name
[1]
Standby/On Switch and Indicator Light
[15]
Volume Adjustment
[2]
“No Probe Connected” Symbol
[16]
Mute Button
[3]
Radionuclide Selection Indicators
[17]
Mute Symbol
[4]
Binary/Dynamic Pitch mode buttons and indicators
[18]
Dynamic Pitch Range Buttons And Indicator Lights
[5]
Probe Input Connector
[19]
EC Authorized Representative Tag
[6]
Count Bar
[20]
Manufacturers’ Tag
[7]
Target Count Readout
[21]
Radionuclide Selector Button
[8]
Background Count Readout
[22]
Serial Port Connector
[9]
Ratio Readout
[23]
BLUETOOTH indicator light
[10]
Target Count Symbol
[24]
Serial Number Tag
[11]
Target Count Button*
[25]
AC Power Inlet Connector
[12]
Ratio Symbol
[26]
Power Rating Tag
[13]
Background Count Symbol
[27]
Equipotential Contact Point
[14]
Background Count Button
®
NOTE: [Numbers] are repeated in following text to identify indicator or control. * Functionality of button [11] same as button on probe with BLUETOOTH® wireless technology. See wireless probe operation manual. 2. EQUIPMENT ASSEMBLY
Step 1 2
Start product Connect Model 2009 power cord to console and into AC power source. DO NOT USE EXTENSION CORD. Maintain proper clearance for access to AC Power Inlet Connector for disconnection from mains power. Press and release Standby/On button Console powers on; displays software version; and operates in Dynamic Pitch Mode
NOTE: Console is equipped with BLUETOOTH® wireless technology and is compatible with both BLUETOOTH® wireless technology enabled probes and cabled probes. User can select either probe type to use with console. A wireless probe cannot be operated at the same time a cabled probe is in use.
AW-000887
Page 5 of 38
neoprobe® GDS Operation Model
Quick Start BLUETOOTH® Wireless Technology Enabled Probe
Step 1 2 3 4 5
Prepare probe equipped with BLUETOOTH® wireless technology Prepare for operation as stated above Install battery in probe Press button on probe; probe blue light is on steady Press and hold Target Count Button [11] on console; displays “disc”; release Target Count button Probe connects; blue light on probe flashes and starts normal operation See manual provided with probe for complete instructions
When base Binary or Dynamic Pitch Mode (not performing a 10-second count, etc), user can press and hold Background Count Button. After five seconds, a Start Beep sounds and wireless probe will turn off. Note: It takes an additional five seconds before system displays “no Linc”.
If Radionuclide Button is pressed and held for more than one second, user will hear a “start beep” and all radionuclide indicators will go out. This signifies an Open Window setting. Exit Open Window by pressing and releasing Radionuclide button (last radionuclide selected is restored). When in base Binary or Dynamic Pitch Mode (not performing a 10-second count, etc) and a wireless probe battery is low, Ratio Indicator will show “Lo” and Background Count will show “batt” for two seconds. A low battery chime is sounded and No Probe Connected Icon turns on for two seconds, then turns off. Previous values are restored. Message is seen every 20 seconds.
AW-000887
Page 6 of 38
neoprobe® GDS Operation Model
Quick Start Probe with cable Procedure for reusable cabled detector probes (Model 1017 or Model 2059).
Step 1 2
3
Prepare Prepare console for operation as stated above: If needed, attach external collimator to probe Using aseptic technique (without sterile surgical drape) connect probe to Model 2024 or Model 2060 probe cable; align red dot on probe to red dot on cable connector; gently insert cable into Probe Input Connector; if using a sterile surgical drape - place probe in drape now Align arrow on cable connector and groove in Probe Input Connector [5] on console; gently insert cable connector neoprobe® system is now ready for use
NOTE: Model 1013 collimator is compatible with Model 1100, 1101, and 1017 probes. NOTE: Model 1017 14mm probe connector has four pins; Model 2059 11mm probe connector has six pins. NOTE: You hear audible click as you insert cable connector into Probe Input Connector. Connector is push/pull component - DO NOT TWIST/TURN CABLE CONNECTOR, damage to connectors and connector pins may occur. 3. DYNAMIC PITCH MODE (DEFAULT) Radioactive isotopes are traced in Dynamic Pitch Mode from injection site to other areas of concentration. To…. Turn system on
Select Dynamic Pitch count range different from 0-100 Select a radionuclide different from 99mTC.
AW-000887
Perform following….. See Equipment Assembly above
Press and release Dynamic Pitch Count Range selection buttons [18]. Press and release Radionuclide Selection button [21] until desired radionuclide is lit
Page 7 of 38
And this occurs…… “Dynamic Pitch” indicator [4] is lit Dynamic Pitch Range automatically set to 0-100 count range, and default background count is 2 cps Radionuclide automatically set to Technetium 99m (99mTC), and indicator [3] is lit Indicator for desired Count Range is lit [18]; Background Count Readout [ 8] changes to default for selected Count Range Radionuclide Selection Indicator [ 3] is lit
neoprobe® GDS Operation Model
To…. Set Dynamic Pitch audible tone.
Perform following….. Turn Volume [15] counterclockwise
And this occurs…… Sound is lowest Sound is highest
Set Dynamic Pitch sound on or off.
Turn Volume [15] clockwise Press and release Mute Button [16].
When sound is off, Mute symbol [17] flashes; when sound is on, Mute symbol [17] is constant
Background Count in Dynamic Pitch Mode Background Count [8] is used as minimum value for selected range. Background Count [8] displays default value for Dynamic Pitch range; Ratio Readout [9] is off; and Target Count [7] displays count rates as probe moves over body tissue.
BACKGROUND COUNT How to acquire Background Count
Place probe tip on target area.
Press and release Background Count Button [14]; a single Start Beep will sound; hold probe steady 2 to 6 seconds until Count Bar [6] is full and a double Stop Beep sounds.
Console display
Background Count Symbol [13] flashes.
Background Count Readout [8] displays dashes.
Count Bar [6] fills from bottom to top as data is collected.
Target Count Readout [7] is blank and is stopped temporarily.
Background Count Value Background Count Readout data [8] will remain until a new Background Count is performed, Count Range [18] is changed, Dynamic/Binary Pitch button is pressed, or system is switched off.
Set Dynamic Pitch range Physician generally sets Dynamic Pitch Range [18] based on maximum count rates expected in order to achieve highest result for a given Dynamic Pitch Range. Default Background Count values are displayed in table below. Count Range 100 1,000 AW-000887
Page 8 of 38
Default Background Count 2 20
neoprobe® GDS Operation Model
Count Range 10,000 50,000
Default Background Count 200 1000
Operational Notes Events that may occur during product use: If…… Background Count is greater than or equal to 80% of maximum value of selected Count Range Background Count is less than or equal to 2% of maximum value of selected Count Range Background Count button [14] is pressed during background count Background Count button 14] is pressed while Background Count value is displayed
Then this occurs…… Example: 800 is displayed for 1,000 Count Range Example: 20 is displayed for 1,000 Count Range Ratio is not calculated during Target Count. A Start Beep sounds and Background Count restarts A new Background Count starts
Scanning to Locate Concentrated Areas of Radioactivity Physician scans target areas to locate radioactivity after setting Background Count and Dynamic Pitch Ranges. System status Target Count Readout [7] displays Count Rate value; Count Bar [6] is on and displays Count Rate activity. Audible signal may be heard, depending on Count Rate, Dynamic Pitch Range selection, and Volume settings. Scanning procedure Physician slowly scans by moving probe over target tissue at a rate of 1-2 centimeters per second (cm/s). Sound rises in pitch as Count Rate increases from Background Count Value to Dynamic Pitch maximum value.
SCAN OVER TARGET AREA NOTE: Count is too high to be displayed when Count Bar [6] fills to top and flashes with varying audio. To correct, press and release Dynamic Pitch Range Button [18] for next higher Dynamic Count Range, and perform a new Background Count if necessary. Optionally, press, hold and then release any Dynamic Range button (18) to activate “Autorange Function”, see autorange instructions below. Acquiring Target Count in Dynamic Pitch Mode Acquire Target Count to identify intensity of gamma radiation in surrounding area.
AW-000887
Page 9 of 38
neoprobe® GDS Operation Model
TARGET COUNT Acquire Target Count
Hold probe stationary over target area to achieve highest Target Count Readout value [7], highest Count Bar level, and highest sound.
Press and release Target Count Button [11]; keep probe steady over target area for 1 to 6 seconds until Count Bar [6] is full and a double Stop Beep sounds.
Collect Target Count
Target Count Symbol [10] flashes green.
Target Count Readout [7] displays dashes.
Count Bar [6] fills from bottom to top as data is collected.
Target Count Value
Target Count Readout data [7] is displayed for 5 seconds; Target Count Symbol (10) flashes green.
Count Bar [6] is off.
After 5 seconds, double Stop Beep sounds and system returns to Dynamic Pitch Mode, displaying last calculated Background Count [8] and current Count Rate [7].
Acquiring Target Count Ratio in Dynamic Pitch Mode
TARGET COUNT RATIO
AW-000887
Page 10 of 38
neoprobe® GDS Operation Model
Acquire a Target Count Ratio
Hold probe stationary over target area. Press and release Background Count Button [14]. Background Count must be greater than default value (2%) of Count Range selected in order to activate Ratio Calculation function.
Hold probe stationary over target area. Press and release Target Count Button [11] until a beep sounds; hold probe steady over target area for 1 to 6 seconds until Count Bar [6] is full and a double Stop Beep sounds.
Collect a Target Count
Target Count Symbol [10] flashes amber.
Target Count Readout [7] displays dashes.
Count Bar [6] fills from bottom to top as data is collected.
Target Count Value
Target Count Readout data [7] and Ratio Readout [9] are displayed for 5 seconds; Target Count Symbol [10] flashes amber.
Amber Ratio Symbol [12] displayed below Target Count Symbol [10].
Count Bar [6] off.
After 5 seconds, a double Stop Beep sounds and system returns to Dynamic Pitch Mode displaying last calculated Background Count [8] and current Target Count [7] data.
Acquiring Ten Second Count in Dynamic Pitch Mode
TEN SECOND COUNT Acquire a Ten Second Count
Hold probe stationary over target area.
Press and hold Target Count Button [11] until beep sounds; then release button.
Hold probe steady for 10 seconds over target area until Count Bar [6] is full and double Stop Beep sounds.
Collect Ten Second Target Count
Target Count Symbol [10] flashes green.
Target Count Readout [7] displays dashes.
Count Bar [6] fills from bottom to top as data is collected.
AW-000887
Page 11 of 38
neoprobe® GDS Operation Model
Ten Second Target Count Value Note: Value displayed is not counts per second. Value is total counts obtained in 10 seconds.
10 second Target Count [7] displayed for 5 seconds; Target Count Symbol [10] flashes amber.
“10” is displayed below amber Target Count Readout, and message “secnd” displayed in green.
Count Bar [6] off.
After 5 seconds, double Stop Beep sounds and system returns to Dynamic Pitch mode, displaying last calculated Background Count [8] and current Target Count Readout data [7].
How to Use Autorange Console has 4 preset ranges: 100; 1000; 10000; and 50000 counts per second. Physician can define a different range with Autorange function.
Hold probe stationary over target area to achieve highest Target Count Readout data [7] and highest sound.
Press and hold one of four Dynamic Pitch Range Buttons [18] until beep sounds, release button. Hold probe steady over target area until Count Bar [6] is full and double Stop Beep sounds.
NOTE: Press and release any Dynamic Pitch Range Button [18] to return to default settings for desired range. NOTE: If Target Count Value [7] is greater than maximum value of desired Dynamic Pitch Range [18], then Count Bar [6] is full and flashes with varying beep. Console display
Target Count Readout data [7] is displayed.
Background Count Data [8] is blank.
Count Bar [6] fills from bottom to top as data is collected; double Stop Beep sounds when completed.
NOTE: Autorange feature sets maximum data point of user defined range to 125% of Target Count [7] acquired during Autorange process.
Background Count [8] is set to either 2 counts per second or 2% of full scale, whichever is greater.
Selected Dynamic Pitch Range light [18] flashes.
AUTORANGE
Operational Note AW-000887
Page 12 of 38
neoprobe® GDS Operation Model
Events that may occur during product use: If…. Target Count Button [11] is pressed while Target Count is calculated Target Count is too high
Then this occurs….. Target Count restarts Overflow Symbols”/////” displayed on Target Count Readout [7] and varying beep is heard
Target Count Button [11] is pressed while Target Count or 10 Second Count is displayed Calculated Ratio is greater than 99.9
/////
Target Count function returns to Dynamic Pitch Mode and displays Count Rate data Overflow symbol “///” is displayed [9]
////
4. BINARY PITCH MODE (OPTION) Binary Pitch Mode sound tells physician when radioactivity is significantly above Background Count of nonradioactive area. To……
Perform following……
And this occurs….
Turn system on
Press and release power standby button [1]
Power indicator is lit. All LEDs are lit System should begin normal operation within 20 seconds Operation of BLUETOOTH®: message “no linc” indicates problem with probe, console or serial port adapter. See troubleshooting instructions below. For a cabled probe: If there is no probe or cable attached message “error no Probe” is displayed. See troubleshooting instructions below. System function indicator lights and “error 2” through “error 6 ” are displayed. See troubleshooting instructions below.
Conduct performance check
See instructions below
Select Binary Pitch Mode
Press and release Binary Pitch/Dynamic Pitch Button [4]
Binary Pitch Symbol is lit Background Count changes to 7 counts per second Radionuclide automatically set 99mTc, and radionuclide symbol is lit
Select different radionuclide from 99m Tc AW-000887
Press and release Radionuclide Selection Button [21] to select radionuclide
Page 13 of 38
Desired radionuclide is lit
neoprobe® GDS Operation Model
To……
Perform following……
Adjust Binary Pitch sound
Turn Volume Adjustment counterclockwise
Sound is lowest
Turn Volume Adjustment clockwise
Sound is highest
Turn Binary Pitch sound on/off
And this occurs….
Press and release Mute Button [16]
Sound is off, Mute Symbol flashes Sound is on, Mute Symbol is steady
Background Count in Binary Pitch Mode Background Count establishes baseline data for radioactivity level of normal tissue. System compares background data to radioactivity level of Target Tissue when a Target Count is performed. System status before background count Background Count Readout [8] displays number “7” as a default value; Ratio Readout [9] is off; and Target Count Readout data [7] updates count rates every one-half second as probe moves over tissue. How to acquire background count
Place probe tip on normal tissue (e.g., normal adjacent tissue, etc.)
Press and release Background Count Button [14]; single beep sounds. Hold probe steady for 6 seconds; beep stops.
Console display
Background Count Symbol [13] flashes
Background Count Readout [8] displays dashes
Count Rate [7] is temporarily blank
Count Bar [6] fills from bottom to top as data is collected for 6 seconds.
Background count display
After 6 seconds, Background Count Data [8] is constant until a new Background Count is taken; Binary Pitch Mode [18] is changed; or system is shut off.
Count Rate [7] data is displayed.
BACKGROUND COUNT - BINARY PITCH MODE
AW-000887
Page 14 of 38
neoprobe® GDS Operation Model
Operational Note Events that may occur during product use: If…..
Then this occurs……
Background Count is too high
Overflow Symbols “/////”on Background Count Readout (7) and beep sounds
Background Count Button (14) is pressed while a count is in progress
A Start Beep sounds; starts new Background Count calculation
Background Count Button (14) is pressed after Background Count Readout data (7) is displayed
Starts new Background Count calculation
/////
Scanning to Establish Boundaries of Target Tissue in Binary Pitch Mode Scan target tissue to locate area of localized radioactivity after Background Count Calculation is completed. Scanning procedure Scan for radioactivity by moving probe slowly over tissue at a rate of 1 or 2 centimeters per second (cm/s). When radioactivity exceeds Background Count Data by a statistically significant amount, beep sounds to indicate target tissue with localized radioactivity. Mark perimeter of Target Tissue. Count display Count Rate is displayed in Target Count Readout [7]. No Target Count or Ratio is displayed during scanning procedure. Acquiring Target Count (6-Second Option) System status before Target Count Background Count Readout [8] displays Background Count Data. Ratio Readout [9] is off. Target Count Readout [8] displays count rates as probe is moved over tissue. How to Acquire Target Count
Hold probe stationary over Target Tissue.
Press and hold Target Count Button [11] until Start Beep sounds. Release button.
Hold probe steady 6 seconds until Stop Beep sounds.
Console Display
Target Count Symbol [10] changes from green to amber and flashes.
Target Count Readout [7] displays dashes.
Count Bar [6] fills from bottom to top as data is collected for 6 seconds.
Target Count and Ratio Display
Target Count Readout data [7] and Ratio Count Data [9] are displayed for 5 seconds. Target Count Symbol [10] flashes amber.
Ratio Readout [9] is displayed. Ratio Symbol [12] flashes.
AW-000887
Page 15 of 38
neoprobe® GDS Operation Model
After 5 seconds, system returns to Binary Pitch Mode displaying last calculated Background Count data [8] and current Count Rate data [7].
TARGET COUNT; 6-SECOND OPTION Operation Note Events that may occur during product use: If….. Target Count Button [11] is activated (press and hold) while a Target Count is calculated Target Count [7] is too high
Target Count button [11] is pressed twice while Target Count Readout data is displayed Calculated Ratio Readout data is greater than 99.9
Then this occurs….. Start Beep sounds and starts new Target Count Overflow symbol “/////” is displayed in Target Count Readout (7) and beep sounds Starts new Target Count Overflow symbol “///”appears in Ratio Readout (9)
Performing a Target Check (2-Second Option) Perform a 2-second Target Check to obtain a quick reading of radioactivity level of target tissue. System status before Target Check Background Count Readout [8] displays Background Count Data. Ratio Readout [9] is off. Target Count [7] displays count rate as probe is moved over tissue. How to perform Target Check
Hold probe stationary over target tissue.
Press and release Target Count Button [11]; Start Beep sounds.
Hold probe steady for 2 seconds until Stop Beep sounds.
Console Display
Target Count Symbol [10] flashes.
Target Count Readout [7] displays dashes.
Count Bar [6] fills from bottom to top as data is collected for 2 seconds.
AW-000887
/////
Page 16 of 38
///
neoprobe® GDS Operation Model
Target Check Display
Target Check data is displayed in Target Count Readout [7] for 5 seconds; Target Count Symbol [10] flashes green.
After 5 seconds, system returns to Binary Pitch mode displaying last calculated Background Count data [8] and current Count Rate data [7].
TARGET CHECK; 2-SECOND OPTION Operation Note Events that may occur during product use: If…..
Then this occurs……
Target Check data is too high
Overflow Symbol “/////” is displayed in Target Count Readout [7] and beep sounds
Target Count Button [11] is pressed while Target Count is displayed
/////
Target Count Readout [7] changes to Binary Pitch Mode and displays Target Count data
System Shutdown Shut down system and prepare for reuse. Step 1 2 3 4 5
System shutdown and reuse Press and release Standby/On button [1] Disconnect power cord Clean console and power cord; wrap power cord around posts on rear panel of console Separate and clean external collimator and probe Sterilize external collimator and probe if no sterile surgical drape is used
5. TERMINOLOGY AND SYMBOLS Terms, symbols and graphics used in this manual. ITEM
DESCRIPTION
Count Rate
A continuous rate of gamma radiation measured in counts per second and updated every one-half second. Count Rate is displayed on same line of LED screen as Target Count data and Target Check data when these functions are not active.
AW-000887
Page 17 of 38
neoprobe® GDS Operation Model
Background Count
In Dynamic Pitch Mode: a baseline value in counts per second stored in console and used as threshold to activate sound In Binary Pitch Mode: baseline value in counts per second stored in console for comparison to Target Count determines if difference in radioactivity between Background Tissue and Target Tissue is statistically significant.
Compton Scattering
Radioactive noise at an energy level lower than photo peak of radioactive material.
Ratio Readout
A value indicating how likely it is that Target Tissue is identified (Target Count divided by Background Count).
Dynamic Pitch
Default mode of operation: baseline value measured in counts per second that is stored in console, and used as threshold at which sound is activated.
Binary Pitch
Scan/Scanning
Optional mode of operation: baseline value measured in counts per second that is stored in console for comparison to Target Count determines if difference in radioactivity between Background Tissue and Target Tissue is statistically significant. Moving probe across Target Area to locate highest radiation reading.
Target Area
Area of interest selected by physician during a procedure
Target Check
Binary Pitch Mode Only: quick check of level of radioactivity measured in counts per second detected by a probe held stationary for 2 seconds over target tissue; more accurate than Count Rate. Target Check function does not display a calculated Ratio Readout.
Target Count
Number indicating level of radioactivity detected by probe when held stationary for 6 seconds over Target Tissue; more accurate than Target Check. Target Count activates and displays a calculated Ratio Readout; 6 seconds in Binary Pitch mode; 1 to 6 seconds in Dynamic Pitch mode. Caution: United States Federal Law restricts this device to sale by or on order of a physician.
+60°C
Storage and Transit Temperature
-20°C
Storage and Transit Pressure
Storage and Transit Humidity
Type CF
Warning: Follow instructions for use CAUTION: consult accompanying documents Standby/ON
AW-000887
Page 18 of 38
neoprobe® GDS Operation Model
CAUTION: non-sterile
WARNING: hazardous voltage or shock hazard present; follow instructions and warnings Devicor uses recyclable materials wherever possible. There are materials in our product that do contain risk associated with Disposal. If the need arises that components, parts, accessories or devices at end of life need to be disposed of, we recommend that you comply with local, state and/or international laws and regulations for your country or area.
Inmetro certified
Anatel certified
6. POTENTIAL APPLICATIONS Product is used transcutaneously and intracutaneously to detect radioactive emissions from body tissues or organs where radiopharmaceuticals are administered. Most commonly administered isotopes are listed in following table, all are detected by this product.
Radionuclide Iodine-125 Cobalt-57 Technetium99m Indium-111 Iodine-131 Flourine-18
Principal Photo peak Energy (keV) 27-35, Te X-rays 122
Physical Half-Life 60 days 270 days
140
6.02 hrs.
99m
171/245 364 511
2.83 days 8.07 days 110 min.
111
Select this Radionuclide Indicator 125 I 57 Co Tc
In I 18 F
131
NOTE: A variety of radiopharmaceuticals are available. It is responsibility of user to determine suitability and clinical utility of chosen radiopharmaceutical or radiolabeled compound, and protocol for administering drug and using probe intracutaneously. External application External gamma detection of administered isotope provides noninvasive means of gathering important physiological and/or anatomical information. Some examples are: detection and localization of blood clot formulation using 125I or 111 In labeled platelets: evaluation of thyroid function by measuring radioactive iodine uptake; evaluation of skin or skeletal muscle blood flow; diagnosis of testicular torsion using 99mTc; intracutaneous scanning for localization of lymphatic tissue.
Intraoperative localization of lymphatic tissue
AW-000887
Page 19 of 38
neoprobe® GDS Operation Model
Lymphoscintigraphy is a common medical procedure employed to define lymphatic flow from a site of injection through lymphatic tissue. Hand-held gamma probes may be useful in assisting a surgeon in localization of regional lymph node basins draining a lesion site. This allows surgeons to identify areas within lymphatics where a biopsy of tissue may be taken to determine histological status of lymph tissue. Minimally invasive radioguided parathyroidectomy A preoperative 99mTc -Sestamibi scan may be used on patients with primary hyperparathyroidism to localize target parathyroid adenoma and enable limited exploration as an alternative to complete bilateral surgical exploration. Hand-held gamma probes may be useful in assisting surgeons in intraoperative localization of target adenomas. Gamma probes can be used to detect and localize increased uptake of 99mTc -99m-Sestabibi by hyperparathyroid gland. Evaluation of ischemic bowel Strangulation of gut may cause ischemic bowel. Surgeon must revascularize it and determine its viability as part of surgical protocol. Gamma probes can be used to detect intra-arterial distribution of 99mTc labeled red blood cells as a means of determining if gut is reperfused. Other tracers, such as 99mTc labeled DTPA for perfusion or 9999mTc labeled pyrophosphate for muscle infarction, may require investigational drug status for this application.
Perfusion of anastomosis-assessment of compromised blood flow When a surgeon creates an anastomosis, it must be determined that each side of anastomosis has adequate perfusion; otherwise, anastomosis may fail, and leakage may occur. A high degree of morbidity is associated with this failure. Gamma probes provide opportunity to assess perfusion before and after creating anastomosis. Intravenous administration of stannous pyrophosphate followed by 99mTc automatically labels red blood cells in vivo. Blood flow to anastomotic ends and across anastomotic juncture can be verified with radiolabeled labeled blood cells detected by gamma probe. Intraoperative localization of osteoid osteomas Osteoid osteoma is a small, but painful, benign bone lesion. Surgical excision is curative. Modern radiographic techniques externally image lesion with 99mTc labeled pyrophosphate. However, because of their size (rarely greater than 1 centimeter) and location within cortical bone, it may be difficult for surgeon to localize lesion intraoperatively. A gamma probe may be useful in localizing a lesion site intraoperatively. Additionally, checking high concentration of radioactive isotope in removed bone fragments provides evidence that nidus is being excised. 7. Cleaning & Disinfection Follow precautions established in your facility when handling any medical device that has been in contact with body fluids, tissues, or blood (intraoperative). All medical devices used intraoperatively must be cleaned, decontaminated or sterilized before reuse. WARNING: Do not clean console or accessories when energized. Disconnect power cord from console and from power outlet before cleaning. Do not sterilize console or immerse it in fluids. Attempting to do so will cause permanent damage. Damp wipe only. CAUTION: Following general warnings apply to sterilization of system components:
Do not sterilize console
Use only approved sterilization procedures described with each probe or accessory.
Do not touch patient or operator with product when electrosurgical device is in use or energized. CAUTION: Prior to sterilization, probe and collimator should be inspected to ensure:
AW-000887
Cleanliness Page 20 of 38