OLYMPUS
ShockPulse-SE Lithotripsy System In-Service
23 Pages
Preview
Page 1
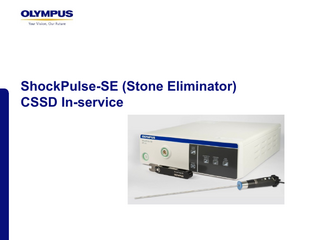
ShockPulse-SE (Stone Eliminator) CSSD In-service
ShockPulse-SE (Stone Eliminator) ¡ Combination of ultrasonic wave energy and ballistic/mechanical energy in one probe ¡ Provides superior speed and efficiency to fragment and remove stones ¡ Simple set-up with a plug and play system ¡ Easy to use ¡ Large lumen for fast stone removal – fast procedure time (fragmentation and removal) ¡ Automated cleaning using a Washer Disinfector is validated ¡ Autoclavable (transducer, nose cone, wrench, large cleaning stylet) ¡ ShockPulse probes are provided sterile and are single use only
Page 2
Probe Set Up – Equipment needed
Wrench
Probe
Cleaning Stylet 3 packs sterile suction tubing (1 for drape, 1 for scope and 1 for ShockPulse) Page 3
ShockPulse Lithotripsy Accessories which need to be cleaned and sterilized for a procedure ¡ Transducer – SPL-T x 2 required ¡ Cleaning Stylet (Large) – SPL-CSL x 2 required ¡ Torque Wrench – SPL-W x 2 required ¡ Nose Cone – SPL-NC x 2 required ¡ In addition depending on the planned procedure an appropriate scope is required such as: – Mini-nephroscope – Nephroscope – Rigid cystoscope – Semi-rigid ureteroscope
Page 4
ShockPulse equipment which is required but does not need sterilisation prior to a procedure procedure ¡ SPL-PC (power cord) ¡ SPL-G (generator) ¡ SPL-FS (foot switch which is optional) ¡ SPL- IFUR (Instruction manual)
Other equipment which is purchased sterile and required for the procedure ¡ ShockPulse Probes are provided sterile and are single use only ¡ Suction tubing x 3 (1 for drape, 1 for scope and 1 for ShockPulse)
Page 5
Sterilization & Reprocessing ¡ Designed for all Global CSSD requirements ¡ Automatic washing processes validated ¡ Re-usable components are autoclavable including the transducer, nose cone, large cleaning stylet and wrench. ¡ Sterilisation in Sterrad and Sterrad NX cycles also possible.
Page 6
Reprocessing Device
Sterilization
High Level Disinfection
Transducer
Autoclave Sterrad 100S /NX/100NX
NOT compatible
Nose cone
Autoclave Sterrad 100S/ NX/100NX
NOT compatible
Wrench
Autoclave Sterrad 100S/NX/100NX
NOT compatible
Cleaning Stylet
Autoclave ONLY!
NOT compatible
Page 7
Automated Cleaning Using A Washer Disinfector
Page
Transducer and Nose Cone – Automated Cleaning ¡ CAUTION: The Nose Cone and any probes must be disassembled from the transducer and the cleaning stylet removed from within the transducer prior to cleaning and sterilization. ¡ CAUTION: After each use or prior to cleaning and sterilizing, carefully inspect transducer and cable for tears, cracks or other signs of damage. ¡ CAUTION: Never use damaged equipment. ¡ CAUTION: This product is not validated for high-level disinfection (HLD).
Page 9
Transducer, Nose Cone, Stylet and Wrench – Automated Cleaning Using A Washer Disinfector Automated cleaning should be performed in an Automatic Washer Disinfector in the following conditions: 1.
With the hand piece, nose cone, cleaning stylet and torque wrench lying loose in the washer rack
2.
The torque wrench does not need to be taken apart for manual or automatic cleaning.
3.
Use alkaline or neutral pH detergent recommended by washer/disinfector manufacturers. An example of an approved detergent is MediClean Forte detergent.
4.
The Automatic Washer Disinfector can be set to these cycle parameters: 1. Pre-Cleaning : Cold water for 2 minutes 2. Wash: Cold water with detergent heated to 55 °C for 5 minutes 3. Rinse 1: Hot water for 2 minutes 4. Rinse 2: Hot water for 2 minutes 5. Final Rinse: Deionized Water at 90 °C for 1 minute 6. Dry Phase: 20 minute dry period at 90 °C
5.
After Automated Cleaning, visibly inspect all components for any adherent soil. Repeat cleaning procedure if needed.
Page 10
Steam Sterilization ¡ CAUTION: Never rinse the ShockPulse-SE components with cooled water for faster cooling after sterilization; sudden changes in temperature may damage the components. ¡ Thoroughly clean, rinse, and dry transducers, nose cone, cleaning stylet, and wrench prior to sterilization. ¡ Torque wrench does not need to be taken apart for manual or automatic cleaning. ¡ The ShockPulse-SE transducer and nose cone, large cleaning stylet, and wrench have been validated and can be reprocessed as follows in a legally marketed Prevacuum Steam Sterilizer controlled within the following parameters: – Disassemble the Nose Cone from the Transducer, but leave the O Ring on the transducer. – Wrap separately the following: a) Transducer, nose cone, large cleaning stylet and torque wrench b) Transducer, nose cone c) Large cleaning Stylet d) Torque Wrench – The ShockPulse-SE transducer and nose cone, cleaning stylet, and wrench should be processed in a legally marketed Prevacuum Steam Sterilizer Page 12
Steam Sterilization ¡ Sterilise according to the Australian standards and your hospital protocol: – Temperature: 134°C – Steriliser pressure: 203kPA – Sterilisation time = 3.5 - 4 minutes – Dry time = as per hospital/machine protocol
Page 13
Sterrad ¡ The ShockPulse-SE transducer, nose cone and wrench have been validated for efficacy sterilization with the following: – STERRAD 100S (Full SHORT Cycle), – STERRAD 100NX (Full STANDARD Cycle) and – STERRAD NX (Full ADVANCED Cycle) systems by Advanced Sterilization Products. ¡ The ShockPulse-SE transducer, nose cone and wrench have been validated for material compatibility. ¡ Please not the large cleaning stylet has not been validated with Sterrad
Page 14
Appendix – Manual cleaning
Page
Manual cleaning An option if automated cleaning using a washer disinfector is not possible
Page
Equipment and Consumable Supplies Needed for manual cleaning ¡ Personal Protective Equipment including eye wear, face mask, moisture-resistant clothing and chemical resistant gloves ¡ Sponge or Towel ¡ Soft Bristled Brush (M16) ¡ Lint free cloth ¡ Pipe cleaner (3/16 inch diametre) ¡ Cleaning agents: – Mild soap solution (use medical-grade, low foaming and neutral pH detergent) – Enzol prepared according to the manufacturer’s recommendations (1oz/gal) using lukewarm tap water
Page 18
Generator and Footswitch – Manual Cleaning 1. Turn off power to the unit and remove the power cord before cleaning. 2. Wipe generator cabinet, front panel, power cord and footswitch with a sponge (or towel) lightly moistened with a mild soap solution (use medical-grade, low foaming and neutral pH detergent). 3. Follow with a sponge (or towel) lightly moistened with clear warm (42 °C-52 °C, 107 °F125 °F) tap water. 4. Dry immediately. 5. Avoid using chemical or abrasive cleaning agents, which damage the finish.
Page 19
Transducer and Nose Cone – Manual Cleaning ¡ CAUTION: The nose cone and any probes must be disassembled from the transducer and the cleaning stylet removed from within the transducer prior to cleaning and sterilization. Dispose of the probe. ¡ CAUTION: After each use or prior to cleaning and sterilizing, carefully inspect transducer and cable for tears, cracks or other signs of damage. ¡ CAUTION: Never use damaged equipment. ¡ CAUTION: This product is not validated for high-level disinfection (HLD).
Page 20
Transducer and Nose Cone – Manual Cleaning 1.
Remove the transducer connector from the generator, if it is attached.
2.
Remove the cover (Nose Cone) of the transducer by turning the Nose Cone counterclockwise as viewed from front of the transducer.
3.
Open the suction control orifice by rotating the suction control ring; the suction control orifice is open when the ring is rotated clockwise when viewed from the back.
4.
Fully immerse the transducer and Nose Cone in an enzymatic cleaning solution that is formulated to dissolve proteinaceous material. Follow the manufacturer’s instructions for dilution, temperature and time. DO NOT USE dishwashing detergents, skin cleansers or any other cleaning agents not designed to dissolve protein.
5.
Let the transducer and Nose Cone soak for a minimum of 5 minutes.
6.
While the transducer and Nose Cone are fully immersed, use a lumen brush to clean down the lumen and to ensure the lumen is free of air pockets and debris. Also, brush down the suction control orifice to remove any air pockets and debris. Actuate the suction control ring 10 times while immersed.
7.
Scrub the transducer and Nose Cone thoroughly with a soft bristled brush and pipe cleaner (3/16 inch diameter). Pay attention to any crevices, entry and exit ports, lumens and hard to clean areas until all visible soil has been removed.
8.
Pay special attention to brushing around the transducer buttons.
9.
Pay special attention to brushing around the clearance space between the transducer horn and black housing.
10. Pay special attention to brushing around the area where the cable comes out of the transducer housing. 11. Ultrasonicate the Nose Cone only for 5-10 minutes. 12. Rinse the transducer (including through the lumen and suction control orifice) and Nose Cone thoroughly in running warm (42 °C-52 °C, 107 °F-125 °F) tap water to remove all traces of cleaning solution; visually inspect the exterior and lumens to ensure no visible contamination is present. Actuate the suction control ring 10 times while being rinsed in running warm tap water. 13. If visible contamination is present, repeat cleaning steps 4-12. 14. Once adequately clean, dry the transducer and Nose Cone with a lint-free towel. 15. The cleaned transducer and Nose Cone is to be sterilized immediately per the requirements
Page 21
Torque wrench – Manual cleaning ¡ After each use or prior to placing in a disinfectant or sterilizer, carefully inspect the wrench for cracks or other signs of damage. ¡ Do not use damaged equipment. ¡ Torque wrench does not need to be taken apart for manual or automatic cleaning. 1. Fully immerse the wrench in an enzymatic cleaning solution that is formulated to dissolve proteinaceous material. Follow the manufacturer’s instructions for dilution, temperature and time. DO NOT USE dishwashing detergents, skin cleansers or any other cleaning agents not designed to dissolve protein. Avoid using chemical or abrasive cleaners that could damage the surface finish. 2. Let the torque wrench soak for at least 5 minutes. 3. Scrub the torque wrench with a soft brush. 4. Pay special attention to openings in the wrench handle where contamination can build up. 5. Ultrasonicate the wrench for 5-10 minutes. 6. Rinse the torque wrench thoroughly in running warm (42 °C-52 °C, 107 °F-125 °F) tap water to remove all traces of cleaning solution; visually inspect the exterior and openings to ensure no visible contamination is present. 7. If visible contamination is present, repeat cleaning steps 1-6. 8. Once adequately clean, dry the torque wrench with a lint-free towel. 9. The torque wrench is to be sterilized immediately after cleaning.
Page 22