QIAGEN
QIAxcel ScreenGel Software Quick-Start Guide Jan 2011
Quick-Start Guide
5 Pages
Preview
Page 1
QIAxcel® ScreenGel Software quick-start guide This Technical Information summarizes how to install and set up the QIAxcel ScreenGel Software. Before using the QIAxcel ScreenGel Software, it is essential that you read Section 6 of the QIAxcel Advanced User Manual (available as a PDF file on the software installation CD) carefully and pay particular attention to the safety information in the QIAxcel User Manual or the QIAxcel Advanced User Manual.
Minimum computer requirements A computer with the correct specification for operating the QIAxcel or QIAxcel Advanced instrument and QIAxcel ScreenGel Software is supplied as part of the QIAxcel or QIAxcel Advanced system. However, if a different computer is used to operate the QIAxcel or QIAxcel Advanced instrument or run the QIAxcel ScreenGel Software, the following requirements are necessary:
Central processing unit (CPU): Intel® Celeron® Processor 540, 1.86 GHz or higher Free hard-drive capacity: 80 GB, formatted for New Technology File System (NTFS) Random-access memory (RAM): 512 MB Screen resolution: 1024 x 768 pixels or greater Instrument connection: 9-pin serial port or input/output (I/O) card (not provided, contact QIAGEN Technical Service for more information).
Operating system: Microsoft® Windows® XP Professional with Service Pack 3 or Microsoft Windows 7 Professional
Installing QIAxcel ScreenGel Software 1.
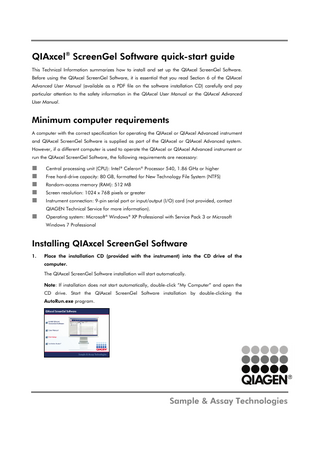
Place the installation CD (provided with the instrument) into the CD drive of the computer. The QIAxcel ScreenGel Software installation will start automatically. Note: If installation does not start automatically, double-click “My Computer” and open the CD drive. Start the QIAxcel ScreenGel Software installation by double-clicking the AutoRun.exe program.
Sample & Assay Technologies
2.
Click “Install QIAxcel ScreenGel Software” and follow the instructions to set up the software. QIAxcel ScreenGel Software uses several software packages provided by Microsoft. If the packages are not available on the computer, a dialog box appears at the beginning of the setup procedure. Click “Install” to install the required software packages.
Note: Depending on the installed software packages, a reboot of the system may be required before proceeding with the setup. After the reboot, the installation procedure is resumed automatically.
3.
Read and accept the license agreement.
4.
Select the program installation path. The default path is C:Program FilesQIAGENQIAxcelScreenGel.
5.
Select the data path for acquired data and all other application data. The
default
path
is
C:Documents
and
SettingsAll
UsersApplication
Data
QIAGENQIAxcelScreenGel for Windows XP and C:ProgramDataQIAGENQIAxcel ScreenGel for Windows 7. After the installation, the QIAxcel ScreenGel Software can be started.
QIAxcel ScreenGel Software quick-start guide
page 2 of 5
Getting started with QIAxcel ScreenGel Software For a detailed description of the QIAxcel ScreenGel Software, refer to Section 6 of the QIAxcel Advanced User Manual (available by clicking “User Manual” in the QIAxcel ScreenGel Software installation window or as context sensitive help by pressing the F1 key when the running the QIAxcel ScreenGel Software). 1.
Launch the QIAxcel ScreenGel Software from the Windows start menu by selecting “QIAGEN/QIAxcel” or by double-clicking the icon on the desktop.
2.
Log in as “Administrator” and click “OK”.
No password is required for the first login and the software will automatically prompt for a new password to be entered. 3.
Enter a valid password for the “Administrator” account.
Leave the field for the old password empty, and enter a valid password twice in the corresponding fields. Note: The password must contain at least 1 upper-case letter, 1 lower-case letter, and 1 number. The password must be at least 8 characters. The “Configuration” environment is displayed by default.
QIAxcel ScreenGel Software quick-start guide
page 3 of 5
4.
Open the “User Manager” tab, and create user accounts.
For more details, see Section 6.3.3 of the QIAxcel Advanced User Manual. 5.
Open the “Settings” tab, and configure the global settings for the QIAxcel Advanced system.
For more details, see Section 6.6.1 of the QIAxcel Advanced User Manual. Note: The instrument serial number must be provided and saved in the “Service” environment when the instrument is first connected to the software. 6.
If necessary, configure which COM port is to be used for connection to the QIAxcel or QIAxcel Advanced instrument. The default port is COM1. For more details, see Section 6.6 of the QIAxcel Advanced User Manual.
QIAxcel ScreenGel Software quick-start guide
page 4 of 5
For up-to-date licensing information and product-specific disclaimers, see the respective QIAGEN® kit handbook or user manual. QIAGEN kit handbooks and user manuals are available at www.qiagen.com or can be requested from QIAGEN Technical Services or your local distributor. Trademarks: QIAGEN®, QIAxcel® (QIAGEN Group); Celeron®, Intel® (Intel Corporation); Microsoft®, Windows® (Microsoft Corporation). 1066904 01/2011 © QIAGEN, all rights reserved. www.qiagen.com
France 01-60-920-930
The Netherlands 0800 0229592
Australia 1-800-243-800
Germany 02103-29-12000
Norway 800-18859
Austria 0800/281010
Hong Kong 800 933 965
Singapore 65-67775366
Belgium 0800-79612
Ireland 1800 555 049
Spain 91-630-7050
Canada 800-572-9613
Italy 800 787980
Sweden 020-790282
China 021-51345678
Japan 03-5547-0811
Switzerland 055-254-22-11
Denmark 80-885945
Korea (South) 1544 7145
UK 01293-422-911
Finland 0800-914416
Luxembourg 8002 2076
USA 800-426-8157
Sample & Assay Technologies