ResMed
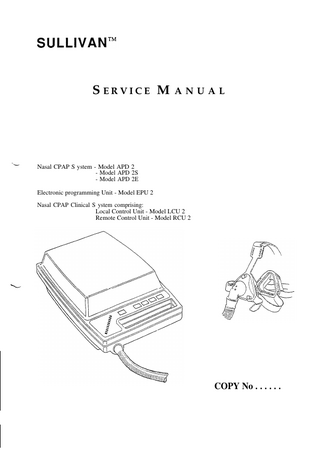
SULLIVAN Service Manual Various Model incl APR, EPU2 Rev 2
Service Manual
36 Pages
Preview
Page 1
CONTENTS 1.
IN T R O D U C T I O N 1 . 1 INTE~EDUsERs OF TI-IIs NLkWAL 1.2 N ASAL C P A P 1.3 THE SULLIVAN RANGE OF EQUIPMENT
2.
N ASAL CPAP S Y S T E M - MODELS APD 2, APD 2S, APD 2E 2.1 COMPONEm ID E N T I F I C A T I O N 2.2 DI S A S S E M B L Y / AS S E M B L Y 2.3 S E R V I C I N G 2.4 R E C T I F I C A T I O N
3.
E L E C T R O N I C P R O G R A M M I N G U N I T - MO D E L E P U 2 3.1 COMPONENT IDENTIFICATION 3.2 DI S A S S E M B L Y / AS S E M B L Y 3.3 SERVICING AND R E C T I F I C A T I O N .
4.
L O C A L C O N T R O L U NIT - M O D E L L C U 2 4.1 C O M P O N E N T I D E N T I F I C A T I O N 4.2 D I S A S S E M B L Y / AS S E M B L Y 4.3 SERVICING AND R E C T I F I C A T I O N
5.
R E M O T E C O N T R O L U NIT - M O D E L R C U 2 5.1 COMPONENT IDENTIFICATION 5.2 DI S A S S E M B L Y / AS S E M B L Y 5.3 SERVICING AND R E C T I F I C A T I O N
A PPENDICES A. P RESSURE SE~G PROCEDURE B. F LOW G ENERATOR C ALIBRATION P ROCEDURE c. CLLNICAL SYSTEM (LCU/RCU) CALIBRATION P ROCEDURE D. S ERVICE /R EPAIR / USER P ROBLEM F O R M E. L IST OF S ERVICING E QUIPMENT F. L IST OF C O N S U M A B L E S , ACCESSORIES AND S PARE P A R T S
2
1.
INTRODUCTION
1.1 I N T E N D E D U S E R S O F T H I S M A N U A L This manual is for use in servicing, repair and maintenance by persomel who comply with the following: (a) Are familiar with the operating manual for the patient system. (b) Are familiar with the operating manual for the clinical system. (c) Have suitable electrical and mechanical training to satisfy the requirements of the relevant Regulatory Authorities. Use only approved SULLIVAW parts and never use parts that have failed, exhibit excessive wear, have been contaminated or are ineffective for their intended use. Repair of equipment is normally performed by substitution of sub-assemblies.
L.
1 . 2 NA S A L C P A P SULLIVANm Nasal CPAP systems have been designed by ResCare for the treatment of Obstructive Sleep Apnea - a disorder that causes a physical obstruction in a person’s airway while sleeping. The principle of treatment is that filtered air is delivered by a flow generator through flexible tubing to a nasal mask worn by the patient while sleeping. The flow generator maintains a positive pressure in the patient’s airway which acts as a pneumatic splint preventing the airway from collapsing during sleep. The pressurised air is generated by means of a variable speed brushless DC motor driving a fan which delivers air at the required pressure to the nasal mask. Pressure setting and adjustment of the flow generator is performed by a special electronic programming unit external to the flow generator (Model APD 2) or by a screwdriver (Models APD 2S and APD 2E). The flow generator uses a switch mode power supply designed to accept a wide range of input voltages. 1 . 3 TH E SULLIVANm RA N G E O F E Q U I P M E N T The main equipment items covered by this manual include: ● ● ● ●
-,
Nasal CPAP S ystem Electronic Programming Unit Local Control Unit Remote Control Unit
- Models APD 2, APD 2S, APD 2E - Model EPU 2 - Model LCU 2 - Model RCU 2
The nasal CPAP systems APD 2, APD 2S and APD 2E commises the flow generator unit and air delivery system provided for” home use by the patient. The electronic ~rogramming unit EPU is used by professional sleep disorders personnel to set the prescribed CPAP level on the APD 2 flow generator unit. (The APD 2S and APD 2E are programmed by a potentiometer accessed through the casing by a screwdriver.) The local control unit LCU is used in the Sleep Center in conjunction with an APD 2 flow generator unit for local (by the patient’s bedside) adjustment of air pressure. The LCU has a pressure transducer which measures pressure in the patient’s nasal mask and transmits this information to the remote control unit. The RCU is used in the Sleep Center’s central control and observation area to display the actual (fluctuating) pressure in the mask and the set pressure, and to remotely adjust pressure on the APD 2 flow generator unit. The APD 2S and APD 2E can not be used with the RCU/LCU Clinical System.
3
2.
NASAL CPAP SYSTEM - MODELS APD 2, APD 2S, APD 2E
2.1 C O M P O N E N T I D E N T I F I C A T I O N Refer Figures for location of components identified below 2 . 1 . 1 AIR D E L I V E R Y S Y S T E M Item No. Component Access port plugs ; Rigid mask frame Air outlet holes 3 4 Flexible air tubing Headgear 5 Forehead pad 6 Nasal Cushion Cushion Clip (Optional) : Air tubing connector 11
I
+
L
No. Required 3 1 * 1 1 1 1 1 1
Reference Figure 1 1 1 1 1 1 1 ;
2.1.2-. FL O W G E N E R A T O R M O D E L A P D 2 Reference Figure No. Required item No. Component #9 Ext socket PCB assembly (for connection of EPU, 1 3&6 LCU or 24V DC supplyj * 2 10 Air tubing inlet 1 3 Air filter assembly 12 1 3 13/14 Mains power switch and power inlet (3 pin) 1 15 Power cord (detachable) * : Carry handle 16 4 1 17 Hour meter (optional) 4 1 Information panel 18 1 5 19 STOP button 5 20 START button 5 ; 21 Delay timer buttons * 5 22 Pressure display 1 6 Upper case 6 1 ;: Inlet baffle 6 1 25 Fan cover 1 6 26 Lower case 6 1 27 Lower case plug (instead of Item 17) 1 28 Foam washer - fan housing : 1 29 Acoustic foam - inlet baffle 6 1 Acoustic foam - upper case 30 * 6 Coolant air, fan cover outlets 31 * 6 32 Coolant air, discharge area 1 Motor/fan assembly 33 1 : Motor plate 34 4 Screw (motor/fan assembly to motor plate) 35 : 3 Suspension grommet 36 6 3 Suspension washer 37 6 3 Screw & lockwasher (motor plate to bosses) 2 6 Cable seal strip ;: 6 40 PSU assembly 6 ; 41 Fuses * 6 42 Fuse holders 6 Wiring harness (PSU assembly to power inlet) * 43 6 44 Wiring harness (PSU assembly to motor control PCB) * 4 6 45 Screw (PSU assembly to lower case) 6 1 46 Motor control PCB
4
Item No. 47 49 50 51 52 53 54 55 56 57 58 59 60 61 # 62 63 64
No. Required Component * Mounting plate Wiring harness (motor PCB to timer PCB) i Screw (motor PCB to lowercase) Wiring harness (motor/fan assembly to * motor PCB) 1 Timer PCB Wiring harness (hour meter to timer PCB) ; Screw (timer PCB to lower case) 11 Screw (fan cover to lowercase -2 types) 6 Screw (upper case to lowercase) Maximum pressure calibration potentiometer * * 5V / 10cm calibration potentiometer Minimum pressure calibration potentiometer * Pressure display adjustment potentiometer * * Delay timer frequency potentiometer Wiring Harness (ext socket PCB assembly to 1 motor control PCB) 1 Adjusting pot & cap (APD 2S, APD 2E) * PSU earth wire (APD 2 only)
Reference Figure 6 6 6 6 6 6 6 6 6 6 6 6 6 6 6 3&6 6
* Numbers required are not shown where components are integral to another assembly or component. # Note that in earlier versions, the ext socket assembly has no PCB and the socket assembly (9) and wiring harness (62) form an integral unit.
2.1.3 F L O W G E N E R A T O R M O D E L A P D 2 S The APD 2S has been designed as a double insulated unit, capable of being set at the users set pressure without the need for an electronic programming unit (EPU 2). Pressure is set by means of a multi turn potentiometer at the rear of the unit which replaces the ext socket PCB, and also removes the option of operation from 24V DC. Apart from the modification to the pressure setting mechanism and the DC battery option the APD 2S is identical to the APD 2. The following component changes from the APD 2 apply (refer 2.1.2): Reference Figure Item No. Component Changes 3&6 9&63 Adjusting pot & cap replaces ext socket PCB 6 47&62 Mounting plate & harness integral with Item 63 3 14 Mains power inlet -2 pin replaces 3 pin
2.1.4 F L O W G E N E R A T O R M O D E L A P D 2 E The APD 2E has been designed as a double insulated unit, capable of being set at the users set pressure without the need for an electronic programming unit (EPU 2). Pressure is set by means of a multi turn potentiometer at the rear of the unit which replaces the ext socket PCB, and also removes the option of operation from 24V DC. In addition, the APD 2 E does not include the panel mounted start and stop buttons, the delay timer buttons, the pressure display, nor the option for the hour meter. ~mfolloowing component changes from the APD 2 (refer 2. 1.2) apply: Reference Figure Component Changes 3&6 9&63 “ Adjusting pot & cap replaces ext socket PCB 6 47&62 Mounting plate & harness inteegral with Item 63 3 14 Mains power inlet -2 pin replaces 3 pin 6 Transition PCB replaces timer PCB 52 Components deleted: Item Nos 17 19 20 21
22
49
5
53
54
@ 61
..
FIGURE 1 AIR DELIVERY SYSTEM
FIGURE 2 FLOW GENERATOR (FRONT VIEW) 6
.,.,-’
FIGURE 3 FLOW GENERATOR (REAR VIEW)
,;~ -. -
FIGURE 4 FLOW GENERATOR (UNDERNEATH VIEW)
FIGURE 5 FLOW GENERATOR USER PANEL (DELAY TIMER AND PRESSURE INDICATION) NOTE - APD 2 and APD 2S ONLY 7
I
2 mL.Y
2s Am 2&
FIGURE 6 FLOW GENERATOR (EXPLODED INTERNAL VIEW) 8
I
2 . 2 DI S A S S E M B L Y / AS S E M B L Y Note: Prior to disassembly or assembly, insure that power is not connected to the flow generator and the power cord (IS) has been disconnected from the main power inlet (14). 2.2.1 IMPORTANT NOTE P RECAUTIONS FOR THE H ANDLING OF I C S
The flow generator contains a number of integrated circuits (ICS) within the PSU assembly (40), motor control PCB (46) and timer PCB (52), and these can be badly damaged by excessive electrostatic discharge or transient voltages. The following procedures are recommended to avoid component damage: 1.
2. 3. 4.
5.
6. 7. 8. 9. 10.
Work benches where handling and repairs are done must have surfaces of metal or suitable conducting material and be directly connected to an electrical ground. The area under and also in front of the work bench must be coated with a suitable conductive floor paint, or alternatively covered with a conductive floor mat. The conductive paint coating or floor mat must be connected to an electrical ground. Soldering irons or solder baths must be at the same reference (ground) potential as the work bench. A wrist strap must be worn by service personnel working at the bench. The wrist strap must have a conductive lead (1 megohm) connected to the bench surface. Alternatively, a heel grounding strap to ground the operator to the floor may be used. (Such a wrist or heel strap should not create an electrical hazard for the ‘ wearer) Handling of ICS should be kept to a minimum. If handling is required, directly touching the leads should be avoided: the recommended procedure is to first touch the container in which the ICS are stored, or the PCB in which they are mounted, before touching the ICS. Service personnel should take every precaution that the items will see the same reference potential when moved. All ICS and PCB assemblies containing ICS should be stored in anti-static bags until use. Service personnel should wear clothing which minimises the build up of static charges. Cotton is preferable to wool or synthetic fibres. Service personnel should avoid electrostatic build up through the movement of air over plastic material. Plastic materials should wherever possible be kept away from the ICS as they develop and maintain high levels of static charge. Low humidity increases potential static problems. Maintaining humidity levels above 60% is one of the most effective ways to guard against static handling problems.
2.2.2 D I S A S S E M B L Y F L O W G E N E R A T O R M O D E L A P D 2 Note: These instructions apply to Model APD 2. Refer to Section 2.2.3 and 2.2.4 for instructions relating to Model APD 2S and APD 2E respectively. A. To Separate Cases Remove the air filter assembly (12). (a) With the flow generator in an inverted position (upside down), remove the six (b) recessed screws (56) located in the flange between the lower case (26) and upper case (23). Rotate the flow generator to the normal upright position and remove the upper (c) case (23). Remove the inlet baffle (24). (d)
9
B. (a) (b) (c) (d) (e)
(f)
assembly (q(l) and cut the cable tie. Disconnect, at the main power inlet (24), the earth wire (64) from the PSU assembly (40J. Disconnect, at the motor control PCB (46), the wiring harness (44) from the PSU assembly (40). Discomect, at the heat sink on the PSU assembly (40), the earth wire from the ext socket PCB assembly (9) and cut the cable tie around the wiring harness (44) and earth wire from the ext socket PCB assembly. Remove the four screws (J5J securing the PSU assembly (40j to the lower case (26) and remove the PSU assembly (40). Note that if the fuses have blown, this almost certainly indicates a fault in the PSU assembly which should then be replaced.
c.
To Remove mains power switch and power inlet
(a)
Disconnect, at the main power inlet (14), the wiring harness (43) from the PSU assembly (40). Disconnect, at the main power inlet (z4J, the earth wire from the PSU assembly (40). Slide the main power switch (13) and main power inlet (14) assembly up and remove from slots in the lowercase (26).
(b)
(c) D. (a)
To Remove the Timer PCB Disconnect, at the timer PCB (52), the wiring harness (53), horn the hour meter
(d)
(Ii’), if fitted. Disconnect, at the timer PCB (52), the wiring harness (49J from the motor control PCB (46). Remove the four screws (54) securing the timer PCB (52) to the lowercase (26). Carefully remove the timer PCB (52J.
E. (a)
To Remove the Motor Control PCB Disconnect, at the motor control PCB (46), the wiring harness (44) from the PSU
(b)
(c)
(f’)
assembly (40). Disconnect, at the motor control PCB (46), the wiring harness (62J from the ext socket PCB assembly (9). Disconnect, at the motor control PCB (46), the wiring harness (51) from the motor fan assembly (33). Remove the timer PCB (52) as described in procedure D above. Remove the three screws (.s0) securing the motor control PCB (46) to the lower case (26). Carefully remove the motor control PCB (46).
F. (a)
To Remove the Hour Meter (when fitted) Disconnect, at the timer PCB (52), the wiring harness (53) from the hour meter
(b)
(c) L
To Remove the PSU Assembly Disconnect, at the main power inlet (14), the wiring harness (43) from the PSU
(d) (e)
(b) (c)
(1 7). Remove the timer PCB (52) as described in procedure D above. Remove the hour meter (1 T) if fitted, by squeezing the restraining lugs on the indicator and pushing downward through the lower case (26).
10
G.
(a)
(b) (c) (d)
H. (a) (b) (c) (d) g) (g) (h)
To Remove the Ext Socket PCB Assembly and Harness Discomect, at the heat sink on the PSU assembly (40), the earth wire from the ext socket PCB assembly (g) and cut the cable tie around the wiring harness (44) and earth wire from the ext socket PCB assembly. Disconnect, at the motor control PCB (46), the wiring harness (62). Carefully remove the ext socket PCB assembly (9J together with connected wiring harness (62) and earth wire by sliding the socket mounting plate (47) upward until it clears the slots in the lowercase (26). Disconnect the wiring harness (62) from the ext socket PCB assembly (9) by unplugging the connector at its PCB. (Note: On earlier versions, there is no PCB and the socket assembly and wiring harness are an integral unit.) To Separate Motor/Fan Assembly Remove the timer PCB (52) as described in procedure D above. Disconnect at the motor control PCB (46) the wiring harness (.51) from the motor/fan assembly (33). Cut the cable tie securing the wiring harness (51) to the lowercase (26). Remove the eleven screws (55) securing the fan cover (25) to the lowercase (26). Remove the fan cover (25). Remove the three screws and lockwashers (38) securing the motor plate (34J to the lower case (26), taking care to retain the three suspension washers (37). Carefully remove the motor/fan assembly (33) with motor plate (34) from the lower case (26). Remove the four screws (35) securing the motor plate (34) to the motor/fan assembly (33) and remove the motor plate (34).
2 . 2 . 3 AS S E M B L Y F L O W G E N E R A T O R M O D E L A P D 2
A. (a) (b)
(c) (d) (e) (f) (g) (h) (i) @ (k)
To Fit the Motor/Fan Assembly Insure that the three suspension grommets (36) are correctly fitted to the motor
plate (34), i.e. with the lip in the suspension grommet (36) for the suspension washer (37) facing upwards towards the motor/fan assembly (33). Locate the three suspension washers (37) on top and into the suspension grommets (36). Position the motor plate (34) on the motor/fan assembly (33). Insure that the locating mark on the motor mounting plate (34) is on the side away from the motor and the motor is orientated with wiring in line with the locating mark. Insert and tighten the four screws and lockwashers (35) through the motor plate (34) to the motor/fan assembly (33). Carefully lower the motor/fan assembly (33) into the lower case (26) and locate on 3 bosses. Insert and tighten the three screws with lockwashers (38) through the suspension washers (37), and suspension grommets (36) to the lowercase (26). Position the fan cover (25) over the motor/fan assembly (33) and carefully lower the fan cover (25) into position. Insure that the wiring harness (51) from the motor/fan assembly (33) is kept flat as it passes through the cable seals (39). Insert and tighten the eleven screws (55) through the fan cover (25) to the lower case (26). Insure the 3 short screws are located at the end of the outlet tube. If a new motor is fitted, separate the 3 thick wires from the 4 thin wires and pass the plug between them 4 times, creating 2 twisted groups of wires. Gently smooth and neaten the wiring. Install a cable tie securing the wiring harness (.51) to the lowercase (26). When the motor control PCB (46) has been fitted, connect the wiring harness (51) from the motor/fan assembly (33) .
11
B. (a) (b)
(c) (d) (e)
harness (62) and earth wire by sliding the socket mounting plate (47) into the slots in the lower case (26), oriented with the cable harness to the outside of the unit. When the motor control PCB (46) has been fitted, comect the wiring harness (62J to it. When the PSU assembly (40) has been fitted,connect at the heat sink on the PSU assembly (40), the earth wire from the ext socket PCB assembly (9.). Install a cable tie around the wiring harness (44) and earth wire from the ext socket PCB assembly.
c.
To Fit the Hour Meter (when fitted)
(a)
Insure that, when fitted, the orientation of the hour meter (17J will be such that the digits will read correctly when viewed from underneath from the direction of the carry handle (16). Insert the wiring harness (53) into the lower case (26). Locate the hour meter (17) in position and push into the lower case (26) until the retaining lugs click into the locked position. Check by gently pushing. When the timer PCB (52J has been fitted, connect the wiring harness (53) from the hour meter (17) to the timer PCB (52).
D.
To Fit the Motor Control PCB The motor control PCB (46) must be fitted before the timer PCB (52).
(a) (b) (c) (d) (e) (f)
.-.
To Fit the Ext Socket PCB Assembly and Harness Connect the wiring harness (62) to the header on the ext socket PCB PCB (9). (Note: On earlier versions, there is no PCB and the socket assembly and wiring harness are an integral unit.) Carefully fit the ext socket PCB assembly (g) together with connected wiring
Position the motor control PCB (46) over the appropriate slots in the lower case (26). Insert and tighten the three screws (50) through the motor control PCB (46) into the lower case (26). Connect the wiring harness (51) from the motor/fan assembly (.?3) to the motor control PCB (46). Connect the wiring harness (44) from the PSU assembly (40) to the motor control PCB (46). Connect the wiring harness (62) from the ext socket PCB assembly (9) to the motor control PCB (46).
E.
To Fit the Timer PCB
(a) (b)
Lay the hour meter wiring harness (if fitted) (53) to the left of the fan housing. Locate the timer PCB (52) in the lower case (26) insuring that the two larger location bosses in the lower case (26) correctly position the timer PCB (52). Insert and tighten the four screws (54) through the timer PCB (52) to the lower case (26]. Connect the wiring harness (53) from the hour meter (Izj, if fitted, to the timer PCB (52). Connect the wiring harness (49) from the motor control PCB (46) to the timer PCB (52).
(c) (d) (e)
F.
To Fit the Main Power Switch and Main Power Inlet
(a)
Insure that, when fitted, the orientation of the main power switch (13) and main power inlet (Id) assembly will be such that the main power switch (13) will be closest to the side of the lowercase (26). Slide the main power switch (13) and main power inlet (14) assembly down into the appropriate slots in the lower case (26). When the PSU assembly (40) has been fitted, connect the wiring harness (43) from the power supply assembly (40) to the main power inlet (14) and connect the earth wire (64) from the PSU assembly (40j.
(b) (c)
12
G. (a) (b) (c) (d) (e) H. (a) g; (d) (e) (0
To Fit the PSU Assembly Locate the PSU assembly (40) in the lowercase (26J. Insure that functional fuses (42) are in position in the PSU assembly (40). Insert and tighten the four screws (45) through the PSU assembly (40) to the lower case (26J. Connect the wiring harness (43) from the PSU assembly (40) to the main power inlet (14) and connect the earth wire (64) from the PSU assembly (40) to the mains power inlet (14). Connect the wiring harness (44) from the PSU assembly (40J to the motor control PCB (46) and connect the earth wire from the ext socket PCB assembly (9) to the heat sink on the PSU assembly (40). Attach a cable tie around wiring harness (62) from the ext socket PCB, the earth wire and wiring harness (44) from the PSU assembly (40). To Fit Cases Lower the inlet baffle (24) into position, insuring that the five supports for the inlet baffle (24) correctly locate in the lower case (26) and that the inlet area on top of the fan cover (25) correctly locates through the hole in the inlet baffle (24J. Locate the upper case (23J in position onto the lowercase (26J. Rotate the flow generator to an inverted position (upside down). Insert and tighten the six case screws (56) through the lower case (26) into the upper case (23). Rotate the flow generator to the normal upright position. Position and insert the air filter assembly (12) by gently pushing the air filter assembly (12) into the flow generator until the restraining lugs on the air filter assembly (z2) click into the locked position.
2 . 2 . 4 DI S A S S E M B L Y A N D A S S E M B L Y F L O W G E N E R A T O R M O D E L A P D 2 S Disassembly and assembly procedures for Model APD 2S are the same as model APD 2 (refer 2.2.2 and 2.2.3) with the following exceptions: There is no earth wire (64) from the PSU assembly (40) to the main power inlet (a) (14). References to the ext socket PCB assembly (9, 62) are not applicable. (b) The adjusting pot (63) and harness assembly (62) are disassembled and assembled (c) to the motor control PCB (46) via a wiring harness connection on the motor control PCB (42). 2 . 2 . 5 DI S A S S E M B L Y A N D A S S E M B L Y F L O W G E N E R A T O R M O D E L A P D 2 E Disassembly and assembly procedures for Model APD 2E are the same as model APD 2S (refer 2.2.4) with the following exceptions: The delay timer PCB (52), wiring harness (49J and hour meter (17) are not installed (a) in the APD 2E. The transition PCB (52) is to be considered as integral with the motor control (b) PCB (46). A stepped spacer (R04 S 061) is fitted on each of the 2 handle-end casing screw (c) bosses (to fill the gap left by deleting the timer PCB). These spacers must be properly located on the bosses before re-assembling the case.
13
2.3 S E R V I C I N G 2 . 3 . 1 GE N E R A L Before servicimz and/or rectification the following procedures should be foIlowed: compl~te a service/repair/complaint fofi- (as given in Appendix D 1), noting in (a) particulm ● The user pressure setting ● Date of last service Any user description of problems ~sure that the user’s mask and air tubing is received with the flow generator. (b) Perform all servicing requirements and repairs (refer Section 2.3.2). (c) Complete a service report (Appendix D2). (d) After servicing and/or repair, reset the flow generator to the pressure particular to (e) the user. Note: It is essential that the system pressure be set to the pressure given by the user by connecting the user’s type of nose mask and length of air tubing. To set the pressure setting of the system refer to instructions given in Appendix A.
2.3.2 S E R V I C I N G (a)
(b) (c)
(d) (e)
(f) (g) (h)
(i)
Visually examine the flow generator for external damage such as: Deformation or cracking of the upper or lower cases. (i) Damaged components such as the mains power inlet, mains power switch (ii) or battery power inlet. (iii) Damage to information label or front panel label. Repair as necessary. Check the pressure setting of the system in accordance with the instructions given in Appendix A. Record the pressure setting of the system as confirmation of the pressure stated on the user advice return form. Disconnect power to the unit, remove air tubing from the air inlet, separate the cases, remove the inlet baffle and air filter assembly. Do not separate the fan cover from the lower case. Inspect the unit for the following, recording any irregularities: All mechanical components are mounted correctly and secured in position. (i) All electrical components are mounted correctly and secured in position. (ii) (iii) There are no loose terminals, loose wires or incomplete insulation on electrical components or connections. (iv) There are no loose pieces of wire or other objects trapped in the PCBS or other areas of the lowercase. Any evidence of decay or contamination of the inlet baffle foam washer (v) and the acoustic foam in either the inlet baffle or the uppercase. Inspect the air filter assembly. If the air filter is dirty or if it has been longer than three months since the last service or replacement of the air filter, replace the air filter. (Refer to instructions supplied with the replacement falter strip) Rectify any problems identified either by the user or noted during the servicing procedure. (Refer Clause 2.4 for rectification procedures). For any component to be returned to ResCare, insure the component is accompanied with a service report. Remove dust or dirt from components and insides of cases. When cleaning dust or dirt from inside the flow generator, use a soft dry cloth. Replace any missing or damaged external components. Reassemble the flow generator and remove any stains from the cases. When removing any stains from the flow generator or air delivery system use soap or detergent-based cleaning solutions. Remove excess and wipe dry after use. Do not use thinners, trichlorethylene or other solvents. Visually inspect the air delivery system and replace components which have failed, exhibit excessive wear, have been contaminated or are ineffective. Note: Do not apply oil to any component of the flow generator. 14
2.4 R E C T I F I C A T I O N 2 . 4 . 1 GE N E R A L It should be noted that one or more problems may be present in the system at the same time. Should either of the cases& fractured and require replacement, insure that all other components within the cases are operational and not damaged. The possible problems and rectification routines identified in this Section are as follows: ● Flow generator not operating. ● Delay timer function faulty ● No pressure display. ● Apparent change in set pressure. ● Pressure variation during operation. ● Unable to alter pressure setting. Should the flow generator, or any components of the system be returned to ResCare, insure that all reports given in Appendix D are completed, copied and accompany the system component returned. Should any major components such as the motor/fan assembly, motor control PCB or timer PCB require replacement, instructions are given in Appendix B on the recalibration procedure for the flow generator. Following the completion of any rectification, insure that the system is fully operational with all connectors and inlets fitted appropriately and the system pressure reset to suit the user’s requirements. Return faulty components to ResCare for credit if within warranty period. Caution: Electrical hazards exist when power is applied to the flow generator with the cases separated. Under no circumstances should contact be made with the PSU assembly (with the exception of the wiring harness to the motor control PCB) when power is applied to the flow generator.
.-
2 . 4 . 2 FL O W G E N E R A T O R N O T O P E R A T I N G Possible Cause: Faulty PSU assy or mains wiring faulty. Rectification: (a) Separate cases and check mains voltage at input to PCB (i.e. at fuses). If no voltage, check mains input wiring and switch. Replace input module if faulty. If fuse(s) blown, replace fuses, but note that this probably indicates a fault in the (b) power supply unit. (c) Check DC output to motor control PCB is 24A IV. If incorrect, unplug motor control PCB and re-check. If output voltage is still incorrect, power supply unit is faulty and should be replaced. If correct output voltage is now restored, motor control PCB or timer PCB may be faulty. If output voltage is restored following fuse replacement, check that power supply (d) unit continues to run for 30 minutes without failure or visible signs of overheating. (Note: some components, e.g. T1, run quite hot under normal conditions.) If the unit does not operate with the power supply providing output voltage, this (e) indicates a faulty motor control PCB, timer PCB, or motor. Try a replacement of each until the faulty item is isolated. IMPORTANT: Do not attempt to run the unit with the motor plug disconnected: this will destroy the motor control MOSFET. If the motor control PCB or motor is replaced, recalibrate the flow generator as (0 detailed in Appendix B. 2.4.3 D ELAY TIMER FUNCTION FAULTY (Not applicable to Model APD 2E) Probable Cause: Fault in timer PCB. Rectillcation: Separate cases. (a) Remove and replace timer PCB. (b) 15
(c) (d)
Check that all functions of timer PCB are operational: ie start, stop, time delay, bargraph and hour meter (if fitted). Reassemble cases.
2.4.4 NO PRESSURE DISPLAY (Not applicable to Model APD 2E) Probable Cause: Fault in timer PCB. Rectification: Same procedure as in Para 2.4.3 above. 2 . 4 . 5 AP P A R E N T C H A N G E I N S E T P R E S S U R E Possible causes: Dirty air filter or change in pressure setting. Rectiilcation: Test run the system in accordance with Appendix A to check whether the (a) pressure of the unit as received from the user differs from the prescribed pressure. If different, remove air filter and check whether prescribed pressure is restored. (b) If so, replace filter. (Note: with a dirty filter, the actual pressure may be low even though the pressure display shows a normal indication.) If the prescribed pressure is still not obtained, carry out the required adjustment (c) in accordance with Appendix A. R E S S U R E VARIAT1ON DURING OPERAT1ON 2.4.6 P-------
Possible causes: Motor control PCB fault or poor earthing in PSU assy. Rectilcahon: Separate cases, remove PSU assy, loosen lock nuts securing PCB, tighten PCB (a) screws and re-tighten lock nuts. Replace PSU assy in unit, re-assemble and recheck for pressure variation. (Note: poor earth contact at these screws can allow noise to affect the speed control circuits.) If variations are still suspected, check the motor speed stability by measuring the (b) speed signal (voltage measured as per Appendix B. 1 (c) or B.2(c)) and monitor for at least 30 minutes. If unstable, replace the motor control PCB and recalibrate the unit in accordance with Appendix B.
2.4.7 U N A B L E T O A L T E R P R E S S U R E S E T T I N G Flow Generator Model APD 2 A. Possible causes: Motor control PCB fault; ext socket PCB failure; ext socket harness failure; EPU faulty. Rectd3cation: Check using a different EPU. This should isolate a faulty EPU. (a) Separate cases, replace ext socket harness and PCB and re-check. This should (b) isolate a faulty harness or PCB. If pressure setting still cannot be adjusted, a faulty motor control PCB is (c) Replace this PCB and recalibrate the unit in accordance with indicated. Appendix B.
B.
Flow Generator Model APD 2S or APD 2E
Possible Causes: Motor control PCB malfunction or adjusting pot harness assembly failure. Rectiilcation: Separate cases, remove and replace the adjusting pot harness assembly and re(a) check. This should isolate a faulty harness. If pressure setting still cannot be adjusted, a faulty motor control PCB is (b) indicated. Replace this PCB and recalibrate unit in accordance with Appendix B.
16
3. ELECTRONIC PROGRAMMING UNIT - MODEL EPU 2 3.1 C O M P O N E N T I D E N T I F I C A T I O N Refer Figures 7 and 8 for location of components identtiled below. Item No. Component 1 2 3 4 5 6 7 ; 10 ‘L
Case External cord assembly (curly) Printed circuit board (PCB) Mounting Plate Stand-off (for PCB mounting) Screw (case to mounting plate) Connector housing Washers UP button $ DOWN button $
No. Required
Reference Figure
1 1 1
7 7&8 7 7 7 7 7 7 8 8
: 2 : * *
* Numbers required are not shown where components are integral to another assembly or component. X Note: Earlier units also had a HOLD button.
.
FIGURE 7 ELECTRONIC PROGRAMMING UNIT (EXPLODED INTERNAL VIEW) 17
I
,o>~
/*~
9
FIGURE 8 ELECTRONIC PROGRAMMING UNIT (FRONT VIEW) 3.2 D I S A S S E M B L Y / AS S E M B L Y Note: Prior to disassembly or assembly, insure that the external cord and 8 pin plug (7) have been removed from the flow generator unit.
3.2.1 D I S A S S E M B L Y (a) (b) (c) (d)
With the EPU in an inverted position (upside down), remove the two recessed screws (6) securing the case (1) to the mounting plate (4). Rotate the EPU to the normal upright position and lift the mounting plate (4J to a height sufficient to access the PCB (3). Disconnect the external cord (2) from the PCB (3).. Remove the PCB (3) from the three stand-offs (5) fixed to the mounting plate (4).
3.2.2 A S S E M B L Y (a) (b) (c) (d)
Push the PCB (3) onto the 3 standoffs under the mounting plate (4). Push on 3 washers (8). Connect the external cord (z) to the PCB (3). Position the mounting plate (4) on the case (1). Rotate the EPU to the inverted position. Insert and tighten the two screws (6) through the case (1) to the mounting plate (4).
3.3 S E R V I C I N G A N D R E C T I F I C A T I O N No general servicing is required on the EPU. However, if a unit is received for servicing, check for splitting of the decal around the buttons and replace if necessary. Should the EPU become inoperable or malfunction, separate the case and mounting plate and replace the PCB. No recalibration of the EPU is required upon replacement of a PCB. Should a PCB require replacement, insure that the original PCB is returned to ResCare together with a service report as given in Appendix D.
18
4. LOCAL CONTROL UNIT - MODEL LCU 2
4.1 C O M P O N E N T I D E N T I F I C A T I O N Refer Figures 9, 10 and 11 for location of components identified below. Item No.
Component
Case
1 2
No. Required
Reference Figure
1
10 10 10 10 10 10
1 1 1
External cord assembly Printed circuit board (PCB) Mounting plate Nut (PCB to mounting plate) : Screw (case to mounting plate) Connector housing for ext cord (curly) 1 * UP button * DOWN button 1 Pressure transducer tube 1 Pressure transducer Cable tie (pressure transducer to PCB) 1 * Pressure tube inlet 1 Ext cord assembly (to RCU) 1 Link-LKl Link - LK 2 (for calibration purposes only) 11 * Test point Zero offset calibration potentiometer (VR2) * * Gain calibration potentiometer (VRl) Connector housing for ext cord (RCU) 1
: 5 6 7 9 10 11 12 13 14 15 16 17 18 19 20 21
9 9 9
10 10 10
9 9
11 11 11 11 10
* Numbers required are not shown where components are integral to another assembly or component.
2
9
10 FIGURE 9 LOCAL CONTROL UNIT (FRONT AND REAR VIEW) 19
4 . 2 DISASSEMBLYIASSEMBLY NOTES: The LCU contains a number of ICs which can be badly damaged by 1.
excessive electrostatic discharge or transient voltages. section 2.2.1 for precautions for the handling of ICS.
2.
Refer
Prior to disassembly or assembly, insure that the power has first been switched off at the flow generator, and then both cords to the unit unplugged.
4.2.1 D I S A S S E M B L Y (a) (b) (c) (d) (e) (f) (g)
With the LCU in the inverted position (upside down), remove the four recessed screws (6.) securing the case (1) to the mounting plate (4). Rotate the LCU to the normal upright position and lift the mounting plate (4) to a height sufficient to access the PCB (3) and pressure transducer (12). Disconnect from the PCB (3), the ext cord (curly) connector (z) and the ext cord (RCU) connector (21J . Disconnect, at the pressure transducer (12), the pressure transducer tube (11). Remove the six nuts (.5) securing the PCB (3J to the mounting plate (4). Separate the PCB (3) from the mounting plate (4J. Remove the cord tie (13) securing the pressure transducer (12) to the PCB (3). Separate the pressure transducer (12) from the PCB (.?).
4.2.2 A S S E M B L Y (a) (b) (c) (d) g (g) (h) (i) @ (k)
Position the pressure transducer (IZ?J against the underside of the PCB (3) and plug the pressure transducer into its socket. Insert and tighten a new cable tie (13) through the PCB (3) to the pressure transducer (12). Position the PCB (.?) against the underside of the mounting plate (d). Insert and tighten the six nuts (.5) through the PCB (3) to the mounting plate (4). Lower the mounting plate (~) and PCB (.?) assembly towards the case (1). Connect the pressure transducer tulx (11) to the pressure transducer (12). Comect the ext cord (RCU) connector (21) to the PCB (3). Comect the ext cord (curly) connector (7) to the PCB(3). Recalibrate the LCU/RCU if necessary (see below). Position the mounting plate (4) on the case (I). Rotate the LCU to the inverted position. Insert and tighten the four screws (6) through the case (1) to the mounting plate (4).
4 . 3 SE R V I C I N G A N D R E C T I F I C A T I O N No general servicing is required on the LCU. Should the LCU/RCU system become inoperable or malfunction: 1. Insure that the APD 2 flow generator in fully operational, 2. Insure that all connecting cables and attachments are correctly fitted, 3. Insure continuity of all power and interconnection cables within the LCU/RCU system, 4. Separate the LCU case and mounting plate and replace the PCB and/or pressure transducer, as appropriate. 5. Refer to ResCare should the LCU/RCU remain inoperable or malfunction. Important: Upon replacement of the PCB and/or pressure transducer of the LCU, the LCU and RCU combination requires re-calibration (refer Appendix C). Should a PCB and/or pressure transducer require replacement, insure that the original PCB and/or pressure transducer is returned to ResCare together with a service report as given in Appendix D. 21
5. REMOTE CONTROL UNIT - MODEL RCU 2 5.1 C O M P O N E N T I D E N T I F I C A T I O N Refer Figures 12 and 13 for location of component identification below. No. Required
Item No. Component ;
3 4 5 6 7 9 10 11 12 13 14 15 16
1 Case * Chart output cable (with connector) 1 Printed circuit board (PCB) Mounting plate : Nut (PCB to mounting plate) 6 Screw (case to mounting plate) 1 External cord assembly * UP Button * DOWN Button Actual Press Adjust screw * (Bargraph zero in early units) 1 Connector housing for ext cord * Chart output socket - Swings * Chart output socket - Actual Chart output span & offset adjustment screws * Set Press Adjust screw (not on early units) *
Reference Figure
13 13 13 13 13 13 13 12 12 12 12 12 12 12 12
* Numbers required are not shown where components are integral to another assembly or component. 14-
/3 7
FIGURE 12 REMOTE CONTROL UNIT (FRONT AND REAR VIEW)
22