Service Manual
37 Pages
Preview
Page 1
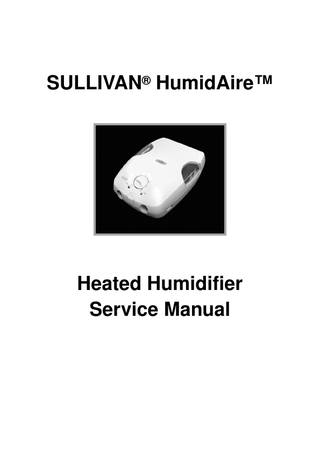
SULLIVAN® HumidAire™
Heated Humidifier Service Manual
Contents 1
How to use this manual... 4
2
Introduction ... 5 Intended users of this manual Features of the HumidAire HumidAire model types
3
5 6 6
General inspection & servicing ... 7 Instructions for general inspection procedures
8
4
Static precautions ... 12
5
Replacing major subassemblies ... 13 HumidAire upgrade Replacing the Control PCB Replacing the Switch PCB
6
16 17 23
Replacement parts ... 27 Lid and base moulding parts Internal components Type 2 upgrade parts
27 28 29
7
Troubleshooting guide ... 30
8
System specifications ... 31
9
Recommended maintenance schedule... 32 Appendix A: Product problem report
33
Appendix B: Schematic diagrams
34
---------------------------------- Contents
3
1 How to use this manual Each of the sections in this manual have been written with a specific purpose in mind. Use this guide to help you find the material which is relevant to your task at the moment. 2
Introduction – Gives a brief overview of the features and use of the HumidAire heated humidifier.
3
General inspection & servicing – Gives procedures to help you examine a HumidAire which has been brought into a service centre. The servicing procedure should be performed before any other work is done on the HumidAire. The Record of Service at the beginning of this section acts as a checklist and a record of the service conducted on the unit.
4
Static precautions – Gives procedures to be followed whenever the Control PCB or Switch PCB is removed from the HumidAire. These procedures will minimize the chance of ICs being damaged by static electricity.
5
Replacing major subassemblies – Gives points to note when replacing components, reassembling the HumidAire and when testing is necessary.
6
Replacement parts – Gives labelled pictures and part numbers of all the HumidAire spare parts and subassemblies available from ResMed.
7
Troubleshooting guide – If you know the symptoms of a faulty unit, use this guide to quickly locate the problem and fix it.
8
System specifications – Lists electrical and mechanical specifications of HumidAire and air tubing.
9
Recommended maintenance schedule – A brief description of the maintenance which the owner of the HumidAire should carry out. There is no need for regular servicing by a service technician. Some countries require all medical equipment to have periodic service to confirm that the unit is in good working order. Section 3, “General inspection and servicing" may be used in this situation.
Appendix A: Product problem report – Whenever you locate a fault in a HumidAire heated humidifier, fill out this form and send it to ResMed for logging. Appendix B: Schematic diagrams – Circuit diagrams are provided for every PCB used in the system. If you require larger copies, please contact ResMed with the names and numbers of the circuit diagrams you need. Note:The circuit diagram numbers are different to the PCB numbers which are printed on the circuit boards.
4
SULLIVAN® HumidAire™ Heated Humidifier Service Manual-----------
2 Introduction This manual is a guide to servicing and repairing the HumidAire heated humidifier. The service manual is written for ResMed distributors, and gives instructions for replacing subassemblies and for recalibration as appropriate. Work at the component level will normally be carried out by ResMed Ltd.
Intended users of this manual Before attempting any repair work, please ensure that you: • are familiar with the SULLIVAN HumidAire Heated Humidifier Operating Manual • have suitable electrical and mechanical training to satisfy the requirements of the relevant regulatory authorities • use the correct antistatic procedures described in this manual Use only approved ResMed parts and never use parts that have failed, show excessive wear, have been contaminated, or are ineffective for their intended use. Nasal CPAP treatment SULLIVAN Continuous Positive Airway Pressure systems are used to treat obstructive sleep apnea, a disorder that causes a physical obstruction in a person’s airway while sleeping. The principle of treatment is that filtered air is delivered by a flow generator through flexible tubing to a nasal mask worn by the patient while sleeping. The flow generator maintains a positive pressure in the patient’s airway which acts as a pneumatic splint, preventing the airway from collapsing during sleep. When we breathe normally, the air is both warmed and humidified as it passes through our airways. An understandable side effect of CPAP therapy is the drying of the upper airways caused by the unusually high air-flow. This drying effect is uncomfortable and in some cases cannot be tolerated by the user. The HumidAire moistens and warms the air from nasal CPAP devices and thus helps to compensate for the drying effect. The HumidAire is used with CPAP systems to make therapy more comfortable.
---------------------------- Section 2: Introduction
5
Features of the HumidAire Provides effective humidification The HumidAire has a large water capacity (600 ml/20 fl oz), yet takes only a few minutes to heat up and start providing humidification. The flat design of the water chamber provides a large surface area for the air to pass over, reducing the need for high temperatures to achieve effective humidification of the air. At the same time, the HumidAire produces very little pressure drop, and much lower pressure swings than some other heated humidifiers. Safe to use All the electrical components are isolated from the water chamber, making the HumidAire very safe to use. An automatic cut-out turns the HumidAire off if the temperature exceeds 75°C/167°F. The HumidAire’s specially designed flat, wide base ensures stability, making it difficult to tip the humidifier over. This design also allows any ResMed flow generator to be placed on top of the HumidAire, thus preventing water from entering the air delivery system.
HumidAire model types ResMed continually develops and improves its products. The different variations are referred to as type numbers. Type 1 and 2 HumidAire models may be distinguished as follows:
Type
Features
1
Original unit with Control PCB R183-106 or R183-107 and single Switch PCB R183-108 in all units.
2
New Control PCBs (R183-125 or R183-126) with design changes and new Switch PCBs (R183-123 or R183-124) created for the different voltage versions of the unit. Wiring harness re-routed.
Note: There is no Type 1 version for 18309 (USA 115V) and 18311 (Germany 240V)
6
SULLIVAN® HumidAire™ Heated Humidifier Service Manual
----------
3 General inspection & servicing Carry out the procedures on the following pages to confirm the HumidAire unit is in good electrical and mechanical condition. These tests will highlight major mechanical or electrical problem with the unit.
Record of Service 1 External examination
Pass
Fail
Repaired/Pass
2 Internal examination
Pass
Fail
Repaired/Pass
3 HumidAire type check
Current type
4 LED Test
Pass
Fail
Repaired/Pass
Pass
Fail
Repaired/Pass
Pass
Fail
Repaired/Pass
Upgraded to current version
5 Minimum setting test °C Ambient temperature °C Heating plate temperature
6 Maximum setting test °C Heating plate temperature
7 Clean HumidAire
Completed
8 Fill out product problem report
Completed
N/A
Service Detials Signature of service agent
Name of service agent
Date of service
Serial number
Reference number
18809/2 02 04
------------------- Section 3: General inspection & servicing
7
Instructions for general inspection procedures 1
External examination Visually examine the HumidAire for external damage such as: • deformation or cracking of the casing lid or base moulding • damaged components such as the mains power cord, mains power switch or thermostat dial • damage to information labels or front panel decal If either the casing lid or the base is fractured and requires replacement, take particular care in inspecting all other components inside the HumidAire for damage.
2
Internal examination Press the casing lid release button and lift open the casing lid to visually examine for internal damage such as: • deformation or cracking of the internal base cover or the water chamber lid • damage to the water chamber latches • damage to the gasket on the underside of the water chamber lid • damage to the heating plate underneath the water chamber. Water chamber latches Water chamber lid Water chamber gasket Water chamber
Heating Plate Internal base cover
Warning: The HumidAire does not provide any primary/secondary isolation, so ALL circuitry is LIVE at mains potential!
!
8
Whenever it is necessary to work with the cases opened up and the power switched on, you must first connect an isolation transformer between the HumidAire and the mains power supply.
SULLIVAN® HumidAire™ Heated Humidifier Service Manual
----------
Disconnect power to the unit, turn it upside down and remove the base moulding. Two of the four screws which hold the base moulding and internal base cover together are covered by the bump-on rubber feet. Remove these to access the screws. Inspect the unit for the following, recording any irregularities: • all electrical components are mounted correctly and secured in position • there are no loose terminals, loose wires or incomplete insulation on electrical components or connections • insulation on wires near the heating plate has not hardened and started cracking • the PCBs are free from any contamination 3
HumidAire type check 1 With the internal components still visible, remove the Switch PCB from its slot. 2 Observe the number of fuses on the board. If the there are three fuses, the unit is a Type 2. If there are only two fuses, the unit is a Type 1 and will need to be upgraded.
Type 1 Switch PCB with two fuses
Type 2 Switch PCB with three fuses
For procedures to upgrade the unit, refer to "HumidAire Upgrade" on page 17.
Note:The water chamber is not required in the following three test procedures. Leave the water chamber out of the HumidAire while the test procedures are being performed. 4
LED test Equipment required Digital thermometer with external temperature probe Range 0 to 60°C (32 to 140°F) 1 Ensure that the heating plate is near ambient temperature. If the heating plate has been on and is still hot you will need to wait until it cools down. 2 Turn the thermostat dial to the maximum setting and switch power on to the HumidAire.
------------------- Section 3: General inspection & servicing
9
3 Confirm that the green (power on) and orange (heater on) LEDs are on.
Heater On LED
Power On LED
4 Switch off the HumidAire. 5 If the unit fails this test refer to section 7, "Troubleshooting Guide" or return the unit to ResMed for servicing. 5
Minimum setting test 1 Turn the thermostat dial to the minimum setting and switch power on to the HumidAire. 2 Wait 30 minutes, then measure and record the ambient temperature. Measure the temperature of the heating plate surface using the external temperature probe along with the digital thermometer. The heating plate temperature should be within 3°C (5.4°F) of the ambient temperature. Note: If the ambient temperature is below 20°C (68°F) then the heating plate temperature should be 20 ± 3°C (68 ± 5.4°F).
External temperature probe
3 Switch off the HumidAire. 4 If the unit fails this test refer to section 7, "Troubleshooting Guide" or return the unit to ResMed for servicing. 10
SULLIVAN® HumidAire™ Heated Humidifier Service Manual
----------
6
Maximum setting test 1 Turn the thermostat dial to the maximum setting and switch power on to the HumidAire. 2 Wait 20 minutes, then measure the temperature of the heating plate surface using the external temperature probe along with the digital thermometer. The heating plate temperature should be 50 ± 5°C (122 ± 9°F). 3 Switch off HumidAire. If the unit fails this test refer to section 7, "Troubleshooting Guide" or return the unit to ResMed for servicing.
7
Clean the HumidAire Reassemble the HumidAire and remove any stains from the lid, base moulding, internal base cover, heating plate and water chamber. When removing any stains from any part of the HumidAire, use soap or mild detergent-based cleaning solutions. Remove excess and wipe dry after use. Do not use thinners, trichlorethylene, bleach or other solvents. Do not apply oil to any component of the HumidAire.
8
Fill out the product problem report Fill out the product problem report in Appendix A of this manual, and send it back to ResMed in Sydney for review and logging. (The address may be found on the back cover of this manual.)
------------------- Section 3: General inspection & servicing
11
4 Static precautions Warning: Prior to disassembly or assembly, make sure that the power is not connected to the HumidAire.
!
Integrated circuits (ICs) within the control PCB can be badly damaged by electrostatic discharge or transient voltages. The following procedures are recommended to avoid component damage: 1 Work benches where handling and repairs are done must have surfaces of suitable conducting material directly connected to an electrical ground. 2 The area under and also in front of the work bench must be coated with a suitable conductive floor paint, or alternatively covered with a conductive floor mat. The conductive paint coating or floor mat must be connected to an electrical ground. 3 Soldering irons or solder baths must be at the same reference (ground) potential as the work bench. 4 A wrist strap must be worn by service personnel working at the bench. The wrist strap must have a conductive lead (1 MΩ) connected to the bench surface. Alternatively, a heel grounding strap to ground the operator to the floor may be used. (Such a wrist or heel strap should not create an electrical hazard for the wearer.) 5 Handling of ICs should be kept to a minimum. If handling is necessary, avoid directly touching the leads. The recommended procedure is to first touch the container in which the ICs are stored, or the PCB in which they are mounted, before touching the ICs. Service personnel should take every precaution that the items will see the same reference potential when moved. 6 All ICs and PCB assemblies containing ICs should be stored in antistatic bags until use. 7 Service personnel should wear clothing which minimizes the build up of static charges. Cotton is preferable to wool or synthetic fibres. 8 Service personnel should avoid electrostatic build up through the movement of air over plastic material. 9 Plastic materials should wherever possible be kept away from the ICs as they develop and maintain high levels of static charge. 10 Low humidity increases potential static problems. Maintaining humidity levels above 60% is one of the most effective ways to guard against static handling problems.
12
SULLIVAN® HumidAire™ Heated Humidifier Service Manual-----------
5 Replacing major subassemblies This section identifies the main components of the SULLIVAN HumidAire and points to be aware of as you replace major subassemblies and reassemble the unit. Note: The test procedures listed in section 3, "General inspection and servicing" should be repeated for any HumidAire which has had any of the following parts replaced: control PCB, switch PCB, thermal cutout switch, thermistor or heating plate. Warning: Make sure the HumidAire is turned off and unplugged before replacing any of the electrical components.
!
Determine whether the HumidAire is a 115 or 240 volt model before replacing the Control PCB, heating plate assembly, base moulding with decals, fuses or the power cord. These parts each have a 115 and a 240 volt version. Thread cutting screws are used in the HumidAire. When replacing a thread cutting screw, turn the screw anti-clockwise until it fits into the previously cut thread. Otherwise the original thread may be stripped out.
External components
Casing lid
Thermostat dial
Heater On LED Power On LED
Casing lid release button
------------------- Section 5: Replacing major subassemblies
13
Internal components
Water chamber
Air tube inlet/outlet
With the water chamber removed the heating plate is revealed:
Heating plate
Internal base cover
14
SULLIVAN® HumidAire™ Heated Humidifier Service Manual
----------
Internal electrical components Pictured below is the HumidAire Type 1 turned upside-down, with the base moulding removed. The internal electrical components can now be viewed. Power cord
Thermistor
Heating plate element connections
Control PCB
Internal base cover
Thermal cutout switch
Switch PCB
------------------- Section 5: Replacing major subassemblies
15
Opening the HumidAire 1 To open the HumidAire, first turn it upside down and remove the four screws which hold the base moulding and internal base cover together. Note: The front two screws are covered by the bump-on rubber feet. Remove these to access the screws.
Remove the rubber feet to access screws
2 Remove the base moulding to access the PCBs, thermal cutout switch, thermistor and heating plate.
16
SULLIVAN® HumidAire™ Heated Humidifier Service Manual
----------
HumidAire Upgrade To upgrade to a HumidAire Type 2, replace the following components: • Wiring harness • Control PCB • Switch PCB • Fuse label Also re-route the wiring harness away from potentially hot components. For the replacement part numbers refer to "Type 2 upgrade parts" on page 29. Replacing the Control PCB Note that the Control PCB is connected to • the thermistor • the Switch PCB • the heating plate
Wiring loom connector
Thermistor connector
Potentiometer spindle
Removing the Control PCB 1 The Control PCB is held in place by the potentiometer spindle sitting inside the shaft of the thermostat dial. To separate from the internal base cover, pull upwards:
2 Remove the wiring loom and thermistor connectors. ------------------- Section 5: Replacing major subassemblies
17
Installing the Control PCB 1 Take the Control PCB and locate the thermistor connector and wiring harness:
Thermistor connector Wiring harness
2 Take the thermistor wire and locate it on top of the PCB as shown below: Note: Ensure wires are clear of the potentiometer spindle.
3 Turn the potentiometer spindle anti-clockwise as far as it can go.
18
SULLIVAN® HumidAire™ Heated Humidifier Service Manual
----------
4 Turn the thermostat dial to zero.This will enable the dial and potentiometer spindle to engage once the Control PCB has been inserted.
5 Take the wires from the harness and insert them in the square gap at the rear of the PCB:
Wires in gap at rear
------------------- Section 5: Replacing major subassemblies
19
6 Turn the Control PCB upside-down, making sure that the wires run to the front of the unit and emerge from the gap between the air inlet/outlet tube, the Control PCB and the LED reflector, as shown below:
LED reflector
Inlet/Outlet tube
20
SULLIVAN® HumidAire™ Heated Humidifier Service Manual
----------
7 Gently push down on the PCB, aiming to locate the potentiometer spindle inside the shaft of the thermostat dial.
Potentiometer spindle
Thermostat dial shaft
Locate potentiometer spindle inside shaft
Press the PCB into position. When it is correctly located, the mounting posts will be clearly visible at the corners of the PCB:
------------------- Section 5: Replacing major subassemblies
21