SANYO
MLS-3750 and MLS-3780 Labo Autoclave Instruction Manual
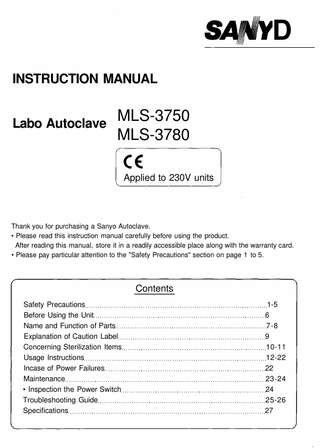
Instruction Manual
32 Pages
Preview
Page 1
D INSTRUCTION MANUAL Labo Autoclave
MLS-3750 MLS-3780 Applied to 230V units
Thank you for purchasing a Sanyo Autoclave. • Please read this instruction manual carefully before using the product. After reading this manual, store it in a readily accessible place along with the warranty card. • Please pay particular attention to the "Safety Precautions" section on page 1 to 5.
Contents Safety Precautions Before Using the Unit Name and Function of Parts Explanation of Caution Label Concerning Sterilization Items Usage Instructions Incase of Power Failures Maintenance • Inspection the Power Switch Troubleshooting Guide Specifications
1-5 6 7-8 9 10-11 12-22 22 23-24 24 25-26 27
Safety Precautions
These precautions must be heeded without fail.
*Please read the "Safety Precautions" section carefully before using the unit. Follow them to ensure the unit is used properly. *These precautions must be heeded without fail as they are intended to ensure the safe use of the unit and to prevent harm to the operator or other persons as well as loss of or damage to property. The displays and significance of each category of precautions are set forth below. • The possible consequences of failing to heed these precautionary displays or operating the unit improperly are classified into the following categories. This warns of actions which could cause death or serious injury to the operator or other persons.
Danger Warning
This warns of actions which could possibly cause death or serious injury to the operator or other persons.
Caution
: This warns of actions which are likely to cause injury to the operator or other persons or loss of or damage to their property. The significance of the symbols presented in the text is as follows.
0: This symbol denotes a prohibited action which must not be performed. i: This symbol denotes a compulsory action which must be performed without fail.
( ^ G e n e r a l prohibition
Disassembly prohibited
pouching with wet hands prohibited
Contact with water prohibited
You must do this. Grounding wire must be connected.
Danger (Never put flammable items into the unit
0
Do not place the following items inside or near the unit. They may cause an explosion or lead to early trouble in the unit. • Explosive substances • Ignitable substances • Oxydizing substances • Flammable substances • Combustible gases
Alcohol
Gas
Warning Connect the unit's power cord to its own dedicated connection outlet where no other plugs are connected.
©
Connect the power cord to its own dedicated single-phase AC Local voltage. Failure to observe this warning can cause ignition or malfunctioning.
Gasoline
Warning Make sure the unit is properly grounded.
©
Make sure I m properly grounded!"
Check that the unit has been properly grounded. Be absolutely sure to connect one end of the grounding wire straight to ground and the other end to the grounding terminal. Failure to observe this warning can cause electric shocks in the event of short-circuiting.
Do not extend the power cord.
0 The power cord must never be spliced or plugged into an extension cord. Failure to observe this warning can result in electric shocks or fire.
When malfunctioning has occurred, shut down operation and turn off the power.
©
r- ^ 00
Do not modify the unit.
a*-' Set my power switch to OFF!
Should a malfunction occur (burning smell, etc.), set the power switch to the OFF position, shut off the mains power, and contact the dealer from whom you purchased the unit. Continuing to operate the unit while it is malfunctioning may result in electric shocks or fire.
Check the unit's sterilization performance.
The unit should never be disassembled or repaired except by a certified repair technician. Failure to observe this warning may result in a fire or malfunctioning or cause injury.
Do not open the drain valve during operation, j
© The unit's sterilization performance will vary depending on such factors as the volume and types of sterilization items, the way the items are loaded into the unit and the types of containers used. Therefore, use a sterilization indicator such as an "OK card" to check this performance.
When draining off the heating water, allow at least 2 hours to elapse upon completion of operation before opening the cover.
Failure to observe this warning may cause accidents or incomplete sterilization.
Failure to observe this warning may cause hot water to gush out, resulting in scalding or accidents. (The heating water is poured inside the chamber to cause the heater in the chamber to generate the steam for sterilization.)
Do not sterilize items inside containers or bags which do not allow steam to pass through
Do not use stoppers to seal up containers with sterilization items inside.
0
0
Failure to observe this warning may cause accidents or incomplete sterilization.
Either use porous caps or loosen the lids sufficiently. Failure to observe this warning may cause accidents or incomplete sterilization.
Safety Precautions Warning Do not allow the sterilization items to block the holes or temperature sensor inside the chamber.
0
Do not allow the sterilization items to apply force to the temperature sensor inside the chamber.
Hole Temperature sensor
Temperature sensor
Hole
Failure to observe this warning may make it impossible to control the unit or cause incomplete sterilization.
Failure to observe this warning may make it impossible to control the unit or cause incomplete sterilization.
When sterilizing only containers such as beakers, flasks or test tubes, place them on their sides or upside down with their openings at the bottom.
To sterilize items in a sterilization bag, pour about 300 milliliters of water inside and keep the bag open.
©
O
Placing the containers right side up with their openings at the top will make it hard for the air inside to escape and for the steam to penetrate sufficiently inside, and incomplete sterilization may result.
Failure to pour water inside the bag or sterilizing items in a bag whose opening has been closed may cause incomplete sterilization.
^Caution Before proceeding with maintenance, set the power switch to OFF.
©
( Do not touch the power switch with wet hands.
Set my power switch to OFF!
Performing maintenance work with the power switch still at the ON setting may cause electric shocks.
Failure to observe this caution may cause electric shocks.
f Do not place objects on top of the power cord, j ( Do not use staples, etc. to secure the power cord.
0 Failure to observe this caution may cause the power cord to overheat and result in a fire.
Failure to observe this caution may cause the power cord to overheat and result in a fire.
Caution Take care not to scald yourself when removing sterilized items upon completion of operation.
© Thermally insulated gloves must be worn without fail. Bear in mind that it takes more time for the temperature of a liquid to drop. Handling sterilized items immediately upon completion of operation may result in scalding.
Keep your face clear of the unit when opening the cover upon completion of operation.
Insert the packing of the drain hose securely into the hole in the exhaust tank, and close the cap.
© Hot steam will be released from the chamber which may result in scalding.
Failure to ensure that the packing of the drain hose has been securely inserted or that the cap is closed may case steam to escape during operation and result in scalding.
Keep clear of the safety valve vent.
j
Do not allow children to use or play with the unit, j
Keep clear of the safety valve vent when steam is escaping from it. Set the power switch to the OFF position, shut off the mains power, and contact the dealer from whom you purchased the unit. Failure to observe this caution may result in scalding.
Failure to observe this caution may result in scalding, electric iniurv. shocks or injury.
© ( Do not touch the hinge part of the cover, j
You may catch your fingers or hand or otherwise injure yourself.
Failure to observe this caution may cause the electrically conductive parts to short-circuit, resulting in electric shocks or a fire.
Safety Precautions Caution ( D O not tip the unit or allow it to topple over.
Do not move the unit while the exhaust tank still has water inside it.
0 Failure to observe this caution may cause the water inside the chamber to spill, resulting in scalding or electric shocks.
When the unit is to be moved, the water still inside the exhaust tank must be disposed of without fail. Failure to observe this caution may cause the water inside the exhaust tank to spill, resulting in scalding or an accident.
Take hold of the grips and carry the unit when it is to be moved.
Set the power switch to OFF when trouble is indicated by a process display.
©
©
Allowing the unit to topple over inadvertently may result in injury or an accident. Always use the lifter when lifting the unit to prevent personnel injuly or equipment damage.
When an operation is re-tried but the same mode is re-established, set the power switch to the OFF position, and contact the dealer from whom you purchased the unit. Continuing to operate the unit while it is malfunctioning may result in electric shocks or fire.
Set my power switch to OFF!
Usage Precautions Use purified or city water for the heating water. )
The inside of the chamber must be cleaned out when cultures generating sulfide or chlorine gases have been sterilized.
Purified water
City water
Use of well water, saline water, etc. may cause trouble.
Failure to observe this caution may give rise to corrosion which in turn may cause early trouble in the unit.
Set the power switch to OFF after the unit has been used for the day.
Drain off the heating water after the unit has been used for the day.
Similarly, if the unit is not going to be used for an extended period of time, the power switch must be set to OFF and the mains power shut off without fail.
Using the same heating water over and over again can cause corrosion in the chamber and blockages in the pipe.
Before Using the Unit Installation • Make absolutely sure that the unit is installed on a level, steady surface. Lock all four casters (by pushing down the ON side of the levers). • Ensure that the rear exhaust tank and tank's mounting fixture are attached to the unit's rear panel without fail. • Do not move the unit by holding onto the control panel. When the unit is to be moved, release the casters (by pushing down the OFF side of the levers), and firmly support it while moving the unit. To navigate ramps, etc., take hold of the unit's grips and watch your step while moving the unit. • Avoid installing the unit in the following locations as they may give rise to trouble. • Places exposed to direct sunlight • Places where water may drip or be splashed onto the unit • Places subject to heavy concentrations of dust • Places inclined at an angle (installing the unit at an inclined angle may cause a failure in detecting heating without water) • Places exposed to air containing salt, sulfur, etc. • Leave a clearance of at least 10 cm behind the unit and at least 5 cm on the right side. Placing the unit right up against a wall may cause the heat to be trapped inside the unit, resulting in trouble. • Avoid installing the unit in a location with a power outlet or electrical equipment since steam is discharged from the rear exhaust tank at the back of the unit. • The unit's boiling point must be set to match the altitude of the locality where the unit is installed. This setting is 100°C when the unit is purchased. Ask your dealer about the setting if the unit is to be installed at an altitude above 500 meters.
At least 5 cm
Danger Do not place the following items near the unit. • Explosive substances • Ignitable substances • Flammable substances • Combustible gases
Oxyidizing substances
• Statement of the range of environmental conditions • indoor use • altitude up to 2000m • temperature 5°C to 40°C • maximum relative humidity 85% • mains supply voltage fluctions not to exceed +10% of the nominal voltage • trasient overvoltages : insulation categorie II • polution degree 2 • do not exert vibration to the product.
Alcohol
Gas
Power supply and ground connections • The unit's power cord must be connected to its own dedicated and properly wired connection outlet where no other plugs are connected. For 120V units : MLS-3750 ; The unit should be connected to an appropriate receptacle that is rated 16.7 or greater. For 220V units The 220V versions of the MLS-3750 / 3780 Autoclave are shipped without a plug on the power cord. Use the power-plug when the products is set. The protective grounding conductor of power supply cord must be connected to the contacting member of an attachment plug. rating ; MLS-3750
Wire size Power cord Type Plug
MLS-3780 AWG14 SJT 250VAC, 10A or greater 250VAC, 20A or greater
For 230V units ; The 230V versions of the MLS-3750 / 3780 Autoclave are shipped without a plug on the power cord. Use the power-plug which is applied IEC60309 when the products is set. The protective grounding conductor of power supply cord must be connected to the contacting member of an attachment plug. rating ; MLS-3750
Power cord Wire size Plug
MLS-3780 AWG14 250VAC, 10A or greater 250VAC, 20A or greater
• The unit must be connected straight to ground. The green / yellow conductor of the power cord is the grounding wire. You must ask your dealer or a qualified electrician to do the grounding work involved.
Gasoline
Names and Functions of the Parts Cover For sealing off the chamber. A silicon rubber packing is fitted inside the cover.
Lever
Control panel
Power switch
For securing the cover to the chamber.
Exhaust tank Grip
For condensing the steam discharged from inside the chamber.
Rear exhaust tankTank mounting fixture
Tank case For housing the exhaust tank. When the drain hose provided is not going to be used, bend it toward the back and stow it away.
Exhaust hose
Drain valve
For passing the steam and air inside the chamber to the exhaust tank.
This is manually opened or closed to drain off the heating water inside the chamber.
Cap
Drain port
This is opened or closed to supply water to the exhaust tank or drain it off.
For draining off the heating water inside the chamber. The water can be drained by connecting the accessory drain hose to the port.
Packing Caster
)
Control Panel
Process display lamps
Pressure gauge
For indicating the nature of the process now under way. The current process is indicated by a flashing bar symbol.
For indicating the pressure inside the chamber.
CONFIRM button
OBJECT TEMP, button
While this is held down, the settings of the operation underway appear on digital displays 1,11 and III.
When the object temperature sensor available as an optional accessory is installed and this button is pressed, the lamp lights, and the sterilization timer is controlled by the temperature of the sterilization items.
HIGH PRESSURE lamp Lights when a high pressure status is attained inside the chamber.
Digital display I For indicating the current temperature, sterilizing setting temperature and melting setting temperature.
Up and down buttons For setting and changing the sterilizing temperature, sterilizing time, melting temperature, melting time, keep warm temperature, exhaust temperature, and programming time.
Digital display II For indicating the set time, remaining time, elapsed time (in minutes), cautionary messages and error messages.
SELECT button For changing and entering the settings.
Digital display III For indicating the cycle/program, exhaust setting temperature and programming time.
O
I- CO
I I I
U_f
TIMER button For setting the time which is to elapse until operation starts.
b l-h3 LEVER LOCK lamp This lights when the lever's lock mechanism is activated after operation has commenced.
C
l
CD
Cycle/program selector buttons For selecting any of 3 programs for any of 4 cycles (12 possible selections) from the memory.
STOP button
START button
For stopping operation and canceling the programming and keep warm status.
For starting operation and programming.
8
Explanation of Caution Label »Label, 1 ;
This caution label explains burning hazard with touching the chamber door, sterilizing items, if the unit is operation or immediately afterward. > Label, 2 and 6; To avoid the malfunction of the unit in accordance with chamber corrosion, this label explains the ban of contents use which is able to corrode stainless steel, and explains how to open the cover. > Label, 3; This label explains usage of Drain tank and its caution. > Label, 4; This label explains cautions of water draining from the drain valve. • Label, 5; This label explains burning hazard in accordance with issuing high temperature boiling water from safety valve.
Back view
9
Concerning Sterilization Items Warning
Porous caps
• Do not place the sterilization items inside containers or bags which will not allow steam to pass through. 1 Do not use stoppers to seal up containers which have sterilization items inside. Either use porous caps or loosen the lids sufficiently. 1 Do not allow the sterilization items to block the holes or temperature sensor inside the chamber.
Sterilizing and melting cultures and other liquids • Capacity of culture to capacity of container Pour in the liquid while taking care not to exceed the container's rated amount. Quantities exceeding the rated amount may boil over. • When sterilizing large quantities of cultures, etc. The time when the whole culture reaches the sterilizing temperature is reached after a delay time subsequent to the time when the temperature inside the chamber has reached the sterilizing temperature. Refer to the table below, and add the sterilizing time and delay time to arrive at the sterilizing setting time which is to be used.
Sterilizing setting time
Temperature 1 21°C -
locrc-
Sterilizing setting time = Sterilizing time + delay time Amount of liquid Agar media 500 ml in 1,000 ml flask x 1 Agar media 500 ml in 1,000 ml flask X 8
Delay time 11 minutes 7 minutes
Agar media 250 ml in 500 ml flask x 1 Agar media 250 ml in 500 ml flask x 14
11 minutes 7 minutes
Time
•^ When the culture is to be sterilized in a small quantity, the temperature inside the chamber rises more quickly and the delay time is increased.
- What we recommend: An "Object temperature sensor" which detects the temperature of the sterilization items and controls the sterilization timer is available as an optional accessory. Even after this sensor has been installed, control can still be switched over to the unit's sensor by pressing the OBJECT TEMP, button ON and back by pressing it OFF. Use the optional sensor to make the sterilization even more dependable. For details, contact your dealer.
Plastic container
> When using plastic containers for sterilization Increase the sterilizing setting time even more. Otherwise, incomplete sterilization may result since these containers are poor conductors of heat. • When melting general agar media in solid form Refer to the table below, and set the melting time (per flask). Capacity 2L
I
1L
Melting temperature 100°C
Melting time 60 minutes 45 minutes _
Durham tube
• When testing a Durham tube The residual air inside the Durham tube can be expelled by setting the exhaust temperature to the appropriate level.
10
Concerning Sterilization Items Sterilizing equipment, etc. Warning When sterilizing only containers such as beakers, flasks or test tubes, place them on their sides or upside down with their openings at the bottom. Placing the containers right side up with their openings at the top will make it hard for the air inside to escape and for the steam to penetrate sufficiently inside, and incomplete sterilization may result.
Sterilizing as part of waste material processing Warning When sterilizing items in a sterilization bag, pour about 300 milliliters of water inside and keep the bag open. Failure to pour water inside the bag or sterilizing items in a bag whose opening has been closed may cause incomplete sterilization.
Checking the sterilization performance Warning Check the sterilization performance. This performance varies depending on such factors as the volume and types of sterilization items, the way the items are loaded into the unit and the types of containers used. Be absolutely sure, therefore, to check the sterilization effects using a sterilization indicator such as an "OK card." Such an indicator is an effective way of preventing incomplete sterilization and accidents.
Sterilizing items in containers with a large capacity (10 liters or more) and very small opening - Advisory note When placing a liquid inside a container with a large capacity (10 liters or more) and a very small opening for sterilization, fill the container to at least 50% of its capacity. When a small amount of liquid in such a container is sterilized, the pressure during sterilization will increase, and steam may be discharged from the pressure safety valve. To sterilize a small amount, either use a container with a large capacity and a wide opening or replace with a small-capacity container suitable for the quantity of the liquid. The water in the exhaust tank increases with each sterilizing operation. When it has risen to the HIGH (maximum) level mark, dispose of the water and fill the tank with fresh water as far as the LOW level mark.
11
Usage Instructions Basic operating procedure o
STERI.
cycle
(sterilizing)
Sterilizing
o STERI. KEEP WARM
cycle
(sterilizing / keep warm)
°
MELT KEEP WARM
cycle
melting / keep warm)
°
STERI. EQUIPMENT
cycle
(sterilizing equipment)
Install the exhaust tank.
13
Set the power switch to ON.
14
Open the cover.
14
Pour in the heating water.
15
Place the sterilization items inside.
15
Close the cover.
15
Select the cycle. (Change the settings.) (Program the operation.)
16 22
Press the START button.
18
Sterilization or melting to keeping warm
17 I
Sterilizing
Operation is completed.
19
Open the cover.
20
Remove the sterilized items.
20
Set the power switch to OFF.
20
Drain off the heating water.
21
12
Usage Instructions 1. Install the exhaust tank. (l)Remove the exhaust tank from the unit, and take off its cap. (DPour in water until it reaches the LOW (minimum) level mark, and close the cap.
Caution Failure to close the cap properly will cause steam to leak during operation, possibly resulting in scalding.
- Memo The water in the exhaust tank increases with each sterilizing operation. When it has risen to the HIGH (maximum) level mark, dispose of the water and fill the tank with fresh water as far as the LOW level mark.
HIGH level mark: approx. 3 liters
LOW level mark: approx. 1 liter
- Advisory note Do not use force to pull the exhaust tank outside the unit while the exhaust hose is still connected. This may cause malfunctioning.
(DCheck that the exhaust hose packing is securely inserted into the hole in the exhaust tank.
Caution When the packing has become disengaged from the hole in the exhaust tank, insert it back securely into the hole. Packing
- Advisory note Push the packing securely into place as far as its base by turning it clockwise and counterclockwise a little at a time. If it is turned in one direction only, the exhaust hose will be twisted, possibly causing malfunctioning.
(4)Check that the drain valve is closed. Drain valve.
(DStow the exhaust tank inside the unit. Check that the exhaust hose is not bent or twisted. If it is, it will be hard for the air inside the chamber to escape.
13
2. Set the power switch to ON. • The control panel lamps light up. (The setting temperature for the boiling point appears on digital display I for the first two seconds.)
i n n
NOW
Setting temperature for the boiling point
LIU]°c
-1
MIN
When the setting temperature for the boiling point is 100°C
Digital displays iWhen the lever has been slid to CLOSED The settings (temperature and time) • To check the temperature inside the chamber are displayed. This status is known as the standby [A I Press the up and down status. r^l buttons together.
• W h e n the lever has been slid to OPEN The current temperature inside the chamber (temperature of heating water) is displayed.
The current temperature is displayed while these buttons are held down. STERI.
I 3 i / L 1 °c
J n
MIN
Jt u °c j
u
3 n
NOW
3 n
3 n L U
NOW
MIN
chamber
Jl
heating water
U °c MIN
O 1
n i
Sterilization cycle with a setting of 20 minutes at 121 °C
When the temperature inside the chamber is 30°C ("Lo" appears when it is under 25°C )
When the temperature inside the chamber (temperature of heating water) is 30°C
3. Open the cover. (The cover cannot be opened unless the power switch is at the ON position.) 1 The following points must always be verified before the cover is opened. Trying to force the cover open may cause malfunctioning. • Power switch: at the ON position • Pressure gauge: 0 MPa reading • LEVER LOCK lamp: off.
Check that the pressure gauge reads "0."
©Slide the lever to OPEN while pressing down on the cover.
(|)Open the cover slowly.
14
Usage Instructions 4. Pour in the heating water. • Pour in the water until the tip of the water level bracket of the heater cover is immersed. Since the amount of heating water decreases with every sterilizing operation, check the water level prior to operation.
Heater cover
MemoThe heating water capacity is about 4.5 liters. Heater
- Advisory note Purified water is best suited as the heating water. If it is not available, use city water instead.
5. Place the sterilization items inside. • Place the items in the accessory stainless steel basket, and place the basket gently inside the chamber.
Caution Do not allow the sterilization items to block the holes or temperature sensor inside the chamber, and do not allow force to be applied to the temperature sensor.
Hole Temperature sensor
- Memo Before initiating operation, check the section "Concerning the sterilization items" (see pages 10 and 11) again, and check how the items should be loaded into the unit, etc.
Hole
6. Close the cover. (l)Check on digital display I that the temperature inside the chamber is under 60°C. ("Lo" appears when it is under 25°C.)
- Memo If the cover is closed when the temperature inside the chamber is over 60°C due to continuous operation, etc., the air inside the chamber will significantly expand in a short time, making it harder to open or close the cover. Wait until the temperature drops to a value below 60°C. (DCheck that the cover packing and chamber opening are free from dirt and foreign matter. Remove any dirt and foreign matter since they can cause steam to leak. (Cover packing and chamber opening => page 23) 3)Slide the lever to CLOSED while pressing down on the cover. The setting temperature and time appear on the digital display.
15
Beep!
Heating water
7. Press one of the cycle/program selector buttons. • One of four cycles can be selected to suit the intended purpose of the unit's use. Each cycle has a choice of three programs, each with its own settings. • Program settings can be changed. Make changes as needed. (* Refer to the ranges of possible changes.) Refer to "When changing the settings" on page 17. • The table below lists the settings which are applicable to the unit when it was purchased. Sterilizing Sterilizing Keep warm Exhaust temperature temperature temperature time
Cycle/program STERI.
121°C
20 min.
RE'
121°C
15 min.
R3
121°C
15 min.
105°C to 135°C
1 min. to 250 min.
121 °C
20 min.
50°C
121 °C
15 min.
50°C
Range of possible change STERI./ KEEP WARM
Boiling point
Ri
h I
b3 Range of possible change i
MELT/ KEEP WARM
Boiling point
+ 10°C Boiling point
+ 15°C Boiling point
15 min.
55°C
105°C
1 min. to 250 min.
45°C to 60°C
to 135°C
Melting temperature: Melting temperature:
30 min.
Melting temperature: Melting temperature:
100°C
10 min.
Melting temperature: Melting temperature:
80°C
50 min.
50°C
50°C 50°C
Melting temperature:
Range Melting temperature: 0 min. 60°C of to to possible 250 min. or 100°C change 72 hours STERI. EQUIPMENT
d I
121°C
20 min.
clE1
126°C
15 min.
63
135°C
10 min.
Range of possible change
105°C to 135°C
1 min. to 250 min. or 72 hours
For sterilizing liquids such as water, cultures and test liquids. Upon completion of the sterilization process, the sterilized items are gradually cooled naturally, and when the exhaust setting temperature is reached, the exhaust valve is opened.
+ 0°C to 25°C
115°C
100°C
o MELT
+ 0°C
Applications, functions
Boiling point
+ 0°C Boiling point
+ 0°C Boiling point
+ 0°C
For sterilizing liquids such as water, cultures and test liquids. This cycle starts with sterilization which is followed by exhaust as with the sterilizing cycle, and after this the items are kept warm at the keep warm temperature.
Boiling point
+ 0°C to 25°C For melting cultures and then keeping them warm. • When cultures are merely to be kept warm, set the melting time to "0." • When the operation is stopped or cycle is completed, cycle will be set automatically to R I program.
45°C to 60°C For sterilizing equipment such as flasks or beakers which can withstand the sudden drops of pressure experienced at the exhaust stage. Upon completion of the sterilization process, the exhaust valve is opened at a temperature below 130°C, and the sterilized items are cooled down. • Liquids may boil over when they are sterilized.
The exhaust temperature is the temperature at which the exhaust valve is opened upon completion of the sterilization process and the steam inside the chamber is discharged. The setting is changed when, for instance, Durham tubes are to be used. (The temperature indicated on the digital display is to be added to the boiling point.)
16
Usage Instructions 8. When changing the settings s
• The settings (sterilizing temperature, sterilizing time, melting temperature, melting time, keep warm temperature and exhaust temperature) can be changed as required. The changed settings are stored in the memory even if the unit's power switch is set to OFF. (Settings changed while operation is underway will not be stored.) (Ranges of possible change: See page 16)
STERI.-
I
L/C
/
i °C MIN
©Press SELECT. This causes one of the setting items to flash. Each time this button is pressed, the setting item changes.
DPress the [up] or [down] button to change the setting.
Memo Each time the [up] or [down] button is pressed, the setting is incremented or decremented by 1. When either button is held down, the setting is rapidly incremented or decremented until the maximum or minimum value is reached, at which time no further change is registered.
Beep!
(DPress SELECT again to cause the next setting item to flash. Press the [up] or [down] button to change the setting. / Repeat the process of pressing SELECT and I the [up] or [down] button to change the setting. I With a setting item which is to remain unchanged, simply press SELECT. 4 Finally, press SELECT. When this button is entered, a prolonged beep is heard, and the program changes are stored in the memory. * If the flashing status is left standing for about a minute, the changes will not be updated, and the standby status will be established. (Standby status: See page 14)
r- Each time SELECT is pressed, the setting items flash one by one in the following sequence.
STERI.
cycle
° STERI. KEEP WARM
cycle
0
MELT KEEP WARM
cycle
° STERI. EQUIPMENT
cycle
(sterilizing)
(sterilizing / keep warm)
[melting / keep warm)
(sterilizing equipment)
Sterilizing temperature
Sterilizing temperature
Melting temperature
Sterilizing temperature
<?
<?
^>
Sterilizing time
Melting time
Sterilizing time
<?
O
O
Exhaust temperature
Keep warm temperature
Keep warm temperature
>
Sterilizing time
O Exhaust temperature j
17
9. Press
START
• When the process is started after select any cycle of STERI., STERI. KEEP WARM or STERI. EQUIPMENT. • When the setting time is over the sterilization time in table below.
®Press
Beep.beep!
START
o
Process will be started. • When the setting time is under the sterilization time in table below.
®Press
Beep!
START
Setting temperature and time in digital display are flashing. Confirm setting condition. (DPress
START
Process will be started. Sterilization temperature (°C)
Sterilization time (min)
115
min. 30
121
min. 20
126
min. 15
132
min. 5
135
min. 3
y
>When the process is started after select the cycle of MELT/KEEP WARM.
®Press
START
Beep!
Setting temperature and time in digital display are flashing. Confirm setting condition. (DPress
START
Beep.beep!
Process will be started. • When the temperature inside the chamber reaches the sterilization or melting temperature setting, the temperature inside the chamber indicate in the digital display I and remaining sterilizing or melting time indicate in the digital display II.
NOW
Temperature inside chamber Remaining sterilizing time (after sterilizing temperature has been reached)
V-
r p
_____-_ Remaining melting time (after melting temperature has been reached)
J
1L
11
J
1
MIN
nn
1 u u •c
vJ
P
f
i
i °c
u
LEFT
NOW
Temperature inside chamber
f
j
LEFT
11
JI u MIN
18
Usage Instructions •When the lever is not slid all the way to CLOSED, "Lid" (cautionary message) appears on digital display II. Slide the lever again to CLOSED, confirm that a beep is heard, and then press START.
NOW
I Q MIN
When the levever is not completed loosed
• When the lever's lock mechanism is activated after start, the LEVER LOCK lamp lights. The cover cannot be opened while this lamp is lighted.
-OtEVERLOCK
To stop operation See page 21.
To check the settings during operation Press CONFIRM. I The settings are displayed while this button is held down.
- To change the settings during operation The sterilizing time, melting time, keep warm temperature and exhaust temperature settings can be changed even while operation is underway. However, the changes made will not be stored in the memory. When changing the settings: See page 17.
10. Operation is now completed. • Sterilizing cycle or sterilizing equipment cycle A succession of prolonged beeps are heard, and the completion indication appears on digital display II.
NOW
°c Completion indication
-
-
_ MIN
• Sterilizing • keep warm cycle or melting • keep warm cycle When the keep warm stage is reached, a prolonged beep is heard, and the KEEP WARM bar sign among the process display lamps flashes. After the keep warm time has continued for 72 hours, operation is completed, a succession of prolonged beeps are heard, and the completion indication appears on digital display II.
19