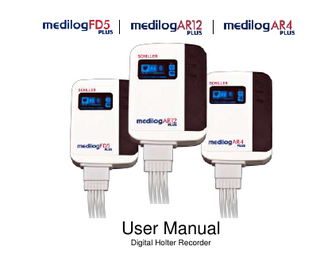
User Manual
39 Pages
Preview
Page 1
medilog® FD5/AR4/AR12 plus Digital Holter Recorder
3 Great care has been taken in compiling the text and diagrams for this manual. However, errors cannot be ruled out completely. The publisher, authors and translator accept no legal responsibility or any other kind of liability for incorrect data and their consequences. All rights reserved, including photomechanical reproduction and storage via electronic media. The commercial use of the models and work shown in this manual is not permitted. © 1999-2010 TOM Medical Entwicklungs GmbH Version: Published by:
1.9 (for firmware 3.0 and higher) TOM Medical Entwicklungs GmbH Anzengrubergasse 8, A-8010 Graz, AUSTRIA
Year of manufacture: Manufactured by:
2010 Schiller AG Altgasse 68 P.O. Box 1052 CH-6341 Baar Switzerland Phone +41 41 766 42 42 Fax +41 41 761 08 80
0123
Symbols used in this manual:
Safety note: Ignoring a safety note can lead to serious harm to the patient or the user.
Supplementary information
Brand names and trade marks are registered by their appropriate owners.
medilog® FD5/AR4/AR12 plus Digital Holter Recorder
Table of contents Table of contents... 4 Safety instructions ... 5 Intended use ... 7 medilogAR12 Plus ... 7 medilogAR4 Plus ... 7 medilogFD5 Plus ... 7 Operating elements ... 9 Type label ... 9 Type label symbols ... 10 Opening and closing the recorder ... 11 Batteries ... 12 Memory cards ... 13 Electrodes... 14 Basic information regarding recorder operation ... 16 Recorder Feature Matrix ... 16 Starting and stopping a recording ... 17 Starting a recording ... 17 Stopping a recording... 20 Deleting a recording from the memory card ... 20 Recorder configuration ... 21 Configuration menu ... 21 Recording settings ... 22 Adjusting the contrast... 25 Setting the time and date ... 25 Configuring the optional radio module... 25 Messages and troubleshooting ... 26 Messages ... 26 Troubleshooting ... 27 Cleaning, inspection, disposal ... 28 Cleaning the device ... 28 Cleaning the patient cable ... 28 Annual inspection ... 28 Packaging and transport ... 29 End-of-life disposal ... 29 Technical data: medilogAR12 Plus ... 30 Technical data: medilogAR4 Plus ... 31 Technical data: medilogFD5 Plus... 32 Ambient conditions ... 33 Information on electromagnetic radiation and electromagnetic immunity ... 34 Contact ... 39
5
Safety instructions Ignoring the safety instructions for operation and storage of the instrument may endanger the patient. The manufacturer accepts no liability for damages resulting from improper use. General: Do not, under any circumstances, open the casing. The device does not contain any serviceable parts. Do not insert any inappropriate objects into the slots. Store the instrument safely away from children. The recorder is not suitable for measurements conducted on children weighing less than 10 kg (formation of loops in the patient cable!). The recorder's power supply and patient circuit are not distinctly isolated. Only use batteries that are specified for the operation of this recorder. Do not, under any circumstances, use a power supply unit - this could threaten the patient's life. Before a recording: Before each recording and before attaching sensors or electrodes to the patient, check the casing and the ECG patient cable for damage which may have occurred, for example, due to mechanical overload, falling from a great height or wear and tear (chafed patches on the cable). Do not use the instrument or the cable if you detect cracks, melted areas or any other signs of damage to the cable or casing. When changing the batteries, make sure you insert them correctly (polarity). The polarity is indicated in the battery compartment. Follow all instructions given in the chapter "Electrodes". Not following these instructions can lead to incorrect measurements and possibly, as a consequence, to incorrect diagnosis. Only use disposables (memory cards, batteries, electrodes) recommended specifically for this device. Ask the dealer for more details. Do not, under any circumstances, insert objects in the SD card slot or the battery compartment other than SD or SDHC memory cards or appropriate batteries, respectively (see section "Batteries"). This may lead to damages to the recorder and endanger the patient. Follow the instructions given in the section "Electrodes". Incorrect application of the electrodes can affect the measurement results and lead to misinterpretations. Make sure that the recording can be clearly assigned to a patient. To do so, you can either initialise the SD/SDHC memory card accordingly (see section "Memory cards") and/or make a voice recording of up to 40 seconds (see section "Starting a recording"). Anonymous recordings (no patient information saved on the memory card) can lead to confusions. Before the start of the recording, ensure that the patient data is correct (see section "Starting a recording"). During a recording: Even though that the device is protected against ingress of liquids (IPx4), prevent it from being exposed to liquids. The recorder is not suitable for use in the bath tub or shower. The recorder is not protected against the effects of defibrillation. Do not use the instrument during defibrillation. Make sure that the electrode plug (patient side) never comes into contact with live parts. Do not operate the recorder near exposed live parts.
medilog® FD5/AR4/AR12 plus Digital Holter Recorder Conductive parts of the electrodes and their connections, including the neutral electrode (black) must not come into contact with other conductive parts, including earth. When using the instrument during sleep, please note that this can cause sleep disturbances; a lack of concentration can therefore occur the following day. During operation, make sure that the cable is not caught by the moving parts of a machine or sport equipment. This could lead to damage or injury (e.g. if loops are formed in the cable). If the patient falls when wearing the recorder (e.g. during sports activities), there is an increased risk of injury (as the patient is not used to wearing it). Simultaneously using or connecting several devices on the same patient can lead to increased patient currents. Contact the device manufacturers to ensure that the simultaneous use/connection of the devices does not cause harm. The recorder is designed for use in an electromagnetic environment with controlled HF interferences. Electromagnetic interferences can be avoided by observing the following minimum distances between portable and mobile HF communication equipment (transmitter) and the Holter recorder, according to the communication equipment's maximum transmitting power. Read the section "Information on electromagnetic radiation and electromagnetic immunity" for more details.
7
Intended use medilogAR12 Plus The recorder (type reference medilog®AR12 Plus) is used to record a 3-channel (single channel with the 3-lead cable) ECG and to measure the time intervals between consecutive R peaks in the ECG. In addition, the device's acceleration in all three dimensions is recorded. The system is designed for a measuring duration of more than 24h and is therefore worn by the patient throughout the day. The preparation for the recording (attaching electrodes, etc.) is undertaken by the technician or doctor. During the recording, the instrument is carried in a protective pouch which can be attached to a belt. The instrument is not designed for emergency monitoring purposes (intensive medical monitor); the instrument i s only designed to record the ECG and/or information derived from ECG. By measuring the ECG or the beat-to-beat heart rate, respectively, the device also records the occurrence of P waves and pacemaker impulses. In addition, the medilog® AR12 plus records the ECG amplitude – due to the heart’s mechanical connection to the ribcage, breathing causes the electrical heart vector to turn and therefore changes the ECG amplitude.
medilogAR4 Plus The recorder (type reference medilog®AR4 Plus) is used to record a 3-channel ECG and to measure the time intervals between consecutive R peaks in the ECG. In addition, the device's acceleration in all three dimensions is recorded. The system is designed for a measuring duration of more than 24h and is therefore worn by the patient throughout the day. The preparation for the recording (attaching electrodes, etc.) is undertaken by the technician or doctor. During the recording, the instrument is carried in a protective pouch which can be attached to a belt. The instrument is not designed for emergency monitoring purposes (intensive medical monitor); the instrument is only designed to record the ECG and/or information derived from ECG. By measuring the ECG or the beat-to-beat heart rate, respectively, the device also records the occurrence of P waves and pacemaker impulses.
medilogFD5 Plus The recorder (type reference medilog®AR12 Plus) is used to record a 3-channel ECG. The system is designed for a measuring duration of more than 24h and is therefore worn by the patient throughout the day. The preparation for the recording (attaching electrodes, etc.) is undertaken by the technician or doctor. During the recording, the instrument is carried in a protective pouch which can be attached to a belt. The instrument is not designed for emergency monitoring purposes (intensive medical monitor); the instrument is only designed to record the ECG and/or information derived from ECG. By measuring the ECG the device also records the occurrence pacemaker impulses.
medilog® FD5/AR4/AR12 plus Digital Holter Recorder The data is stored digitally on a memory card. After removing the memory card, the data can be read by an appropriate card reader. The recorder is not designed for emergency monitoring purposes (intensive medical monitor). It is only designed to record the ECG and/or heart rate.
The recorder is not protected against the effects of defibrillation as outlined in EN60601-2-25.
The recorder is not suitable for infants weighing less than 10 kg (22 lbs).
9
Operating elements Display/signal check Microphone Upper button Lower button
Locking cap
Patient cable
Type label Manufacturing date Type reverence Serial number Cable type IP protection class
Battery compartment cover
medilog® FD5/AR4/AR12 plus Digital Holter Recorder
Type label symbols Observe the safety notes The number beneath this symbol indicates the year of manufacture Applied part type BF
0123
The recorder meets the essential requirements of the Medical Device Directive 93/42 EEC.
Disposal of the device in accordance with the EU Directive 2002/96/EC (WEEE). not for infants <10kg
The recorder is not suitable for measurements conducted on children weighing less than 10 kg (formation of loops in the patient cable!).
NRTL symbol
11
Opening and closing the recorder
Do not open the recorder as long as a patient is connected to it. To open the recorder, slide the locking cap backwards and lift the cover off. The cover can be completely detached from the recorder. The type label, battery compartment and memory card slot are located beneath the cover.
Locking cap
To close the recorder, follow the above instructions in reverse. Insert the lugs at the upper end of the casing and close the cover until it clicks in place. Before locking it by use of the locking cap, press on the cover so that the locking cap can be easily slid in place.
Battery compartment cover
medilog® FD5/AR4/AR12 plus Digital Holter Recorder
Batteries Insert the batteries with the negative pole (flat end) first. Make sure you position the batteries correctly. Remove the battery by lifting it at the positive pole. Do not, under any circumstances, use a tool to remove the battery. Alternatively, you can remove the battery by lightly tapping the device against the palm of your hand. A battery with the following specifications is required: Type/size: Nominal voltage:
AAA/LR03 1.2V – 1.5V
Positive pole Negative pole
Operation with rechargeable NiMH batteries (at least 900 mAh) is possible. Please note that the recorder's running period can be reduced depending on the state and age of the rechargeable battery.
If the battery capacity is running out during a recording, the recording is ended automatically and the device is switched off automatically. This prevents data loss.
Make sure to remove the battery from the recorder if it is not used for a longer period of time.
Observe correct polarity when inserting a new battery. Follow the instructions given in the battery compartment. Incorrectly inserted batteries can damage the recorder.
Only use batteries specified and approved by the manufacturer. The mechanical manufacturing tolerance for batteries is often considerable and can in the worst case lead to problems with the battery contacts. Moreover, the energy density (capacity) of different batteries can vary significantly.
Batteries must be disposed of separately in accordance with EU directive 2006/66/EC.
13
Memory cards A memory card with the following specifications is required: Type: Capacity:
SD (Secure Digital) or SDHC (Secure Digital High Capacity) 128 MB – 32 GB (FAT16/32) Use the medilog® Setup software to initialise the memory card. Insert the memory card in the card reader and start the medilog® Setup program. Fill in the information and click on Save. The patient data helping to clearly identify the patient or recording, respectively, is saved onto the memory card. Insert the memory card in the recorder and switch the recorder on.
The memory card slot is a so-called "push-push slot". In order to insert the memory card into the device, push the card into the slot until it locks in place. To remove the memory card, push the card 1 - 2 mm into the slot to release the locking catch.
The recorder is mechanically protected from an incorrect insertion of the memory card. Do not force the card into the slot. If the storage space runs out during a recording, the recording is stopped automatically and the instrument switches off. Only use memory cards specified and approved by the manufacturer. Memory cards vary considerably with respect to their power consumption and read/write speed!
Using the memory cards with other instruments (digital cameras, MP3 players, etc.) can lead to incorrect functioning and/or data loss.
medilog® FD5/AR4/AR12 plus Digital Holter Recorder
Electrodes Many ECG adhesive electrodes are suitable for use. As ECG electrodes from different manufacturers have different electrical properties, the choice of ECG electrodes can considerably affect the measurement results and quality. Ensure that only high-quality electrodes are used. We recommend electrodes manufactured by Ambu GmbH (61231 Germany): Ambu® Blue Sensor L Ambu® Blue Sensor VL Ambu® Blue Sensor VLC Before attaching the electrodes, clean (with alcohol) and dry the body areas to which the electrodes will be attached. If there is a substantial amount of body hair, these areas should be shaved to prevent the electrodes coming loose during a recording. In the case of overweight patients, it is recommended to connect the cable to the electrode before attaching the electrode to the patient. A - green B - red G - black
B
D
G
G
B
B
B I
I
A
G
II
A - green B - red C - white D - yellow E - orange F - blue G - black
B F
D
G
C A
A
G
A - green B - red C - white D - blue G - black
B
C E A
D
B III
A C A
G
I
D F II
A C
III
E
The main channel (channel I) is used for various real-time evaluations (e.g. detection of R wave and P wave). The positioning of these electrodes is therefore of special importance. Ensure in particular that there is no strain on the electrodes. The 3-lead variant of the medilogAR12 Plus is recording only one ECG channel.
15
If you take the electrodes from a package with several electrodes, ensure that the package is sealed air-tight so that the electrodes do not dry out. Do not use electrodes which have dried out. Dried out electrodes are easy to recognise as they have no gel-like substance on the electrode surface. Dried out electrodes deliver a weakened and often non-reproducible signal which can distort the results. Never use patient cables which show damage of any sort. Damaged cables can lead to increased patient currents.
For reasons of hygiene and to ensure optimal functioning, use ECG electrodes only once.
medilog® FD5/AR4/AR12 plus Digital Holter Recorder
Basic information regarding recorder operation The recorder is operated by means of two buttons, and . The symbols on the display indicate the respective function of the buttons. In this example, the upper button is used to switch off the recorder. By pressing the lower button , the settings menu is entered. The battery capacity is indicated in the top right-hand corner. Time and date are generally displayed at the bottom.
If no button has been pressed for some time, the recorder switches off to save energy.
Recorder Feature Matrix
ECG channels
ECG cable
Recording rates [Hz]
Pacemaker detection
R peak detection
p-Wave detection
EDR
Movement sensor
The following table is showing the available features depending on the recorder variant.
medilogAR12 Plus
3
5, 7
125, 250,1000
yes
yes
yes
yes
yes
medilogAR12 Plus 3-lead
1
3
250
yes
yes
yes
yes
yes
medilogAR4 Plus
3
5, 7
125,250,1000
yes
yes
yes
no
yes
medilogFD5 Plus
3
5, 7
250
yes
no
no
no
no
17
Starting and stopping a recording Starting a recording Switch the recorder on by pressing the upper button . If no memory card is inserted in the slot, the start screen is displayed. When the device is switched on, the icon is displayed for some seconds. This icon indicates that the recorder is switching on correctly.
When a memory card has been inserted, the information screen is displayed automatically. If the memory card has been initialised with the medilog® Setup PC program, the entered patient data is displayed on the screen. The icons in the top row give information on the selected recording mode. Moreover, the battery capacity is displayed. Sampling rate
Acceleration sensor Event mode
Battery indicator
Patient data
Starting a voice recording
Lead test
Displaying ECG channel 1 Date and time
The sampling rate is either 125 Hz, 250 Hz or 1000 Hz, depending on the configuration. For more details, please refer to section "Recorder configuration". If the acceleration sensor icon is displayed, the accelerometer is activated and the corresponding data recorded. If the Event mode icon is displayed, the patient may exchange the battery. The recording is continued automatically (the recording can be interrupted for as long as necessary). For more details, please refer to section "Recorder configuration".
medilog® FD5/AR4/AR12 plus Digital Holter Recorder
The battery indicator displays the charge state of the inserted battery. Empty batteries are indicated by the icon . Please note that the use of partly discharged batteries can lead to a premature termination of the recording. If the icon is displayed on the screen directly after switch-on, the battery has to be replaced to ensure regular operation. The lead test shows if all cables and electrodes are fully functional. In the case of kinked cables or dried out electrodes, the damaged cable and/or electrode is indicated. In this example, the cables and/or electrodes labelled "B" and "D" are faulty. Exchange the faulty electrodes. If the error remains, exchange the cable. To do so, please contact our service department.
Start the voice recording by pressing the upper button . This can be used if no patient data is stored on the memory card. In this way, the measurement can still be clearly identified. Press the upper button to start and end the voice recording. Recording is possible for up to 40 seconds. Make sure that the microphone is close to your mouth when recording and that you speak at a normal volume.
When the information screen is displayed, press the lower button to view the first ECG channel. In this way, you can check the signal quality and polarity and correct it by repositioning the electrodes, if necessary. You can then start the recording by pressing the upper button , or check the second ECG channel by pressing the lower button (not available for the 3 lead variant of the medilogAR12 Plus).
After having checked the second ECG channel (not available for the 3 lead variant of the medilogAR12 Plus), press the upper button to start the recording, or press the lower button to check the third channel (not available for the 3 lead variant of the medilogAR12 Plus).
19 After having checked the third ECG channel (not available for the 3 lead variant of the medilogAR12 Plus), press the upper button to start the recording, or press the lower button to display the information screen.
At the start of a recording and every time a button is pressed, the time is displayed for a short time. This is particularly helpful if the patient keeps a record of his/her activities. At the bottom, the duration of the ongoing recording is displayed. If no button has been pressed for some time, the screen goes blank; however, an icon indicating the correct functioning of the recorder is flashing in short intervals.
If the patient presses one of the buttons during the recording, this passage is flagged with a time marker so it can later be located in the measurement data. If the patient presses the lower button during a recording, the marker type can be selected. To do so, various icons are available (configurable). The icon is selected by pressing the lower button and the selection confirmed by pressing the upper button .
medilog® FD5/AR4/AR12 plus Digital Holter Recorder
Stopping a recording The recording can be stopped at any time by pressing and holding both buttons for several seconds. When the set recording duration has been reached or if the battery capacity is low, the recorder switches off automatically. Short interruptions of the battery contact (e.g. due to strong impacts on the recorder) only result in a loss of a few seconds worth of data. In such case, the recording continues automatically. When the device is switched off, the icon is flashing for some seconds. This indicates that the recorder is switching off correctly.
Removing the memory card during a recording does not result in a significant data loss. However, reading of the data may take considerably longer. Make sure to switch the recorder off correctly (if it is still switched on (flashing icon)) before removing the memory card.
Deleting a recording from the memory card If the recorder detects a recording saved on the memory card which has not yet been read by the PC, the most important recording information is displayed when the memory card is inserted. The recording can be deleted by pressing both buttons for several seconds. If the recorder is in Event mode, the user can delete (or stop) the recording within 15 seconds. Otherwise, the recording continues automatically.
If you decide to continue the recording, ensure that the displayed data is correct (correct patient?). This is highly important to avoid confusions. The displayed patient data is saved with the recording.
21
Recorder configuration Configuration menu If you switch the recorder on (upper button ) when no memory card is inserted, the start screen is displayed.
Press the lower button to enter the main configuration menu. Select a menu item by means of the lower button and enter the menu by pressing the upper button :
Specifying the recording quality and duration and activating/deactivating the acceleration sensor. Moreover, you can select the operation mode (Normal or Event mode). Adjusting the screen contrast.
Setting the time and date.
This menu is only available if your recorder is equipped with a radio module; such radio module is configured in this menu. Selecting the battery type. Select 1.5V for alkaline batteries and 1.2V for NiMh rechargeable batteries. Only use batteries and rechargeable batteries that have been approved for this recorder. This menu gives you recorder-specific information, including version and serial number. Please have this information at hand when contacting our service department as it facilitates the troubleshooting.