Instruction Manual
70 Pages
Preview
Page 1
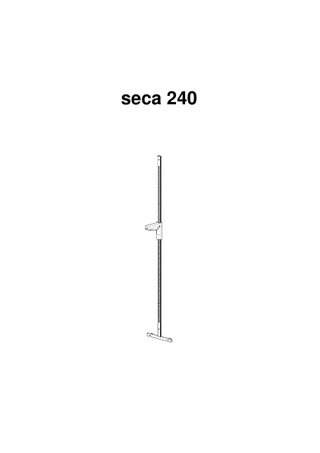
seca 240
1. Congratulations! In the seca 240 mechanical measuring rod, you have acquired a highly accurate and simultaneously sturdy piece of equipment. seca has been putting its experience at the service of health for over 150 years now, and as market leader in many countries of the world, is always setting new standards with its innovative developments for weighing and measuring. seca 240 measuring rod is used for diagnosis and treatment in hospitals and doctors’ surgeries.
The measuring rod seca 240 is attached directly to the wall. It has a heel plate to ensure that the patient is correctly positioned. The dual track and the large surface of the head stop ensure that the height of individuals can be determined with precision. The measuring rod is of a very sturdy construction, and will give you long and reliable service.
2. Safety Before using the new measuring rod, please take a little time to read the following safety instructions. • When assembling, ensure that screws • Follow the safety instructions in the inare tight and that the rod has been asstruction manual. sembled correctly (see “Assembly” on • Attach the measuring rod only to safe, page 9). solid walls. • After measuring height, push the slide • Use the assembly material supplied. unit back up – risk of injury!
8
3. Before you start… Unpacking Remove the packaging. The scope of supply includes: • • • • • • • •
measuring rod, bottom part measuring rod, top part, with head stop heel plate 5 mounting screws 5 rawlplugs 20 spacers 2 cylindrical bolts (plastic) and nuts 1 bag containing a pan-head tapping screw • 1 set of operating instructions
Assembly – Select a location for attaching the measuring rod where the floor is level and unyielding. In order to avoid damage to the measuring rod during use, the heel plate must be supported against the wall. The number of spacers used determines the distance of the measuring rod from the wall. You need to use at least one spacer for each of the two mounting points. – Place the spacers on top of one another and screw them to the heel plate using the plastic nuts and bolts. Alternatively..
Model 240
GB 9
– Mark drill holes for the heel plate. – Drill using a 5 mm drill bit. – Push the rawlplugs supplied into the holes. – Mount the heel plate and the spacers using two screws. – Remove the cable tie (provided for transport purposes) on the top measuring rod. – Push the top measuring rod onto the plastic guide of the bottom measuring rod and screw it tight using the panhead tapping screw. – Place the bottom measuring rod on the heel plate and hold the measuring rod up to the desired point of attachment. Use a spirit level to align it in the perpendicular. – Mark the drill hole for the measuring rod. – Drill using a 5 mm drill bit. – Push the rawlplug into the hole. – Push the bottom measuring rod onto the heel plate. – Put the spacers between the measuring rod and the wall and fix the measuring rod in position.
1.
2.
3.
10
4. Operation – Push head stop upwards according to the height of the person to be measured. – The person to be measured stands with his or her back to the measuring rod. The back and head must be straight. – Slide the head stop along the measuring rod until it touches the head.
– Read off body height at the read-off mark. If the above-mentioned instructions are followed, accuracy greater than ± 2 mm can be achieved.
5. Cleaning Clean the measuring rod and the outside of the display housing as required using a domestic cleaning agent or commercially-available disinfectant. Follow the manufacturer’s instructions. Under no circumstances use abrasive or acid cleaners, white spirit, benzene or the like for cleaning. Such substances can damage the high-quality surfaces and the printing.
6. What do I do if… … the slide unit slips down? – Tighten up the screw on the slide unit using a small screwdriver.
Model 240
GB 11
7. Technical data Dimensions width: height: depth: Weight Accuracy Reproducibility Measurement range Graduations Medical product as per Directive 93/42/EWG
300 mm 2200 mm 250 mm approx. 2.0 kg ±2 mm ±1 mm 60-210 cm / 24-82.6 ins 1 mm / 0.05 ins Class I
8. Disposal If the measuring rod can no longer be used, the responsible waste disposal association will be glad to advise you on the measures necessary to dispose of it properly.
9. Warranty A two-year warranty from date of delivery applies to defects attributable to poor materials or workmanship. All moveable parts - batteries, cables, mains units, rechargeable batteries etc. - are excluded. Defects which come under warranty will be made good for the customer at no charge on production of the receipt. No further claims can be entertained. The costs of transport in both directions will be borne by the customer should the equipment be located anywhere other than the customer’s premises. In the event of transport damage, claims under warranty can be
12
honoured only if the complete original packaging was used for any transport and the merchandise secured and attached in that packaging just as it was when originally packed. All the packaging should therefore be retained. A claim under warranty will not be honoured if the equipment is opened by persons not expressly authorised by seca to do so. We would ask our customers abroad to contact their local sales agent in the event of a warranty matter.