Instruction Manual
89 Pages
Preview
Page 1
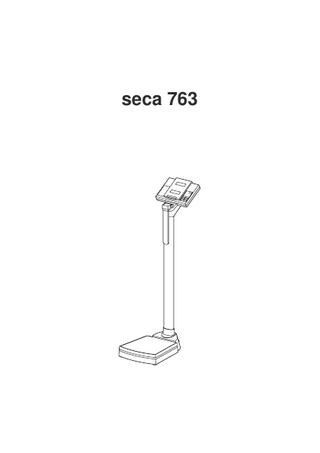
seca 763
D
Bedienungsanleitung und Garantieerklärung
3
GB Instruction manual and guarantee F Mode d’emploi et garantie
16
I
Manuale di istruzioni e garanzia
44
E
Manual de instrucciones y garantia
58
P
Instruções de utilização e declaração de garantia
72
30
English
1. Congratulations! Your purchase of this integrated measurement station seca 763 means you have a high-precision and sturdy electronic body height and body weight measuring instrument. seca has been putting its experience at the service of health for over 150 years now, and as market leader in many countries of the world, is always setting new standards with its innovative developments for weighing and measuring. The integrated seca 763 measurment station is primarily used in accordance with national regulations in hospitals, doctor's practices and health care centers. The integration of electronic scales and electronic height measurement in one deivce means the seca 763 is particularly
suitable where weighing and measuring must be carried out where little space is available. The data measured can be converted at the push of a button into a Body Mass Index. The telescoping design used for the height measurement unit as well as the retractable head slide allows the device to be easily moved on the built-in castors. The sturdy design and intelligent power management system ensure a long period of maintenance-free service so that the device can be used for years to come. Operation is easy with two large displays allowing weight and height to be read out simultaneously.
2. Safety Before using the device, please take some time to read the following safety instructions. • Follow the safety instructions in the in• Be sure to use only the seca AC adapstruction manual. tor supplied. Before plugging the AC adaptor into a socket, check that the • Keep the operating manual and the mains voltage indicated on the AC declaration of conformity contained adaptor matches local mains voltage. therein in a safe place. • When using the device with an AC • Never drop the deivce or expose it to adaptor, be sure that the power supply strong shocks. cable does not pose any danger of trip• Have repairs carried out exclusively by ping or entanglement. authorised persons. • Be sure to have the device maintained • After moving the device, place it careregularly (see "Maintenance"). fully back in the position for use. • After using the height measurement unit fold the head slide down. This avoids the hazard of injury.
16
3. Before you start… Unpacking Remove the packaging and place the based on a solid, even surface. The equipment supplied includes: • Base of scales • Column with integrated height measurement and display head • Protective cover for column • SW 3 Allen spanner • SW 5 Allen spanner • 2 screws • seca AC adaptor • Operating instructions with a declaration of conformity
Mounting the column – Place the protective cover onto the column. – Place the column in to the notch so that the folding head slide is pointing down toward the platform. – Screw the column from beneath onto the weighing platform. – If needed, carefully place the scales on the side to tighten the screws. – As shown in the illustration, connect the power supply cable on the bottom of the weighing platform. – Insert the plug of the display cable in the jack on the bottom of the weighing platform. – Fasten the cable in the cable guide. – Now put the device back in an upright position. – Slide the column cover all the way down until it locks into place on the weighing platform.
Model 763
17
Power supply The power supply must come from the supplied AC adaptor. The connector for the AC adaptor is located under the rod. Please only use the power supply unit supplied with the product or power supply units from the seca accessories range. Before plugging into the socket, check whether the mains voltage details on the power supply unit match those of the local voltage supply. Please use only the mains unit supplied or mains units from the seca range of accessories. Before plugging the unit into the socket, check whether the mains voltage marked on the mains unit matches local mains voltage.
4. Setting up and aligning the scales – Place the scales on a level surface. – Align the scales by removing the foot screws. The scales must stand securely on the floor on all four feet.
18
5. Operation Controls and displays The controls and display are in the display part.
Switching the device on and off Press button briefly
→ switch between kg and lbs
hold down
→ switch between kg and sts
In the function menu → Raise the value Press button briefly
→ Active/deactivate hold function
hold down
→ Set the display to zero, activate/deactivate TARE
In the function menu → Lower the value Activate BMI function, confirm Toggling the unit of height measurement between cm and inch Setting the height measurement to zero for relative measurements Pushing button to mark the valid height measurement value
Model 763
19
Correct weighing – Press the Start key with no load on the scale. se(a, 8.8.8.8.8. and 0.0 appear consecutively in the display. The scale is then automatically set to zero and ready to use. – If necessary, change over the weight display (see "Switching the weight display"). – Stand on the scales and remain motionless. – Read the weighing result off the digital display. – If a weight of more than 250 kg or 550 lbs is placed on the scales, then St0P appears in the display. – To switch off the scales, press the Start button again.
Switching the weight display The weight display can be switched between kilogrammes (kg) and pounds (lbs) or between kilogrammes (kg) and stones (sts). – Switch on the scale using the green START key. Weight is initially displayed in the last setting selected. – To switch the weight display between kilogrammes and pounds, press the kg/lbs/sts key. – The kg or lbs display lights up. – To switch weight display between pounds and stones, hold down the kg/lbs/sts key for approx. 2 seconds. – The lbs or sts display lights up.
Switching off the device – To switch off the scales, press the Start button again.
20
Taring weight display (TARE) The TARE function is useful if an additional weight should not be considered while weighing. Proceed as follows: – Press the Start key with no load on the scale. – First, place the additional weight onto the scales and activate the TARE function by pressing the HOLD/TARE button. The display is reset to zero. 0.0 appears in the display. The note “NET” appears. – Now place the patient onto the scales with the previously weighed additional weight. The scales show the weight of the patient without the additional weight. You can now perform as many weighing operations as you like. – Deactivate the TARE function by pressing the button again; this puts the scales back into the normal weighing mode, the tare value (the additional weight value) is deleted. – The tare value is likewise erased when the scales are switched off.
Store weight value (HOLD) You can also continue displaying the weight determined once the load has been removed. This makes it possible to look after a patient first, before having to note the weight: – Press the HOLD/TARE button while the scales have a weight on it. – “HOLD” appears in the digital display. The weight remains stored in the display until the Hold function is automatically switched off. – The triangle with the exclamation mark indicates that this frozen display is an additional facility which is not subject to calibration. – The HOLD function can be switched off by pressing the HOLD/TARE key again.0.0 appears in the display if the scales have no load, otherwise the current weight is shown. The “HOLD” display vanishes. Note: The HOLD and TARE functions can also be used simultaneously.
Model 763
21
Height measurements – Press the START button on the display housing to switch on the device. First appears in the height display. The unit selected before switching off the device is active and is marked by an arrow. – If required, switch the unit of height measurement (see “Toggling unit of height measurement”). – Raise the head slide up and push the head slide up far enough for the person whose height is being measured to easily stand under it. – Ask the person being measured to place his back against the height rod. Make sure the person's posture is upright and head is straight. – Now push the head slide down until it rests on the person's head. – Read off the height on the display.
Toggling unit of height measurement The display can toggle between "cm" and "ins" (inches). – Switch the device on. The height readout is displayed in the most recent unit selected. – To switch the unit displayed press the cm/ins button. – An arrow lights up next to the cm or ins display.
22
Relative measurements The height rod can be set to zero at any position. This function allows extremities to be measured. – Press the ZERO button in order to set the height rod to zero at its current position. ZERO SET is highlighted in the display. All lengths are now measured starting from this zero set point. Any measurement below this zero point will cause results to be displayed with a minus sign. – Press the ZERO button again if you want to start measuring from absolute zero again.
Body Mass Index (BMI) The Body Mass Index compares body size with body weight while also allowing more precise information to be determined for ideal body weight according to Broca. A tolerance range is given which is considered ideal for health. By using the integrated measurement station seca 763 you can have the Body Mass Index calculated directly from the size measured and the measured weight. Please follow these steps. – Press the Start key with no load on the scale. se(a, 8.8.8.8.8. and 0.0 appear consecutively in the display. The scale is then automatically set to zero and ready to use. – Now measure height as described. After you have determined that the patient is standing up straight and the head slide is correctly positioned, then please push the DATA VALID button. This marks the height measurement as a valid value for the Body Mass Index calculation. – Push the head slide back up. – Now read the weight value in the weight display. – Press the FUNC key. The measured height which is marked as valid now appears in the display. Push the kg/ lbs/sts buttons (raise the value) or HOLD/TARE (lower the value) if you want to correct the height, for example to compensate for shoe heel height.
Model 763
23
– Push the FUNC button again The BMI function is now activated. – Now the patient should try to stand as still as possible. – Read the BMI on the LED and compare it with the categories under "Evaluating Body Mass Index“. – To return to normal weighing mode, press the FUNC key. – To switch off the scales, press the Start button again. Note: The Body Mass Index is correctly calculated even when you have not selected metric display units.
Evaluating Body Mass Index for adults: Compare the value determined with the categories quoted below which correspond to those used by WHO, 2000. • BMI below 18.5: Warning, this patient weighs too little. There could be a tendency to anorexia. An increase in weight is recommended to improve well-being and performance. If in doubt, consult a specialist. • BMI between 18.5 and 24.9: The patient is of a normal weight. He can stay as he his. • BMI between 25 and 30 (pre-obese): The patient is slightly to moderately overweight. The patient should lose weight if a previous illness exists (such as diabetes, high blood pressure, gout, lipid disorders). • BMI over 30: Weight reduction is essential. Metabolism, cardiovascular system and bones are all under strain. A consistent diet, plenty of exercise and behavioural training are all recommended. If in doubt, consult a specialist.
6. Care and cleaning When needed, clean the device with a household cleaning agent or other common disinfectant. Follow the manufacturer’s instructions. Under no circumstances use abrasive or acid cleaners, white spirit, benzene or the like for cleaning. Such substances can damage the high-quality surfaces.
24
7. What to do if … … no weight or height readout appears? – Is the device switched on? – Is the plug between the power supply connector in the rod and base properly connected? – Is the plug contact of the AC adaptor properly connected on the device rod? – Is the plug contact for connecting the display and the base properly connected? … 0.0 does not appear before weighing? – Press the start button again – there must not be any load on the scales – and only its feet should be in contact with the floor. … one segment is illuminated constantly or not at all? – The relevant segment has a fault. Inform Servicing. … St0P appears in the weight display? – Maximum load has been exceeded. … the weight display is blinking? – If you have just activated the Hold or Tare function, please wait until the scales have detected a steady weight value. The display will then stop flashing. – If there has been no activation of a function beforehand, remove the load from the scales and wait until 0.0 is displayed, then weigh again. … the display appears? – The ambient temperature of the device is too high or too low. Place the device where the ambient temperature is between +10 ˚C and +40 ˚C. Wait about 15 minutes until the device has adjusted to the ambient temperature and weigh again. … the display and a number appear? – Use the Start button to switch off the device and start again. After this the device will function normally. – If this is not the case, disconnect the power supply by briefly unplugging the AC adaptor. If this measure is equally unsuccessful, inform the Service department. … appears in the height display? – Slide the head slide up or down quite a ways. This will make the head slide pass a mark which can be evaluated and the system can now calculate the position correctly again.
Model 763
25
… the head stop slides down and does not stay in the required position? – Place the scale carefully on its side so that the base of the scale is accessible. Insert the Allen key supplied in the rectangular hole on the end of the measuring rod as shown in the illustration and tighten up the screw for the measuring rod guide clockwise. The measuring rod with the head stop should remain freely mobile, but not be able to slide down on its own. Then stand the scale upright again.
8. Servicing Your seca scale leaves the factory with an accuracy greater than ± 0,15 %. To ensure that this accuracy is maintained, the product must be carefully set up and regularly maintained. Depending on the frequency of use, we recommend servicing every 3 to 5 years. Please ensure that a qualified service agent is used. If in doubt, contact seca Customer Service for further information.
26
9. Technical data Device dimensions Width: Height: Depth:
360 mm / 14.2 ins 1320 +10 mm / 52 +0.4 ins 686 mm / 27 ins
Weight
approx 20.5 kg
Temperature range
+10 to +40 °C
Insulated equipment, Protection Class II: medical electrical equipment type B Colour
white/black
Maximum load Graduations Precision
250 kg / 550 lbs / 39 sts 50 g / 0.1 lbs better than ±0.15% / ±100g
Height measurement Precision
Tolerance of ±2 mm
Reproducibility
±1 mm
Measurement range
110 - 200 cm / 43 - 79 ins
Resolution
1 mm / 0.05 ins
10. Spare parts RS232 adapter kit with print port
Order no. 460-00-00-004
Model-specific power unit Designation: Plug-type AC adaptor 230 V~/50 Hz/12 V=/130 mA
Order no. 68-32-10-252
Designation: External power supply, reversible 115 V~/230 V~/50-60 Hz/ Order no. 68-32-10-243 9 V=/350 mA Description: Plug-type AC adaptor, USA: 120 V~/60 Hz/12 V=/150 mA
Model 763
Order no. 68-32-10-259
27
11. Disposal Disposing of the device Do not dispose of the device in domestic waste. The device must be disposed of properly as electronic waste.
Follow the national regulations which apply in your case. For further information, contact our service department at: service@seca.com
12. Warranty A two-year warranty from date of delivery applies to defects attributable to poor materials or workmanship. All moveable parts - batteries, cables, AC adaptors, rechargeable batteries etc. - are excluded. Defects which come under warranty will be made good for the customer at no charge on production of the receipt. No further claims can be entertained. The costs of transport in both directions will be borne by the customer should the equipment be located anywhere other than the customer’s premises. Warranty claims for
28
damage during transport can only be enforced if the complete original packaging was used in transit and the goods contained are secured and fixed into position in their original condition. All the packaging should therefore be retained. A claim under warranty will not be honoured if the equipment is opened by persons not expressly authorised by seca to do so. We would ask our customers abroad to contact their local sales agent in the event of a warranty matter.
Modello 763
57