Quick Start Card
1 Page

Preview
Page 1
X150 3D Quick Scan Card NF 9.pdfPage 1 10/1/2008 4:29:19 PM
ACUSON X150™ Ultrasound System Quick Scan Card 3-Scape Real-Time 3D Imaging
The 3-Scape Real-Time 3D Imaging feature is a system option that allows the acquisition of three-dimensional ultrasound images. Ultrasound data based on three-dimensional imaging methods can assist the diagnostic process. 3D imaging anatomical volumes is suited for viewing and post processing e.g.: arbitrary slicing, volume rendering, rotation and magnification of localized areas of interest.
Intended Use
C
M
Y
The 3D imaging feature can be used to image any structure where a view cannot be achieved by standard 2D-mode ultrasound to improve understanding of complex structures. 3D imaging is intended for the following uses: • Imaging of volumes to improve diagnostic analysis. • Rotation of 3D images (volume and slices) to view aspects of a structure that cannot be imaged directly.
Setting Up 3-Scape Real Time Imaging
CM
MY
CY
CMY
K
Preparation for volume acquisition begins with scanning in 2D-mode. Image optimization must be competed before acquisition as only TGC, and over all GAIN are available during acquisition. After activating 3D imaging, you can define a 3D ROI to limit acquisition to the data contained within the ROI. Present Software 2.0 activation of the 3D imaging feature is in the OB Exam type and on the CH5-2. Obtain Volumes and Images by the following method: • Rocked: An angular scanning motion, during which the transducer face is used as a pivot (does not slide).
The system updates the scan length/angle and scan duration depicted on the time gauge. The system computes the scan duration based on the selected scan length or angle range, acquisition speed, and the current frame rate. The seconds of the scan duration is the amount of time required by the system to acquire the volume. • P Allows control of Power • 3D Region of Interest (ROI) Activates display of the 3-Scape ROI • Scan Method Fixed for Rocked • Angle selects the scan angle for volume acquisition. • Scan Speed/Quality Selects the scan speed for volume acquisition.
Acquiring the Volume
1. Rotate the SELECT control to highlight 3D and then depress knob to activate. 2. Optimize the 2D-mode image. 3. To resize the 3D ROI press SET key and move trackball to increase or decrease size. Press SET key again to lock. b. Position the ROI use trackball. 2. Press the UPDATE key to begin acquisition. Rocked scanning is required. Use the transducer face as a pivot. 3. To cancel the acquisition press the UPDATE key e.g.: image artifact or patient movement. 4. To complete volume acquisition before the scan duration on the time gauge elapses, press the FREEZE key.
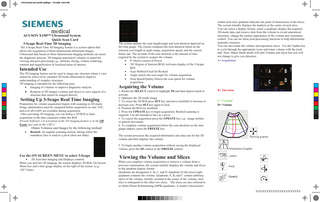
• 3D Activates Imaging and Displays controls When you activate 3D imaging, the system displays 3D ROI, On Screen Menu box and a time gauge display on the right of the screen. (e.g.: 120°/16sec) .
B= Elevation C= Coronal D= Volume
The system processes the acquired information into data sets for the 3D volume and then displays the volume. 5. To begin another volume acquisition without saving the displayed volume, press the 2D control or the FREEZE control.
Use the ON SCREEN MENU to select 3-Scape
within each slice quadrant indicates the point of intersection of the slices. The system initially displays the markers at the center of each slice. You can select a display format, select a quadrant, display the acquired 2D-mode data, and remove data from the volume to reveal anatomical structures, change the surface appearance of the volume and Animation control. You can use these post-processing functions to help differentiate anatomic structure. You can also rotate the volume and reposition slices. Use the Update key to cycle through the appropriate icons and rotate volume with the track ball. Note: Major Mode knobs will turn Volume and slices but icon will not change to give you direction. A=Acquisition
Orientation Graphic
Viewing the Volume and Slices
When you complete volume acquisition or retrieve a volume from a previous examination, the system initially displays the volume and slices in the quadrant display format. Quadrants are designated A, B, C, and D. Quadrant D (the lower-right quadrant) contains the volume. Quadrants A, B, and C contain arbitrary slices of the volume, initially oriented at the center of the volume; each slice is orthogonal to the other two slices. The slices are also referred to as Multi-Planar Reformatting (MPR) quadrants. A marker (focal point) XXXXXXXXXXXXXXXXXXXXX