Quick Guide
1 Page
Preview
Page 1
Using the VENTURI™ NPWT system NB. Prior to use, the medical professional(s) treating the wound must use their medical judgement to assess how to best use NPWT for an individual wound.
APPLYING THE WOUND SEALING KIT 1. If required, irrigate the wound bed thoroughly with approximately 20ml of normal saline. Ensure surrounding wound edges are dry. 2. Place the drain in the wound bed / sinus to calculate length required; remove and trim as necessary to fit. 3. If a non-adherent wound contact layer is used cut a single layer to the approximate size and shape of the wound and lay across the wound bed. 4. Place a layer of saline-moistened (not saturated) gauze on the wound bed and place drain on top of gauze, within approx. 1cm from wound edge to allow for wound contraction (alternatively, gauze can be wrapped around the drain if more suited to the wound). There should always be a layer of gauze between the drain and the wound bed, except if managing a sinus when the drain can be placed directly down the sinus tract. 5. Fill wound bed with remaining saline-moistened (not saturated) gauze and fluff to skin level. 6. Cover the filled wound with transparent adhesive film, ensuring contact with at least 2.5cm of intact skin beyond wound edge, and pinching or crimping film around drain tube to secure a proper seal (adhesive gel can also be used).
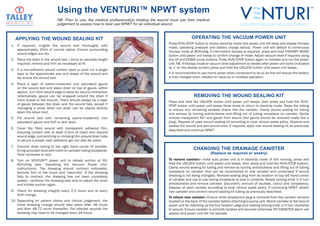
OPERATING THE VACUUM POWER UNIT Press RUN/STOP button to invoke stand-by mode (the power unit will beep and display therapy mode, operating pressure and battery charge status). Power unit will default to continuous therapy mode at 80mmHg. If intermittent therapy is required, press and hold THERAPY MODE button until power unit beeps to confirm change of mode. Adjust vacuum level if required using the UP and DOWN arrow buttons. Press RUN/STOP button again to initialise and run the power unit. NB. If therapy mode or vacuum level adjustment is needed after power unit locks (indicated by 'L' on the display screen) press and hold the UNLOCK button until power unit beeps. It is recommended to use mains power when convenient to do so as this will ensure the battery is fully charged when needed for back-up or cordless operation.
REMOVING THE WOUND SEALING KIT Press and hold the UNLOCK button until power unit beeps, then press and hold the RUN/ STOP button until power unit beeps three times to return to stand-by mode. Raise the tubing to ensure any remaining exudate drains into the canister. Clamp wound sealing kit tubing and remove by turning anticlockwise and lifting out of tubing receptacle on canister. Gently remove transparent film and gauze from wound (the gauze should be removed easily like a plug). Dispose of used wound sealing kit according to local clinical waste policy. Observe and assess the wound and peri-wound area. If required, apply new wound sealing kit as previously described and continue NPWT.
7. Connect drain tubing to top right hand corner of canister, lining up locator stud with notch on canister tubing receptacle. Twist clockwise to lock.
CHANGING THE DRAINAGE CANISTER
8. Turn on VENTURI™ power unit to initiate suction at 6080mmHg (see ‘Operating the Vacuum Power Unit’ instructions). The dressing should contract noticeably, become firm to the touch and 'raisin-like'. If the dressing fails to contract, the dressing has not been completely sealed - reinforce the dressing seal and/or adjust the drain and initiate suction again.
To remove canister:- make sure power unit is in stand-by mode (if still running, press and hold the UNLOCK button until power unit beeps, then press and hold the RUN/STOP button). Clamp wound sealing kit tubing and remove by turning anticlockwise and lifting out of tubing receptacle on canister (this can be reconnected to new canister and unclamped if wound dressing is not being changed). Remove sealing plug from its location on top left hand corner of canister and use to cap tubing receptacle to seal in contents. Rotate locking knob 1/4 turn anticlockwise and remove canister. Document, amount of exudate, colour and consistency. Dispose of used canister according to local clinical waste policy. If continuing NPWT, attach new canister and connect wound sealing kit tubing as previously described.
9. Check for dressing integrity every 2-3 hours and at every shift change. 10. Depending on patient status and clinical judgement, the initial dressing change should take place after 48 hours and then 48-72 hours thereafter. For infected wounds the dressing may need to be changed every 24 hours.
(Replace as required or weekly)
To attach new canister:- Ensure white polystyrene plug is removed from the canister sensors located on the back of the canister before attaching to pump unit. Attach canister to flat face of power unit by matching up the four location pegs and rotating locking knob 1/4 turn clockwise to secure. Ensure canister is correctly located and secured otherwise NO CANISTER alarm will appear and power unit will not operate.