VERATHON Inc
BladderScan series
BladderScan i10 IN-SERVICE Training Professional Competency Certification Rev 01
Professional Competency Certification
2 Pages

Preview
Page 1
IN-SERVICE TRAINING
Professional Competency Certification Name
Date
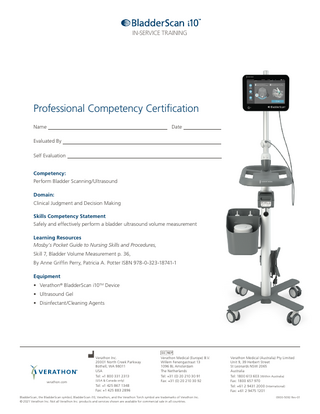
Evaluated By Self Evaluation Competency: Perform Bladder Scanning/Ultrasound Domain: Clinical Judgment and Decision Making Skills Competency Statement Safely and effectively perform a bladder ultrasound volume measurement Learning Resources Mosby’s Pocket Guide to Nursing Skills and Procedures, Skill 7, Bladder Volume Measurement p. 36, By Anne Griffin Perry, Patricia A. Potter ISBN 978-0-323-18741-1 Equipment • Verathon® BladderScan i10TM Device • Ultrasound Gel • Disinfectant/Cleaning Agents
Verathon Inc. 20001 North Creek Parkway Bothell, WA 98011 USA Tel: +1 800 331 2313 verathon.com
(USA & Canada only)
Verathon Medical (Europe) B.V. Willem Fenengastraat 13 1096 BL Amsterdam The Netherlands Tel: +31 (0) 20 210 30 91 Fax: +31 (0) 20 210 30 92
Tel: +1 425 867 1348 Fax: +1 425 883 2896
BladderScan, the BladderScan symbol, BladderScan i10, Verathon, and the Verathon Torch symbol are trademarks of Verathon Inc. © 2021 Verathon Inc. Not all Verathon Inc. products and services shown are available for commercial sale in all countries.
Verathon Medical (Australia) Pty Limited Unit 9, 39 Herbert Street St Leonards NSW 2065 Australia Tel: 1800 613 603 (Within Australia) Fax: 1800 657 970 Tel: +61 2 9431 2000 (International) Fax: +61 2 9475 1201 0900-5092 Rev-01
Performance Criteria Self Evaluation Evaluator
METHOD OF EVALUATION KEY: T – Test O – Observation RD – Return Demonstration
Self-Evaluation (circle one) 1.
Identified intended use and contraindications – BladderScan i10TM
T, O, RD
2.
Performed hand hygiene and donned clean gloves
T, O, RD
3.
Verified patient identity
T, O, RD
4.
Placed the patient in a supine position
T, O, RD
5.
Disinfected the probe according to the guidance in the BladderScan i10 Operations and Maintenance Manual
T, O, RD
6.
Turned the BladderScan on
T, O, RD
7.
Viewed onboard tutorial
T, O, RD
8.
Verified whether user is located on the patient’s left or right side
T, O, RD
9.
Applied a generous amount of ultrasound gel to the probe or abdomen, taking care not to incorporate air bubbles
T, O, RD
10. Aligned the body icon seen on the top of the probe to the patient position, keeping probe cable parallel to scanning arm
T, O, RD
11. Placed the probe about 1 inch (2.5 cm) above the symphysis pubis and aimed it toward the bladder, pointing the probe slightly toward the patient’s feet. Applied probe pressure appropriate for patient BMI.
T, O, RD
12. Used pre-scan imaging to locate the widest diameter of the bladder, observing the vertical green line indicating center and BladderTraqTM bladder outline display to position the bladder before activating the scan
T, O, RD
13. Pressed and released the scan button on the probe or tapped the SCAN icon on the console; held the probe steady until the scan results were displayed
T, O, RD
14. When the volume measurement was displayed, verified that on the aiming screen the crosshairs were centered on the bladder, indicating an accurate probe placement. Repeated the scan as needed to obtain an accurate measurement.
T, O, RD
15. Chose the desired scan within the series of scans
T, O, RD
16. Tapped on the printer icon (if a hard copy was desired)
T, O, RD
17. Tapped the SAVE AND EXIT button to save the desired volume
T, O, RD
18. Removed gel from the patient
T, O, RD
19. Cleaned the probe with manufacturer recommended and hospital-approved disinfectant
T, O, RD
20. Removed gloves and performed hand hygiene
T, O, RD
Satisfied Unsatisfied
NA