Instruction Manual
268 Pages
Preview
Page 1
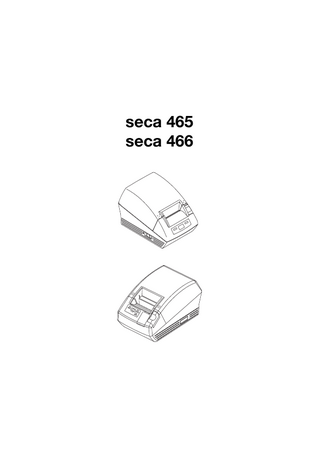
seca 465 seca 466
FE
ED
D
Bedienungsanleitung und Garantieerklärung... 3
GB
Instruction manual and guarantee... 41
F
Mode d’emploi et garantie... 77
I
Manuale di istruzioni e garanzia... 115
E
Manual de instrucciones y garantia... 153
P
Instruções de utilização e declaração de garantia... 191
PL
Instrukcja obsługi i gwarancja... 229
English English CONTENTS 1. Description of device... 42 1.1 Congratulations!... 42 1.2 Intended purpose... 42 2. Safety information... 43 2.1 Basic safety precautions... 43 2.2 Safety information in this user manual... 44 3. Overview... 45 3.1 Controls... 45 3.2 Symbols on the device... 46 3.3 Information on rating plate... 47 4. Before you get started …... 48 4.1 Scope of supply... 49 4.2 Connecting the power supply . . 50 4.3 Set up seca 465... 51 Adjust paper sensor... 51 Insert paper roll... 52 4.4 Set up seca 466... 53 Adjust paper sensor... 53 Set paper type... 53 Insert paper roll... 54 Adjust sensors for labels and Black Mark paper... 55 5. Operation... 57
5.2 Use configuration program... 59 Install configuration program. . . 59 Start configuration program . . . 60 Select References (references) . 60 Select your own logo (logo)... 61 Select layout file (layout)... 63 Restore factory settings (reset) . 67 Call up instruction manual in pdf format... 67 Read in changed configuration on printer... 68 Close configuration program. . . 68 6. Cleaning... 68 7. What should I do if …?... 70 7.1 Troubleshooting... 70 7.2 Remove paper jam... 72 7.3 Reset paper cutter (seca 466) . 72 8. Maintenance... 73 9. Technical data... 74 10. Accessories... 75 11. Disposal... 75 12. Warranty... 75 For USA and Canada... 267
5.1 Operate the printer in a wireless network... 57 Introduction... 57 SD card... 57 Integrate the printer in a wireless network... 57 Set date and time... 58
Contents • 41
1. DESCRIPTION OF DEVICE 1.1 Congratulations! By purchasing the seca 465 or seca 466 seca wireless printer, you have acquired an extremely accurate and robust device. For more than 170 years, seca has devoted its experience to healthcare and, as the market leader in many countries, is constantly setting new standards with its innovative weighing and measurement developments.
1.2 Intended purpose The seca 465 and seca 466 printers are mainly used in hospitals, doctors' surgeries and inpatient care facilities in accordance with national regulations. They are for printing out measurement results determined by seca 360° wireless weighing and height measuring systems. The seca 360° wireless systems transmit measuring results wirelessly to the printers. The seca 465 printer is for creating paper printouts. The seca 466 printer is for creating paper printouts and labels. It is equipped with an automatic paper cutter. The seca Print Designer Software supplied allows measurement results to be printed out adapted to suit local regulations and your own requirements.
42 •
English
2. SAFETY INFORMATION 2.1 Basic safety precautions Handling the printer
• Please take note of the information in this user manual. • Keep the user manual in a safe place. • Make sure that the printer is positioned securely on a flat, non-vibrating surface. • Do not drop the printer. Protect the printer from violent impacts. • If you wish to transport the printer, ensure that there is no paper roll in the paper compartment. • Have servicing performed regularly (see "Maintenance" on page 73). • Only have servicing and repairs carried out by authorized persons. • Make sure HF equipment (e.g. mobile phones and televisions) is kept at a minimum distance of approx. 1 metre to prevent incorrect measurements or interference with wireless transmission.
Handling measurement results once printed out
• Before using printed measurement results ensure that the value printed out is plausible and matches the display on the measuring device. • For data protection purposes and to prevent confusion, assign printed measurement results to the right patient file immediately after the measurement. • Thermal printouts are sensitive to both temperature and light. Keep thermal printouts away from heat and direct sunlight to prevent the information fading rapidly. For filing, we recommend that you make a copy of the printout using a laser copier.
Safety information • 43
2.2 Safety information in this user manual DANGER! Used to identify an extremely hazardous situation. If you fail to take note of this information, serious irreversible or fatal injuries will occur. WARNING! Used to identify an extremely hazardous situation. If you fail to take note of this information, serious irreversible or fatal injuries may result. CAUTION! Used to identify a hazardous situation. If you fail to take note of this information, minor to moderate injuries may result. ATTENTION! Used to identify possible incorrect usage of the device. If you fail to take note of this information, you may damage the device or the measurement results may be incorrect. NOTE Includes additional information about use of the device.
44 •
English
3. OVERVIEW 3.1 Controls 7
6
8
9 5
4
3
2
Additional controls on the seca 466:
1
10 12
11
No.
Control
1
On/Off switch
For switching the printer on and off.
Function
2
Key for Paper compartment cover
For opening the cover of the paper compartment.
3
Error LED
Flashes at different rates depending on the fault which has occurred (see "Troubleshooting" on page 70)
4
Feed key
For manual paper feed: • press briefly: feed one line • keep depressed: continuous feed until the key is released
5
Power LED
Comes on when the printer is switched on. Overview • 45
No.
Control
Function
6
Paper compartment cover
Opened to put in a paper roll and to adjust the paper sensor.
7
Wireless module For wireless communication with seca 360° wireless with SD card weighing and measuring systems. reader
8
SD card
Contains default settings for printing out measuring results and seca Print Designer Software for customizing printouts.
9
Power connection
For connecting the power supply unit.
10
Adjusting wheels, paper sensor (seca 466)
11
Adjusting wheel, For resetting the paper cutter. paper cutter (seca 466)
12
Paper LED (seca 466)
For adjusting the paper sensors to suit the type of paper used.
Comes on when only a little paper, or none at all, is left in the printer.
3.2 Symbols on the device B
C
A D Symbol
46 •
Meaning
A
Hot surfaces: the print head is very hot immediately after printing.
B
Location for paper roll
C
seca 466: sharp edges
English Symbol
D
Meaning Device is equipped with a wireless module. Data are received and transmitted wirelessly.
3.3 Information on rating plate Text/symbol
Meaning
Model
Model number
Type
Type designation
Ser. No.
Serial number
FCC ID
For USA: device licensing number issued by US FCC (Federal Communications Commission) authority
IC
For Canada: device licensing number issued by the Industry Canada authority Device complies with EC standards and directives. Symbol of the FCC (USA) Symbol of the "Underwriters Laboratories" product safety institution. Symbol of the Voluntary Control Council for Interference (Japan) Operate the device with direct current only, note the polarity of the device plug Do not dispose of device in household waste
Overview • 47
-
+
4. BEFORE YOU GET STARTED … WARNING! Electric shock, fire, smoke, overheating, malfunctions
Do not operate or store the printer in the following conditions: − naked flames − high ambient humidity − direct sunlight − hot air flows, radiated heat − ambient air containing salt, corrosive gases − inadequate ventilation − chemical reactions − oil mist, steel particles or dust − static electricity, strong magnetic fields WARNING! Electric shock, fire, smoke, overheating, malfunctions
− Do not use metallic, sharp-edged or pointed objects to operate the keys of the device. − In the event of the device being damaged, do not attempt to repair the printer. Contact seca customer service. − Do not attempt to dismantle or modify the printer. WARNING! Electric shock, fire, malfunctions
Do not place any objects on the printer. Do not allow any objects or liquids to get into the printer. − If objects or liquids do get into the printer, switch the printer off immediately and disconnect the power supply plug. − Contact seca customer service.
48 •
English WARNING! Electric shock, suffocation, cuts
Operate and store the printer out of the reach of children. − Do not allow children to open the device. − Route the power supply unit and power supply cable out of the reach of children. − Dispose of the plastic wrapping for the device immediately after unpacking. CAUTION! Fire, injuries, damage to device
Set up the printer so that it is adequately ventilated. − Set up the printer an adequate distance from walls and other devices. − Do not cover the printer with blankets or cloths. CAUTION! Cuts, crushing
− Do not touch any of the moving parts of the printer such as the paper cutter, gear wheels or active electrical parts during the printing process. − Open and close the paper compartment cover carefully. ATTENTION! Device damage, paper jam, poor print quality
− Ensure that the paper roll is inserted correctly. − Use only the paper available from seca. − Use only undamaged paper rolls. − Do not stick the ends of paper together, with adhesive tape for example. − Do not pull on paper which has already been inserted once the paper compartment lid is closed.
4.1 Scope of supply • • • •
Printer and wireless module Power supply unit SD memory card (in card reader of wireless module) seca Print Designer Software configuration Before you get started … • 49
• • • •
program (included on SD memory card) USB memory card reader Instruction manual seca 465: – thermal paper, one roll seca 466: – labels, one roll – thermal paper, one roll
4.2 Connecting the power supply WARNING! Personal injury and damage to device if incorrect power supply unit is used
The voltage supplied by standard power supply units may be higher than their indicated rating. This may cause the device to overheat, catch fire, melt or short-circuit. − Use only the power supply unit supplied or a genuine seca replacement part of the same type. WARNING! Electric shock, fire, malfunctions
Note the following points when handling power supply units and power cables. − Ensure that your hands are dry when you plug in or unplug the power supply plug. − Operate the printer only at the quoted power supply voltage and frequency. − Ensure that the power supply socket to which the printer is connected has an adequate rating. − Do not use a multiple socket or adapter plug to which other devices are also connected to supply power. − Clean dust and other deposits off the power supply plug before connecting it to the power supply socket. − Do not use deformed or damaged power supply cables. − Do not move the printer when it is switched on. − Do not place any objects on the power supply cable. Set up the printer so that people do not step on the power supply cable. 50 •
English − Ensure that the power supply cable is not bent, twisted or subjected to tension when the printer is in use or being transported. − Do not try to modify the power supply cable. − Do not route the power supply cable close to heaters. − Ensure that the power supply socket used is always freely accessible. − Disconnect the power supply plug from the power supply socket if you do not intend using the device for an extended period. − Always hold the power supply cable by the plug when you take it out of the power supply socket. 1. Ensure that the On/Off switch of the device is set to "Off". 2. Plug the power supply cable into the power supply unit. 3. Plug the cable for the power supply unit into the connecting socket on the printer. 4. Plug the power supply cable into a power supply socket.
4.3 Set up seca 465 Adjust paper sensor
The paper sensor enables the device to detect when the paper roll is coming to an end. For this feature to function reliably, the paper sensor must be set to suit the type of paper roll in use. NOTE • The printer is preset for a paper roll diameter (∅ paper roll) of 22 mm. You do not need to perform the steps in this section for the thermal paper available from seca (see "Accessories" on page 75). • The paper sensor works only with thermal paper. This function is not available for labels. 1. Ensure that the device is switched off. 2. Open the paper compartment cover. 3. Adjust the lever to the correct position as shown in the table below.
Before you get started … • 51
Position
∅ of paper roll 22 mm 24 mm 27 mm No function No function No function
1 2 3 4 5 6
Internal diameter of paper roll
Residual paper thickness
Ø of paper roll 5 4 12
6
3
NOTE "∅ of paper roll" is derived from the internal diameter of the roll and the thickness of the residual paper. The residual paper can be recognized by its pink colour. 4. Close the paper compartment cover.
Insert paper roll
Proceed as outlined below to insert paper in the printer. CAUTION! Burns and cuts
− Do not touch the print head. This is very hot immediately after printing. − Do not touch the paper cutter. − Do not hold the paper by the edges. These too can cause cuts. 1. Open the paper compartment cover. 2. Insert the paper roll. NOTE Ensure that the paper roll is correctly aligned. See adjacent illustration. 3. Close the paper compartment cover until you hear it engage. The device is operational.
52 •
English
4.4 Set up seca 466 Adjust paper sensor
The paper sensor enables the device to detect when the paper roll is coming to an end. For this feature to function reliably, the paper sensor must be set to suit the type of paper roll in use. NOTE • The printer is preset for a paper roll diameter (∅ paper roll) of 22 mm. You do not need to perform the steps in this section for the thermal paper available from seca. • The paper sensor works only with thermal paper. This function is not available for labels. 1. Ensure that the device is switched off. 2. Open the paper compartment cover. 3. Adjust the lever to the correct position as shown in the table below. Position 1 2
∅ of paper roll 22 mm 34 mm Internal diameter of paper roll
1 2
FEE
D
Set paper type
Residual paper thickness
Ø of paper roll
NOTE "∅ of paper roll" is derived from the internal diameter of the roll and the thickness of the residual paper. The residual paper can be recognized by its pink colour. 4. Close the paper compartment cover. For paper feed and paper detection to work correctly, you need to set the type of paper in use. 1. Ensure that the device is switched off. 2. Open the paper compartment cover. 3. Ensure that there is no paper in the paper compartment. Before you get started … • 53
4. Keep the Feed key depressed and switch on the device. The Power LED flashes. 5. Release the Feed key.
ERROR
POWER FEED
PAPER
6. Close the paper compartment cover. The Paper LED comes on. The type of paper currently set is displayed by the Power LED and the Error LED. Type of paper Labels Thermal paper Black Mark paper
Power LED On Off On
Error LED Off On On
7. Press the Feed key until the Power and Error LEDs display the type of paper in use. 8. Open and close the paper compartment cover. The set paper type is now stored. NOTE As no paper has yet been inserted, the Power, Error and Paper LEDs ("Paper" error message) come on. As soon as you have inserted paper, only the Power LED is on. The device is then operational.
Insert paper roll
Proceed as outlined below to insert paper in the printer. 1. Ensure that the device is switched off. CAUTION! Burns and cuts
− Do not touch the print head. This is very hot immediately after printing. − Do not touch the paper cutter. − Do not hold the paper by the edges. These too can cause cuts. 2. Open the paper compartment cover. 3. Insert the paper roll. NOTE Ensure that the paper roll is correctly aligned. See adjacent illustration. 4. Close the paper compartment cover until you hear it engage. The device is operational.
54 •
English
Adjust sensors for labels and Black Mark paper
The seca 466 printer has separate sensors for labels or Black Mark paper to control the paper feed and paper cutter. NOTE The printer is preset to the labels available from seca. You need only carry out the procedure described here if you want to use different labels or Black Mark paper. You must set the sensor to suit the type of paper in use.
Black Mark paper sensor
Label detection photocell Label detection LED
Adjusting wheel for Black Mark paper sensor LED for paper type sensors
Adjusting wheel for label sensor
Cover for paper type sensors
1. Ensure that the device is switched off. 2. Open the paper compartment cover. 3. Switch the device on. 4. Keep the Feed key depressed and close the paper compartment cover. The Error LED flashes. 5. Open the paper compartment cover. 6. Insert the desired paper (see "Insert paper roll" on page 54). – Insert labels so that with the paper compartment cover closed, a label is positioned between the Label detection LED and the Label detection photocell. – Insert Black Mark paper so that the black mark of the paper does not cover the Black Mark paper sensor with the paper compartment cover closed. 7. Close the paper compartment cover. 8. Open the cover for the paper type sensors.
Before you get started … • 55
9. Turn the relevant sensor adjusting wheel for the paper in use clockwise until the Paper type sensors LED goes out. 10. Slowly turn the sensor adjusting wheel anticlockwise until the Paper type sensors LED comes on. The sensor is set correctly. Label length Gap between labels
Label Length Gap Length
: XXXmm : XXmm
Example for label measurement Interval between black marks Height of black mark
Black mark Interval Black mark Length
: XXXmm : XXmm
Example for Black Mark paper measurement
56 •
NOTE If you turn the sensor adjusting wheel too far clockwise, the Paper type sensors LED starts flashing. In this case, slowly turn the sensor adjusting wheel back until the Paper type sensors LED comes back on. 11. Close the cover for the paper type sensors. 12. For reference purposes, you can now measure the labels or the Black Mark paper. To do so, press the Feed key. The measurement results are printed out.
English
5. OPERATION 5.1 Operate the printer in a wireless network Introduction
This device is equipped with a wireless module. The wireless module allows measurement results determined using seca 360° wireless weighing and height measuring devices to be received wirelessly. Details on setting up a seca 360° wireless network can be found in the instruction manuals for scales and height measuring systems.
SD card
An SD card reader is integrated in the wireless module of the printer. The SD card supplied with the printer is already inserted in the SD card reader at the factory. The SD card contains factory settings for printing out measurement results and evaluations (see "Restore factory settings (reset)" on page 67). The printer is preconfigured to be operational. seca Print Designer Software is likewise on the SD card. This software allows measurement results to be printed out adapted to suit local regulations and your own requirements (see "Use configuration program" on page 59).
SD card
Integrate the printer in a wireless network
While setting up a wireless network (see the instruction manual for the seca 360° wireless measuring device in use) you will be asked to switch on all the seca 360° wireless components for integration in a wireless group. ATTENTION! Loss of wireless connection to other components
If the components of an existing wireless group stay switched off during the integration process, their wireless connection to the seca 360° wireless measuring device will be lost. − If a wireless group already exists, ensure that both the printer and all the components in the existing wireless group are switched on during the integration process.
Operation • 57
The wireless module for the printer is not switched on using the On/Off switch for the printer. The wireless module is permanently supplied with power by the power supply unit for the printer. For the printer to be detected correctly in the wireless network, both the printer itself and the wireless module must be de-energized briefly. Proceed as follows. Connecting socket
1. Ensure that the On/Off switch of the printer is set to "Off". 2. Disconnect the device plug from the printer's power supply connection socket. The printer and the wireless module are de-energized.
Wireless module On/Off switch
Application $ProjectRevision: 1.19 $ Veryfing file checksums Finished Reading Master-Image-file Downloading images to printer Finished Reading-Master-File Finished Reading BMI-File Finished Reading Master-Table-File Finished Printer ready
Set date and time
3. Start setting up the wireless network as described in the instruction manual for your seca 360° wireless measuring device. 4. When the instruction manual for your seca 360° wireless measuring device requests you to switch on all the components of the wireless group, proceed as follows. – If a wireless group already exists, switch on its components. – Plug the device plug into the printer's power supply connection socket. – Switch on the printer at the On/Off switch. The printer performs a self-test and prints out a test page with the current settings. 5. Continue setting up the wireless network as described in the instruction manual for your seca 360° wireless measuring device.
Date and time cannot be set directly on the printer. Date and time are set on a seca 360° wireless measuring device and transmitted wirelessly to the printer. The prerequisite is that the printer and the seca 360° wireless measuring device are logged on to the same wireless group.
58 •